

If you have multiple locations for your online store with different services, delivery times, lead times, and more, you can set all of these up under one website using Orderable.
This guide will show you the ins and outs of Orderable’s Locations feature. Including creating multiple locations, assigning services, and managing orders for these locations.
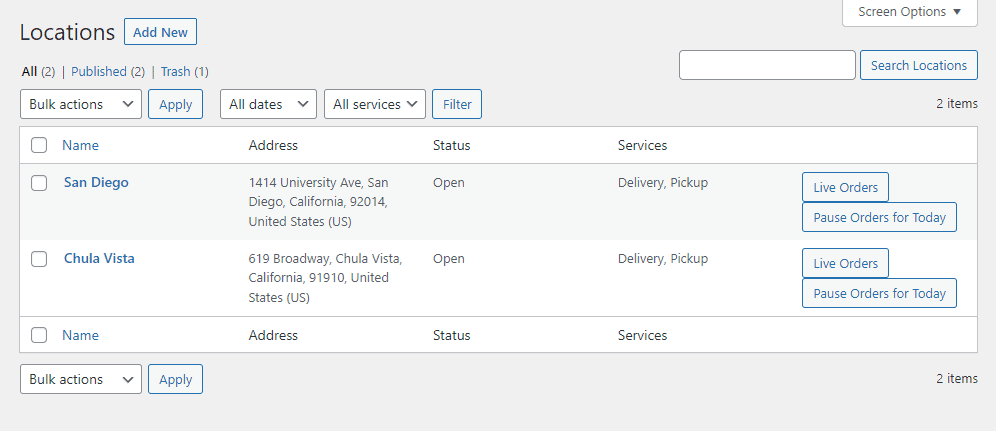
How to create locations
The first thing you’ll want to do is create your locations. With Orderable, you can create as many store locations as you like. We’ll walk you through how to set one up.
- From your WordPress dashboard, go to Orderable > Locations and click the Add New button at the top of the page.
- You’ll then be presented with your location screen. Give your location a title and enter its address details.
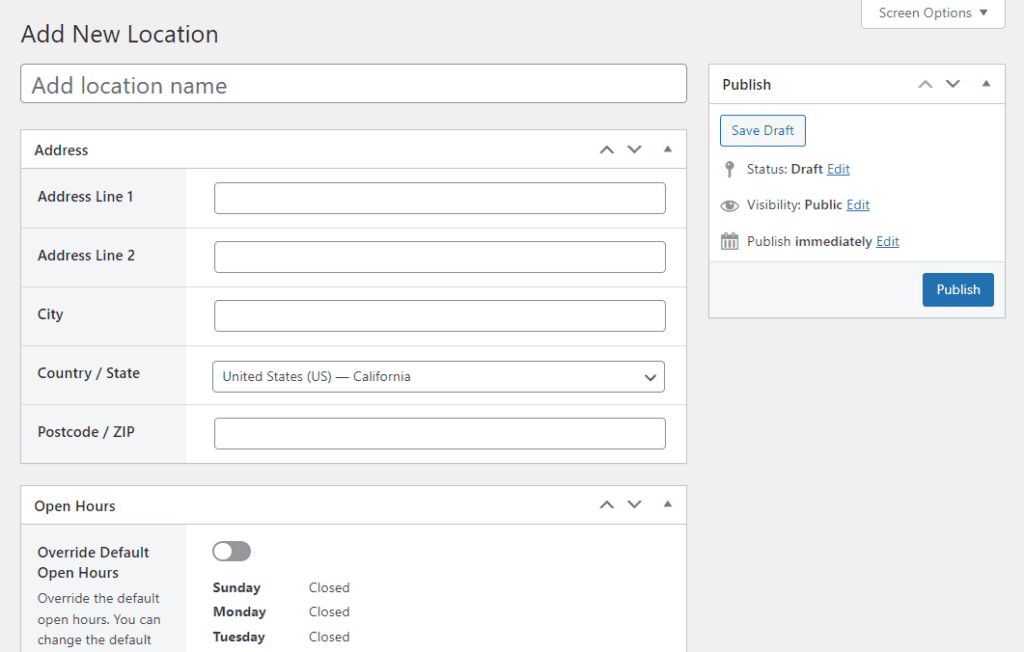
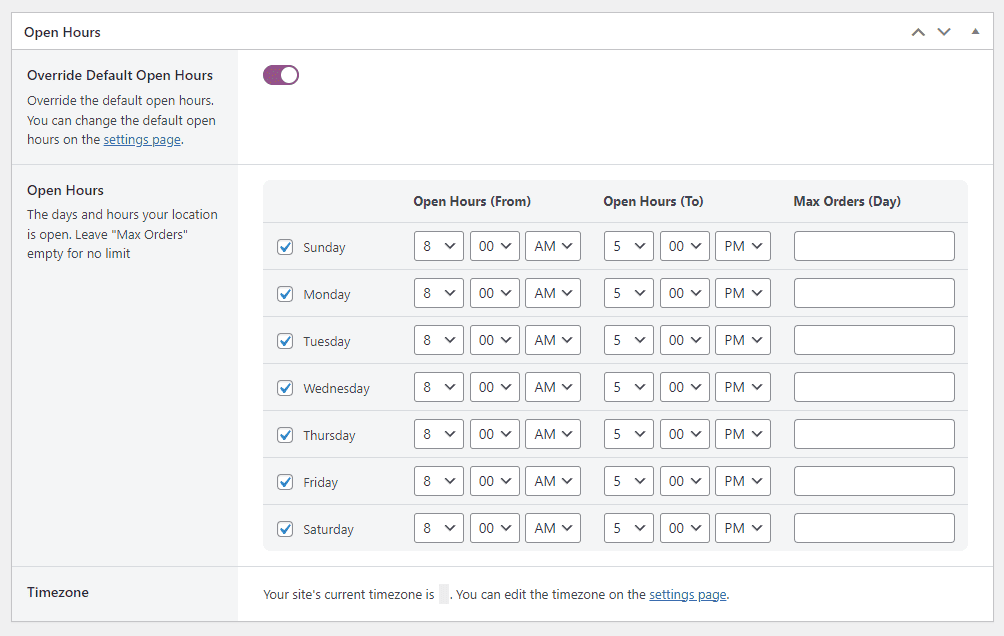
- Next, you’ll be able to add your store’s opening hours. In this section, you can keep your opening hours the same as your default ones (found by going to Orderable > Settings > Locations). Or override them using the Override Default Open Hours toggle button, and entering your new hours.
- The next section allows you to set your store’s services. Click the toggle button next to Delivery and/or Pickup to activate them. Once clicked, you’ll be able to customize each with the days and hours when you offer delivery/pickup services.
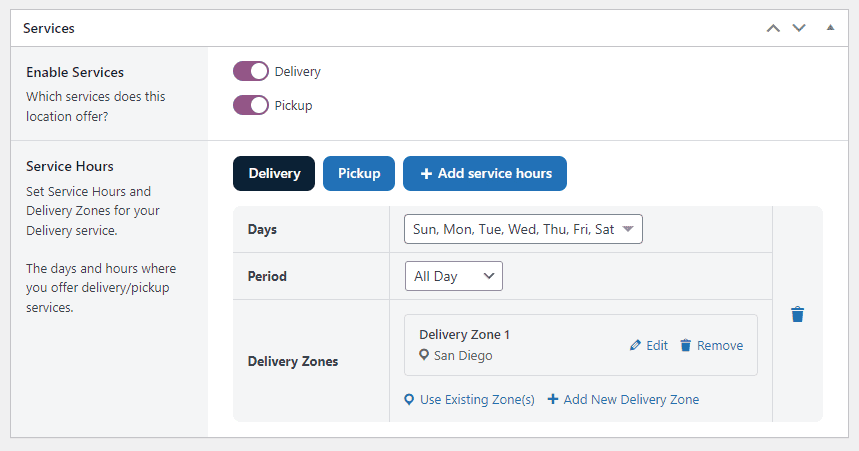
Note: At this point, you can create Delivery Zones for each of your services. See our Delivery Zones guide for how to set this up.
- Scroll down the page, and you’ll get to the Order Options section. This gives you some settings to customize your location’s schedule even further.
- You can allow ASAP delivery and customize it in the As Soon As Possible section.
- Set Lead Time and Preorder Days and customize the calculation method for both of these.
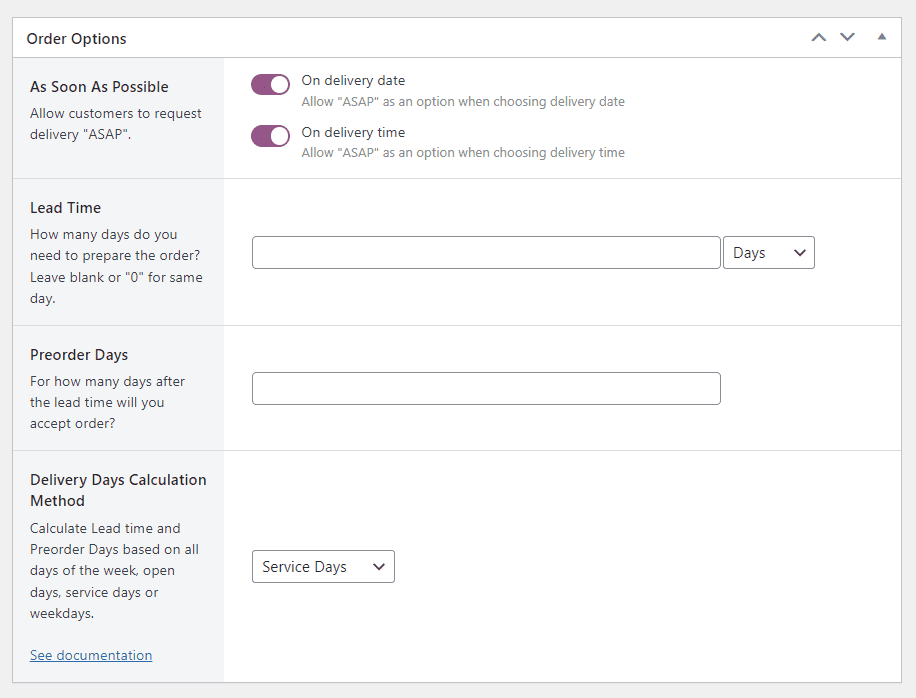
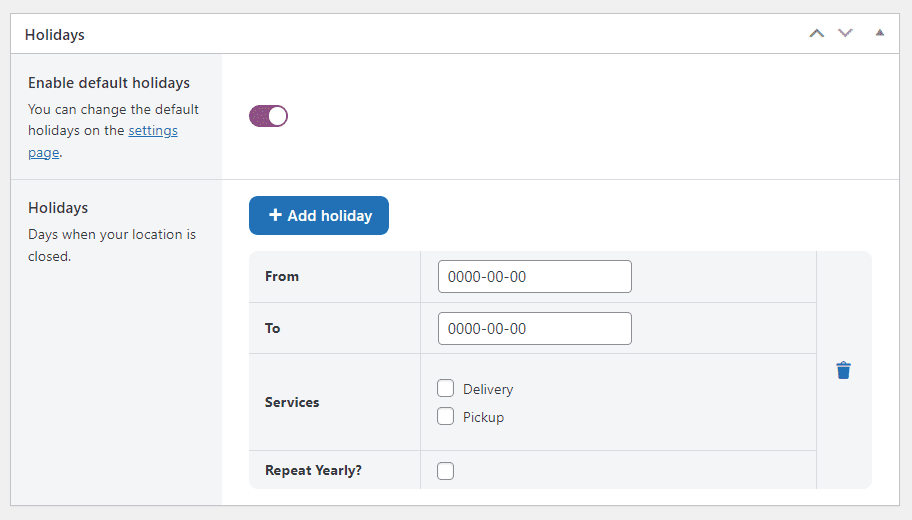
- Lastly, you can set any Holiday dates when you may not be able to offer delivery or pickup services for your store.
- Once you’re happy with the setup of your location, scroll up the page and click the Publish button.
How to ask customers to pick a store location
With your locations up and running, it’s time to decide how customers will select their closest location to buy from.
With Orderable, there are a few options that will help you do this:
- A popup that appears when customers land on your site.
- Blocks/widgets you can add to any page, post, or location on your website.
We’ll go through each of these in turn.
How to add a location selector popup to your store
If you want to add a popup that shows when a customer lands on any page on your site, or specific pages, take the following steps:
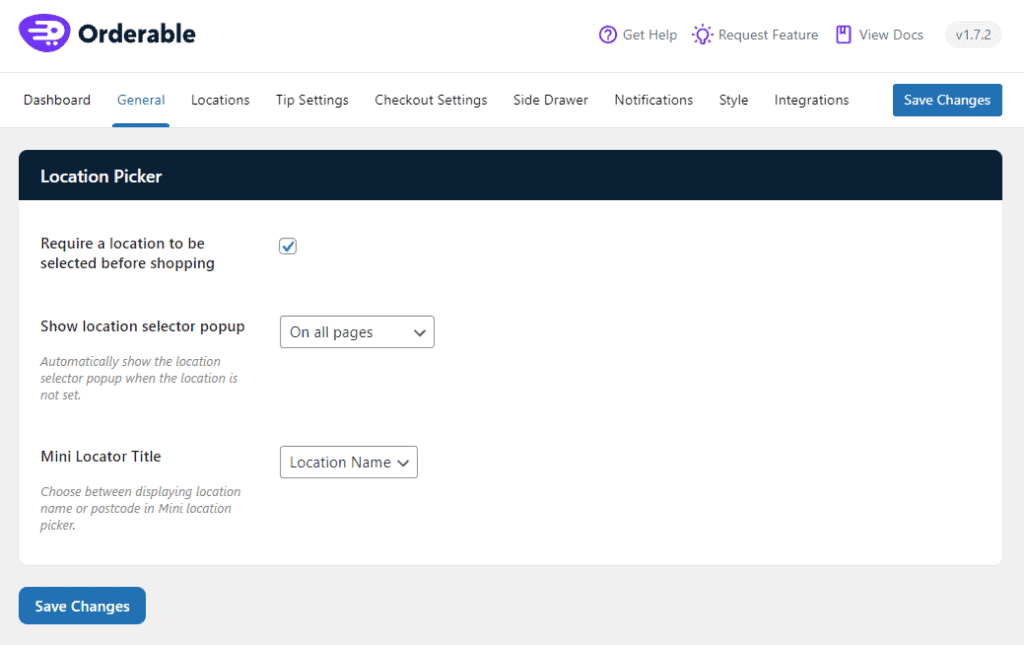
- From your WordPress dashboard, go to Orderable > Settings and click the General tab at the top of the page.
- In the Location Picker section, you’ll see a few settings to customize. The Show location selector popup dropdown allows you to customize where this popup shows. Either on all site pages, on specific pages, or not at all.
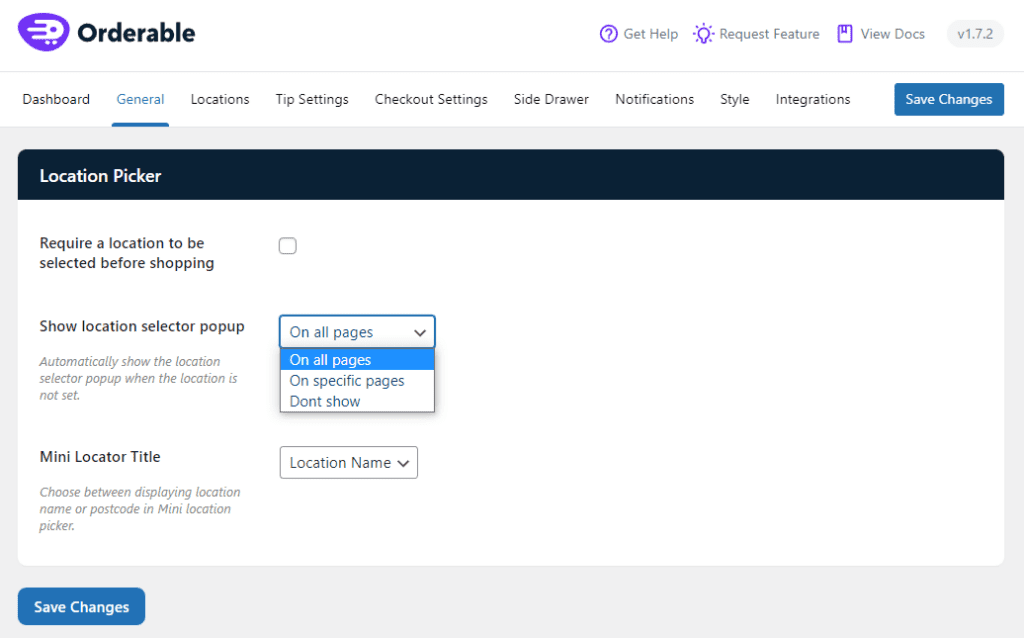
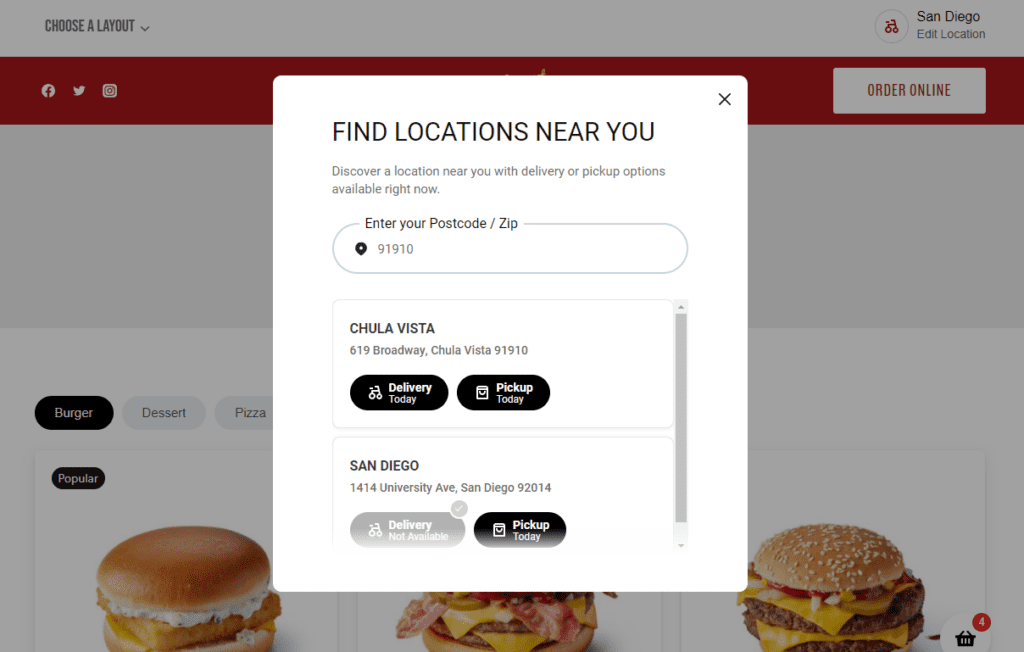
- If you want this to be forced, so customers can’t close the popup, click the checkbox next to Require a location to be selected before shopping.
If this is checked, a customer, when they land on your store, will be asked to select their nearest location before shopping. This takes the form of a popup on your website and looks a little something like this:
How to add location selector blocks/widgets to your store
If you want customers to select their nearest location without the popup, you can do so with our in-built blocks/widgets.
In this case, we’ll show you how to add our location selector blocks to a page, but you can use this technique to add them to your site’s sidebar, posts, layout elements if you’re using a page builder, and more.
To find and add these, take the following steps:
- From your WordPress dashboard, go to Pages and then click to edit the page you want to add the location selector to.
- Once there, click the black + icon to find our location selection blocks. The easiest way to do this is to search Orderable in the search box.
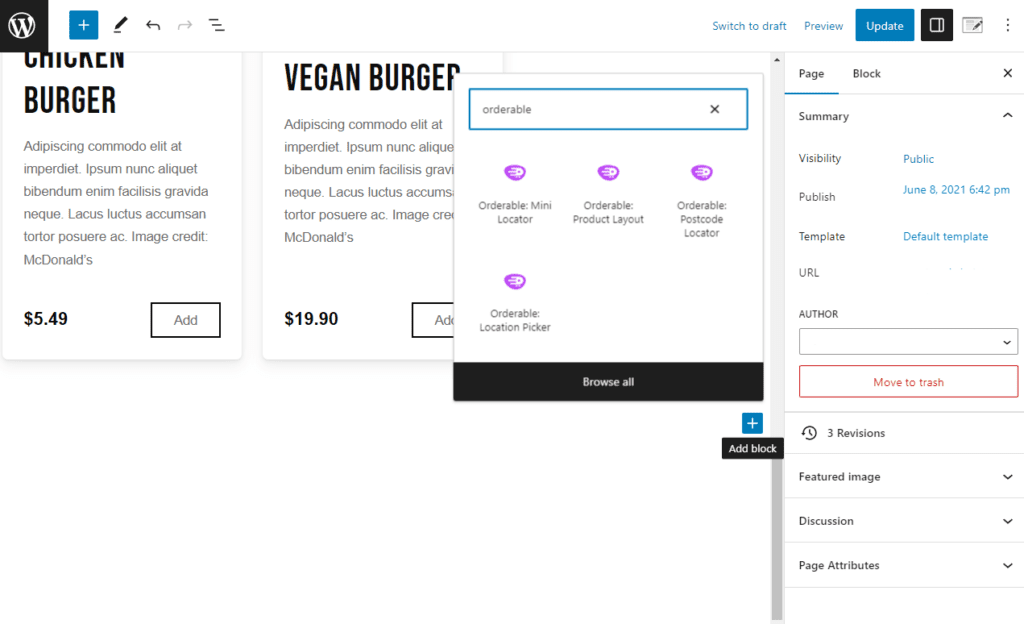
- Here you’ll see each of our location selector blocks. Click on the one you want to add.
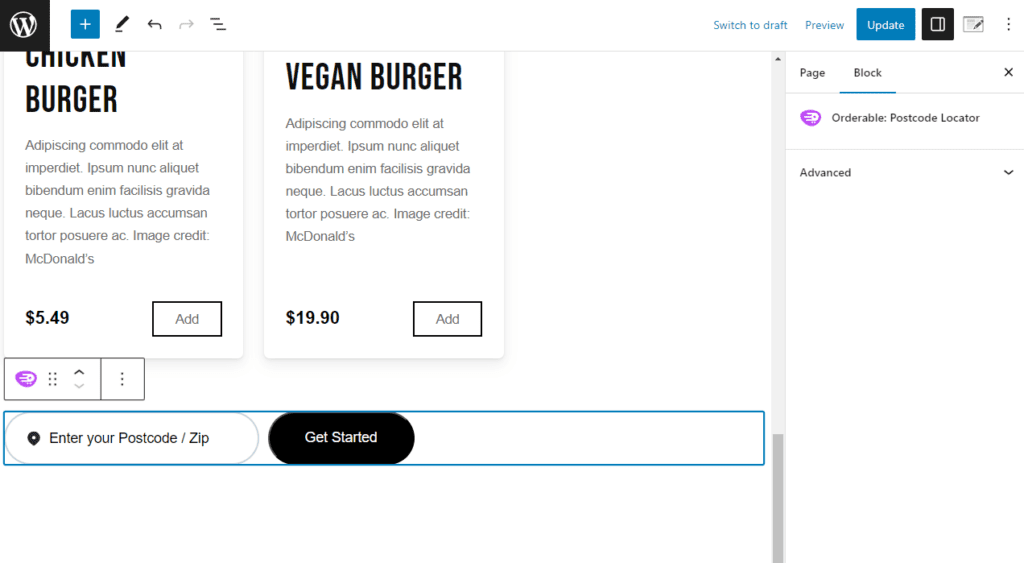
- Once you’re happy with your selection, click the Update button at the top of the page.
How to set up custom order notifications per location
Let’s say you have three locations, and each of them has a different set of drivers, staff, and of course, customers. You’ll likely need to send different order notifications for each of these.
The good news is, with Orderable, you can create an unlimited number of order notifications and assign them to each of your locations.
To do this, take the following steps:
- From you WordPress dashboard, go to Orderable > Order Statuses and click Add New at the top of the page.
- Walk through the steps to create a new order status for your location, then scroll down the page.
- Click the blue Add Notification button to create a new notification, then click to expand it.
- Create your notification as you would normally, and then scroll down until you see the Location dropdown. Here you’ll be able to select the notification you want this to apply to.
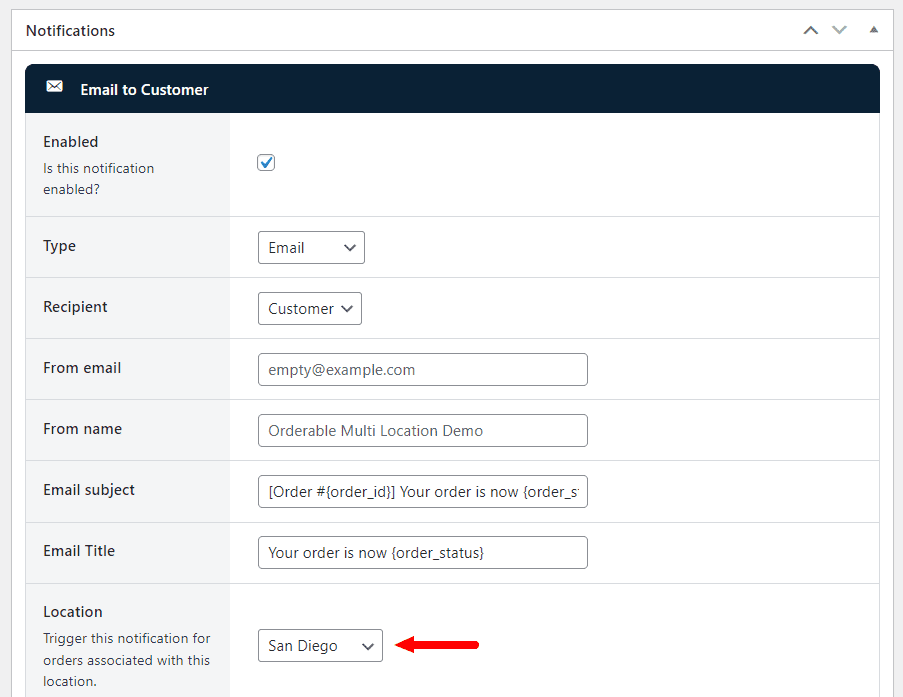
- Once happy, scroll to the top of the page and click Publish.
Note: We went over order notification settings very briefly here. To get a more in-depth tutorial, check out our guides.
- How to Create a Custom Order Status
- How to Send WhatsApp Order Notifications
- How to Send SMS Order Notifications via Twilio
How to manage orders for multiple locations
Your location is set up and running, but how do you manage orders once they start coming in? There are a few ways you can do this.
- From your WordPress dashboard, go to Orderable > Live Order View. Here you’ll see a page filled with your upcoming orders with a column on the end called Location. To view all orders from one location, you can use the location dropdown at the top to see orders just from one location. Make sure to press the Filter button to see the changes.
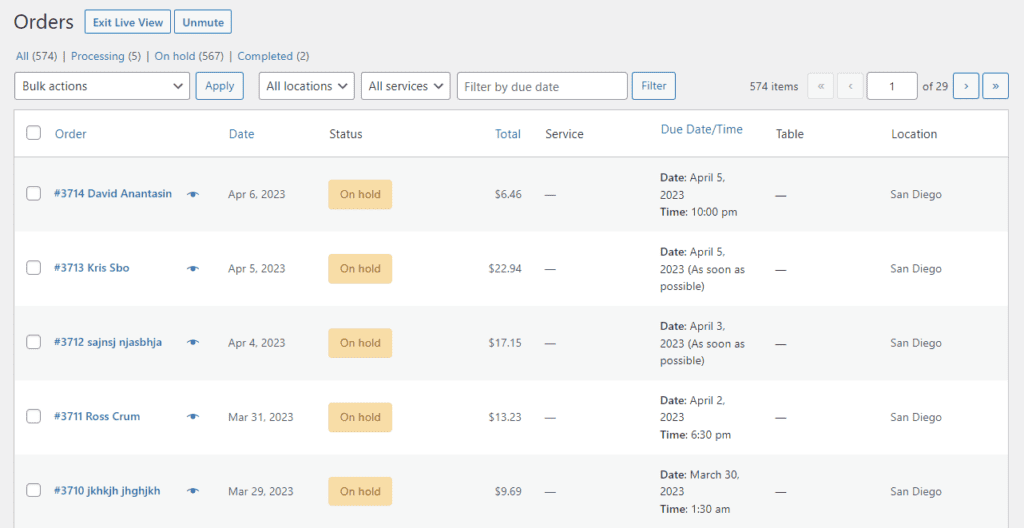
- Alternatively, you can see a similar setup by going to WooCommerce > Orders from your WordPress dashboard. Just like on the Live Order View page, you can filter orders here.
Get Your Restaurant Online With Orderable
The WooCommerce plugin designed to help restaurants take orders online – with no added fees!
View Pricing
