

One of the first things you’ll do when setting up Orderable is to create your products (or menu items) for your online menu.
This guide will walk you through the steps of doing this with WooCommerce and Orderable.
Step 1: Add a new product
The first thing we’ll need to do is create a new product or menu item. For the purposes of this guide, any time we say product, know that this refers to a menu item or dish you will display in your online ordering menu.
Note: WooCommerce is the plugin that helps you add products to your online store. Orderable allows you to display these in an online menu and gives you additional features such as nutritional information, allergens, product labels, and more.
To do this, take the following steps:
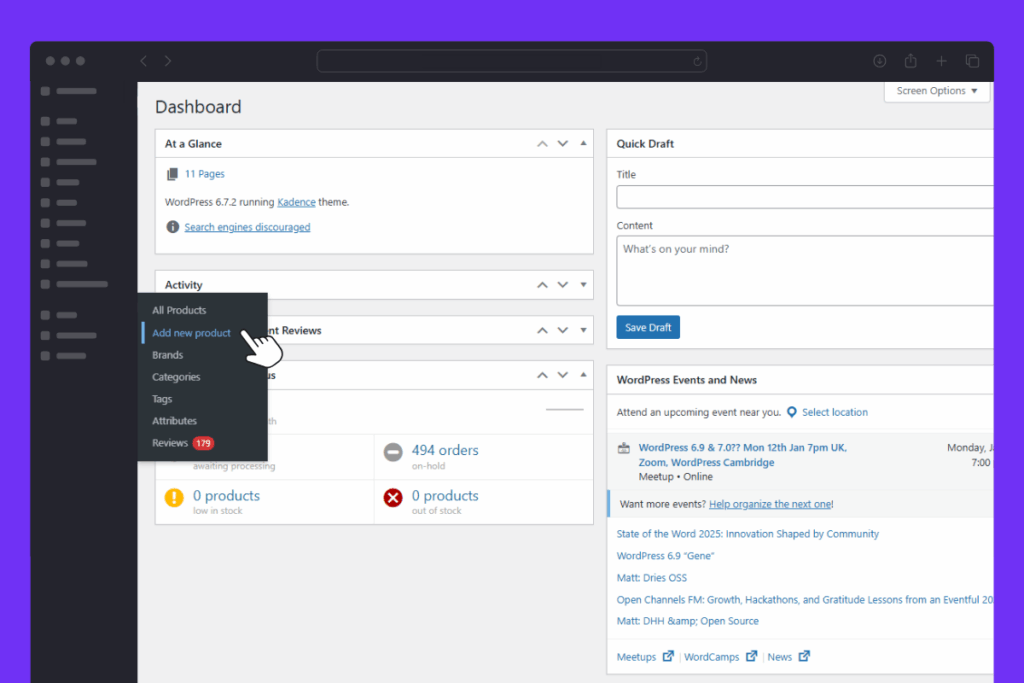
- From your WordPress dashboard sidebar, hover over Products and click Add New. This will take you to the edit product page.
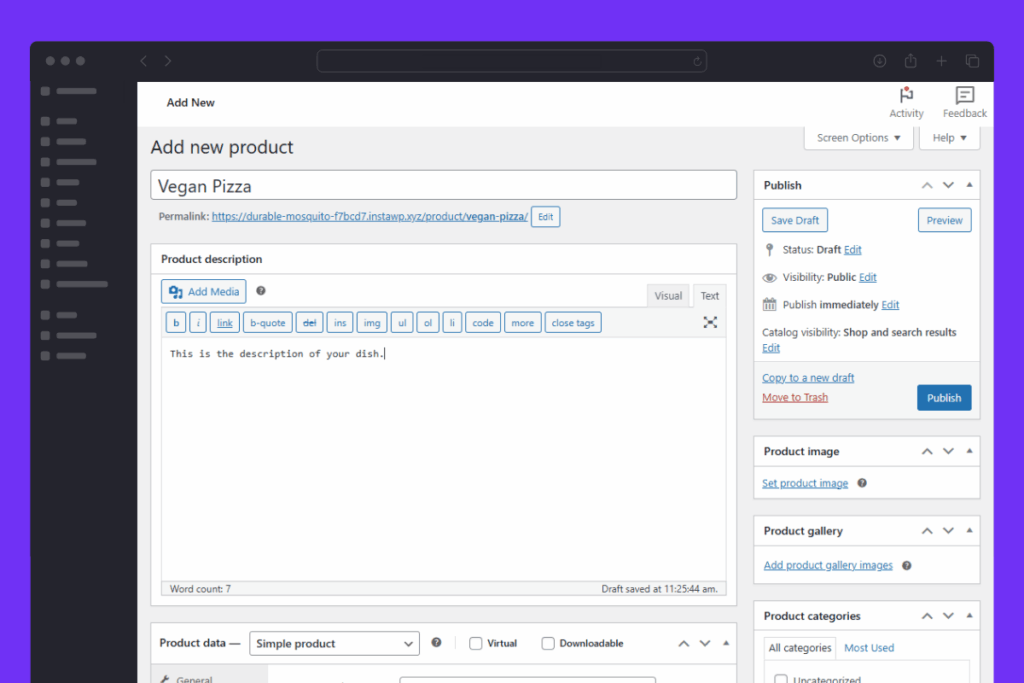
- Give your product a name in the Product name field (i.e., Vegan Pizza). Underneath this, you’ll see the Product description. Here, you can add as much or as little information about your product as you’d like.
Step 2: Select your product categories and image
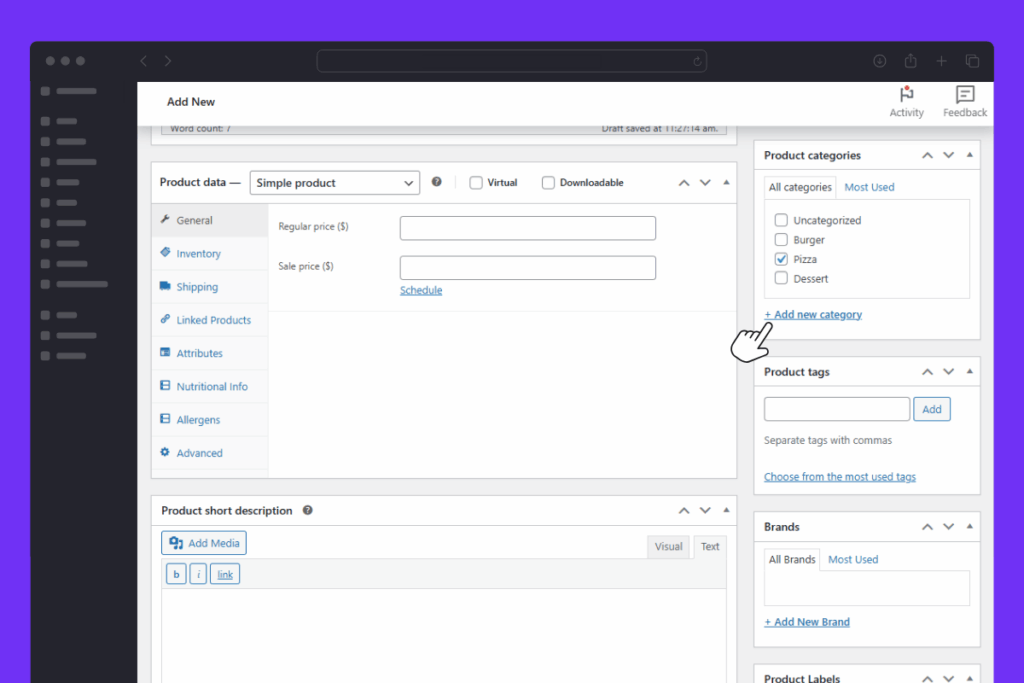
- On the right, you’ll see a section called Product categories. These categories will help you keep different types of dishes separate in your online menu.
- For example, if you want different sections for Starters, Mains, and Desserts, then add categories for those. If you also want to keep dietary dishes, specials, or sauces separate, do that here too.
- To do this, click Add new category and add as many as you like. Then, make sure the checkbox is ticked next to each one.
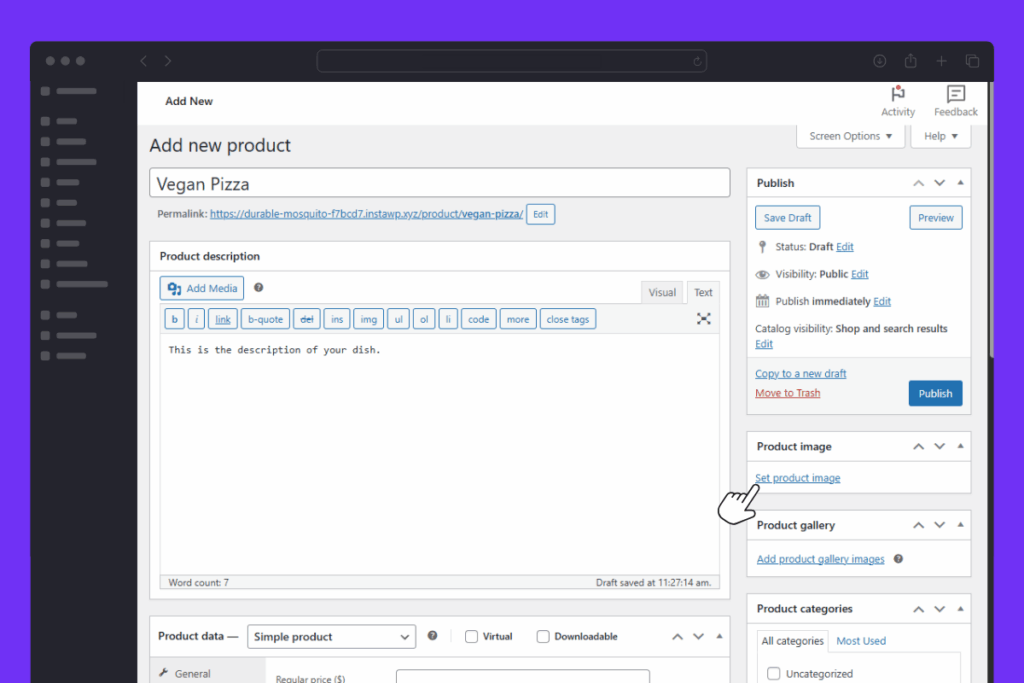
- Still on the right, you’ll see Product image. If you click the Set product image link below this, you’ll be able to upload an image for your product.
Step 3: Set your product price
- Next, scroll down the page to the Product data section. Here is where you will set things like the price of your dish. You can set this in the Regular price field in the General tab.

Step 4: Add additional information
Note: This section contains features only available in Orderable Pro.
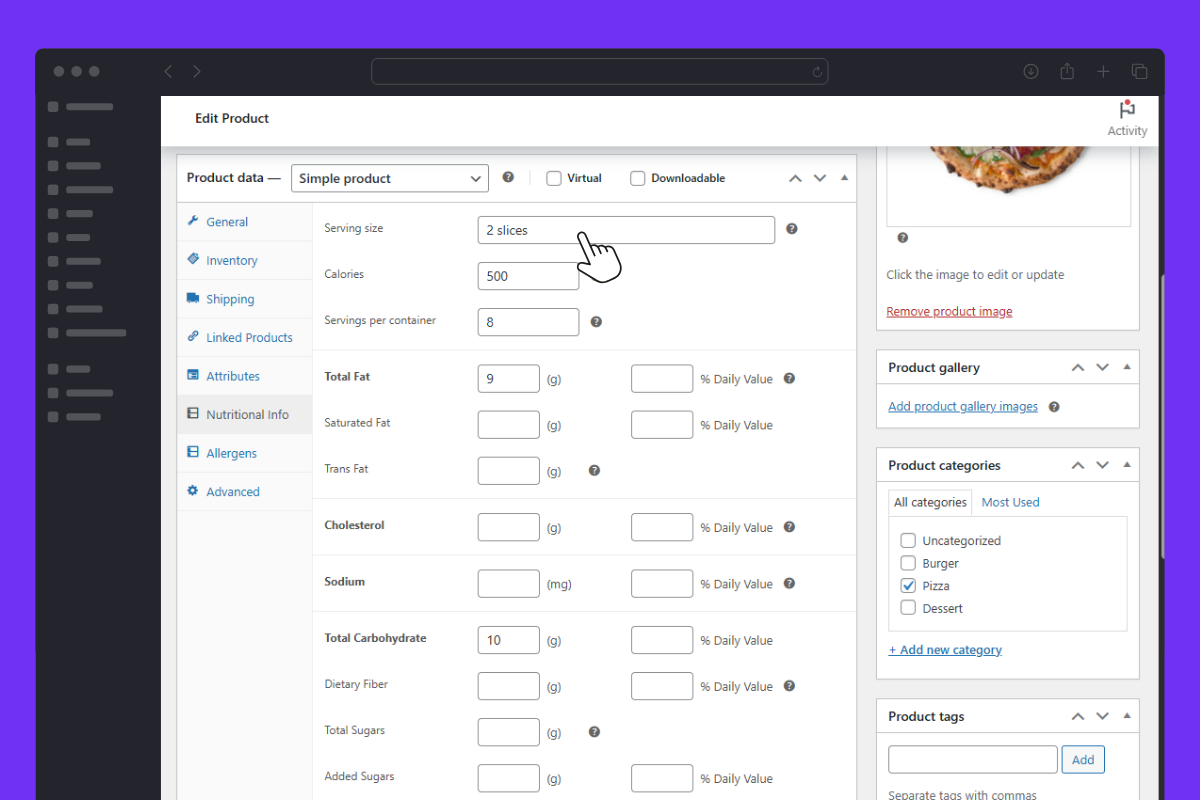
If you’re using Orderable Pro, you’ll see some additional tabs in the Product data section of this page. These include Nutritional Info and Allergens.
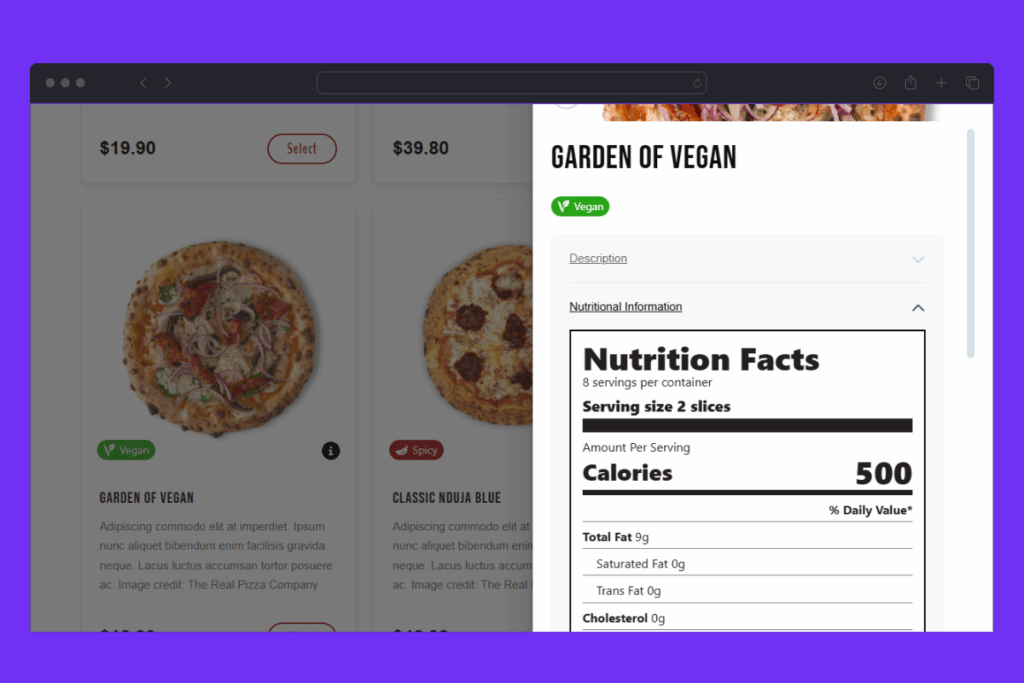
If you click the Nutritional Info tab, you’ll be able to fill in a nutritional information table that will display when a customer clicks on a product. Any fields you don’t fill in, won’t display. So you can keep this as simple or as detailed as you like.
The Allergens tab is a little more simple but allows you to give customers the information they might need to make an informed decision. Use the fields in this section to let customers know what your dish contains, may contain, or may contain due to shared equipment in your kitchen.
Step 5: Publish your product
If you’re happy with everything we’ve covered, make sure to Publish your product. If you need more time, you can save it as a Draft and come back later to finish.
Once done, you can move on to setting up your product layout/online ordering menu.
Get Your Restaurant Online With Orderable
The WooCommerce plugin designed to help restaurants take orders online – with no added fees!
View Pricing
