

If you’re looking to set up table ordering for your business, this guide will walk you through how to do it with the WooCommerce plugin Orderable.
Orderable Pro allows you to generate QR codes for tables within your business. When a customer places an order via one of these codes, the table will be automatically assigned to their order. It will also automatically disable the requirement for a shipping address/shipping method.
The typical process would look like this:
- You add all of the tables in your business to Orderable.
- Orderable will generate QR codes automatically for these tables.
- You print the QR codes and place them on the relevant tables.
- Your customer sits at the table and scans the QR code.
- The customer is then directed to the URL you entered when creating the table, usually your menu, where they can start their order.
- When the customer places their order, the table is automatically assigned.
- Your staff can then see which table an order belongs to, prepare the order, and bring it to the correct table.
Step 1: Create a table in Orderable
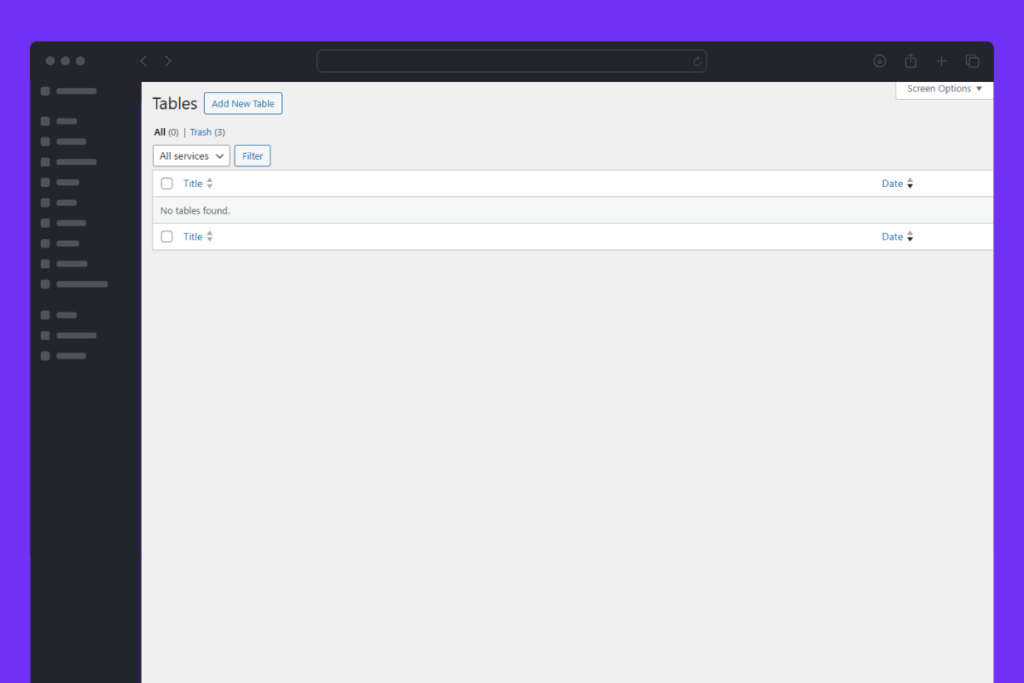
- From your WordPress dashboard, go to Orderable > Table Ordering.
- Click the Add New Table button at the top of the screen.
- Next, enter a Title for the table. This would usually be the table number.
- The Table ID will be auto-generated based on the Title. Alternatively, you can enter a unique ID here. This will be visible in the URL your customer visits via the QR code.
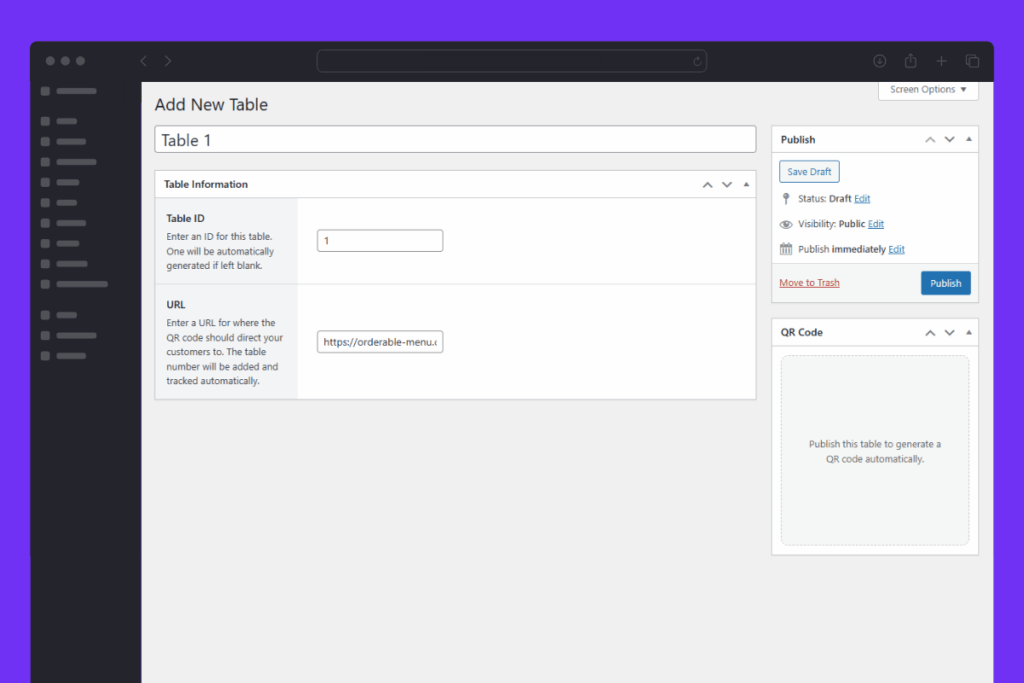
- Enter the URL to direct your customer to when they scan the QR code. This would usually be your menu or shop page.
- Click Publish or Save Draft, and your QR code will be automatically generated for you.

Step 2: Print your QR code
Once your QR code is generated and you’ve published your table, you can now print all your QR codes.
- While still on the Edit Table screen, click the blue Download button underneath the QR code image. This will save the QR code to your computer.
- Next, print this QR code image and any others you’ve created and place them on your business tables. We recommend laminating or taping over these to make sure they don’t easily get ruined while customers eat.
Step 3: Manage table orders
Now you have your tables set up, QR codes printed and set, it’s time to manage your table orders as they come in.
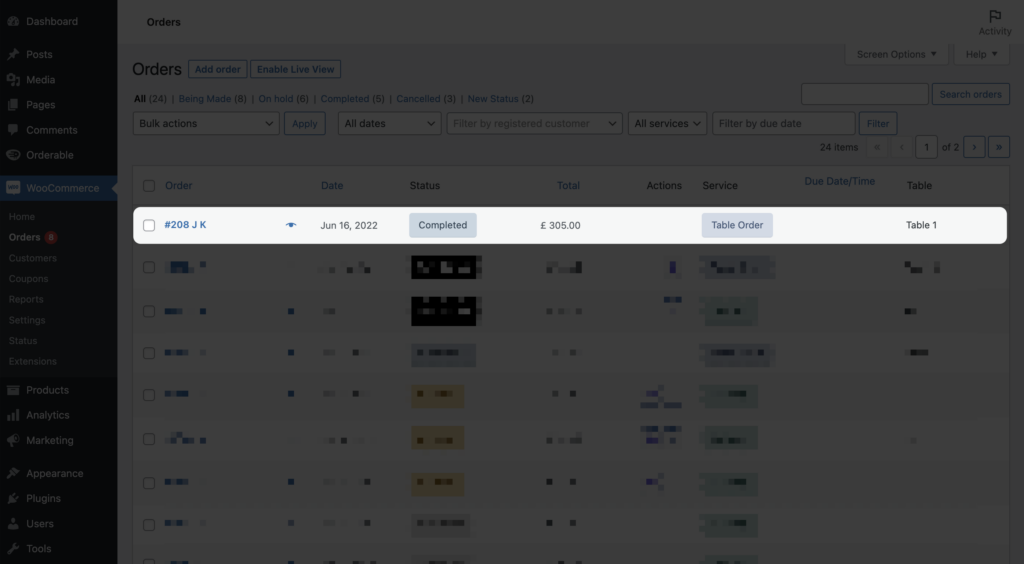
- From your WordPress dashboard, go to Orderable > Live Order View. Here you will see all of your orders as they come in.
- In the Service column, you’ll find that any orders made using your QR codes will have the service type set to Table Order.
- On this page, you can also filter by Table Orders and your location. So if you want to see only table orders, you can do.
- When you click on a table order, you’ll be able to interact with and process the order like you would normally.
Get Your Restaurant Online With Orderable
The WooCommerce plugin designed to help restaurants take orders online – with no added fees!
View Pricing
