The Live Order View page is one of the most important features of Orderable. This page will help you manage and organize your orders as they come in – all so you can run your store smoothly.
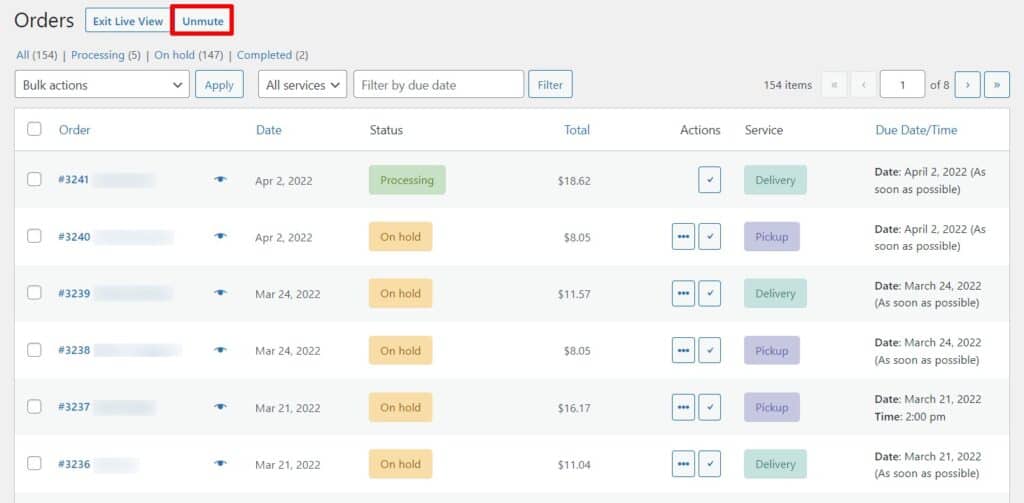
When you first install Orderable, your Live Order View will look a little something like this:
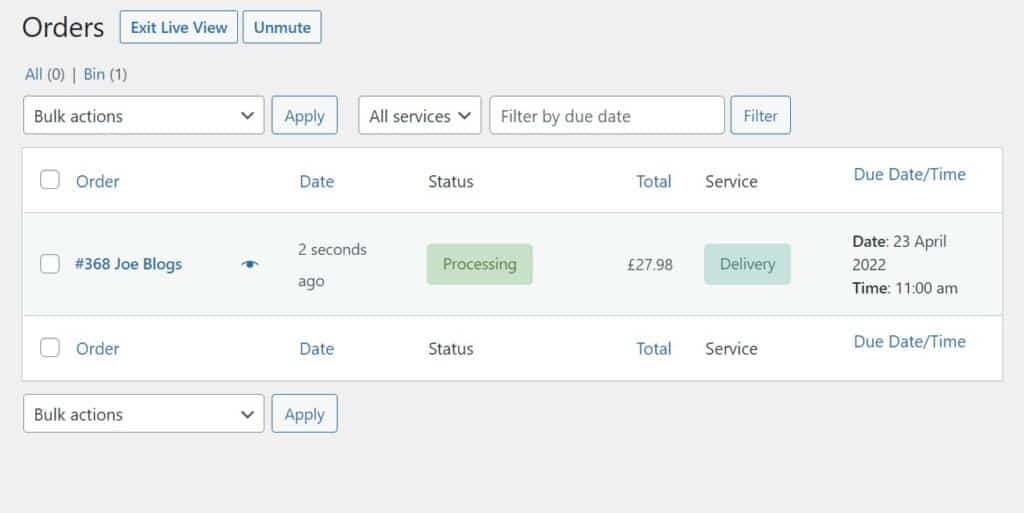
This page will update in real-time. So if a customer places an order while you’re looking at this screen, it will update. Many businesses using Orderable will keep this page open on a tablet so they can keep tabs on orders as they come in.
Some settings to be aware of
Before we go through each section in the table, we’ll need to make a few adjustments to the settings.
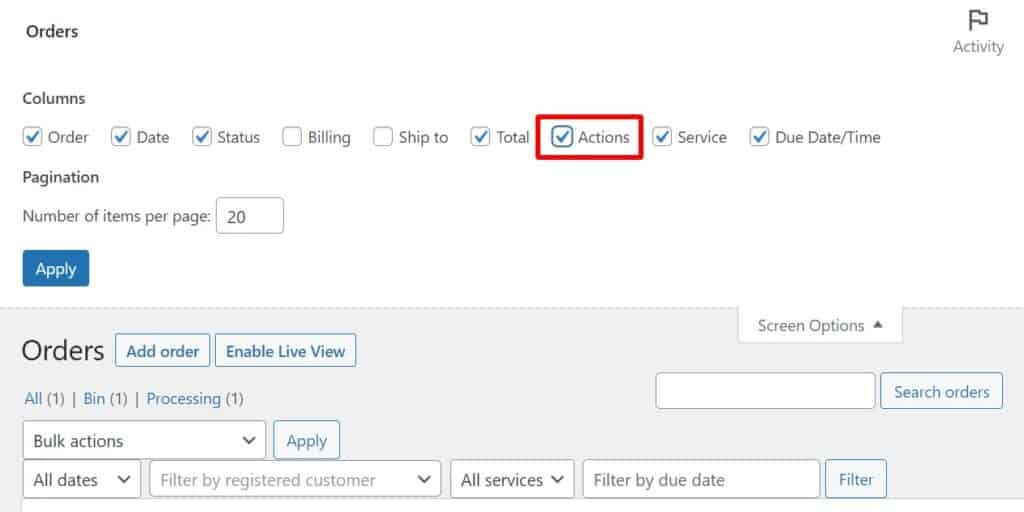
First, to allow for easy order management, we need to add an Actions column to the table. To do this, take the following steps:
- From your WordPress dashboard, go to WooCommerce > Orders.
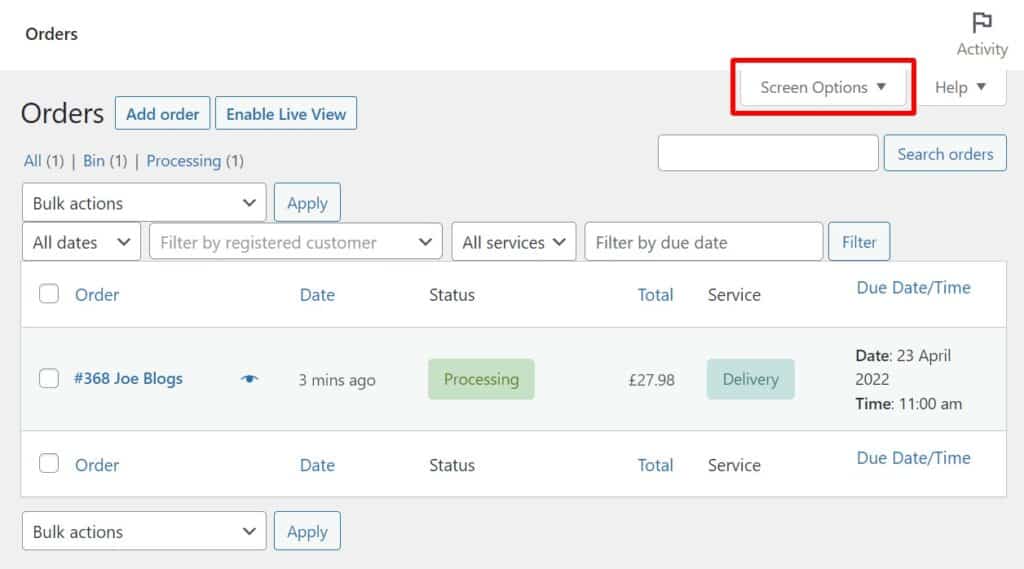
- At the top of this page, you’ll see a Screen Options dropdown. Click this and you’ll see a whole load of options you can toggle on and off for the Orders and Live Order View page.
- Make sure the checkbox next to Actions is ticked and then click the blue Apply button.
- Go back to the Live Order View page and you’ll see the Actions column in the table. This allows you to quickly process or complete your order directly on the Live Order View page.
Next, we’ll need to decide if we want the Live Order View page to make a sound (bing) when a new order comes through or not. To do this, take the following steps:
- From your WordPress dashboard, go to Orderable > Live Order View.
- At the top of the Live Order View page you’ll see a button that says Unmute. Click this and the Live Order View page will make a sound whenever a new order comes in.
How the table works
Now we’ve adjusted a few settings, we’ll go through the table column by column.
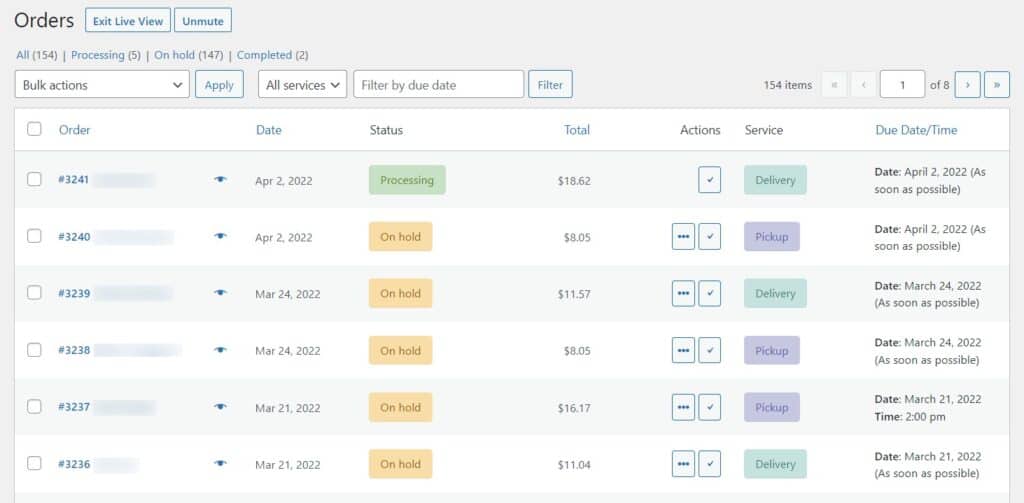
- Order – this column contains the order number/ID and customer name.
- Eye icon – the eye icon allows you to see the order in detail without leaving the page.
- Date – this column contains the date the order was made (not the date of delivery).
- Status – this column contains the order’s current status. Hover over the status to see when this was changed.
- Total – the total price for the order, including delivery costs.
- Actions – this column contains a few icons by default. The three dots changes the order status to Processing when clicked. The tick changes the order status to Complete when ticked.
- Service – this column will either say Pickup or Delivery, depending which delivery method the customer chose.
- Due Date/Time – this is the selected delivery/pickup date and time the customer selected at the checkout.
While on this page, you’ll also be able to filter the orders to manage them easier.
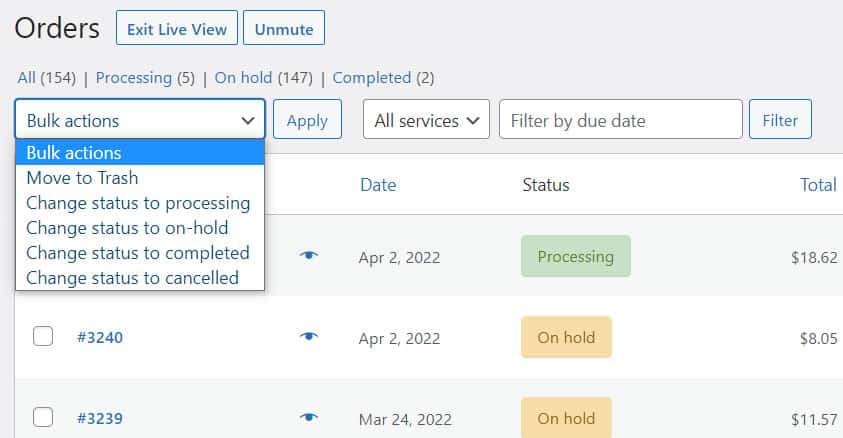
- Bulk edit your orders using the Bulk actions dropdown. Using this you’ll be able to select multiple orders and change their status all at once, or remove orders if you don’t want them.
- Use the All services dropdown to only show Delivery or Pickup.
- Use the Filter by due date field to see all the Delivery or Pickup orders that are due on a specific date or date range.
Get Your Restaurant Online With Orderable
The WooCommerce plugin designed to help restaurants take orders online – with no added fees!
View Pricing
