

If you need to change an order in some way after your customer has placed it, this guide will help you do so.
The following sections will help you edit an order after it has been placed in WooCommerce, depending on what you need to change.
How to edit an order (additional items/payment)
If your customer wants to add additional items to their order after they’ve placed it, follow these steps:
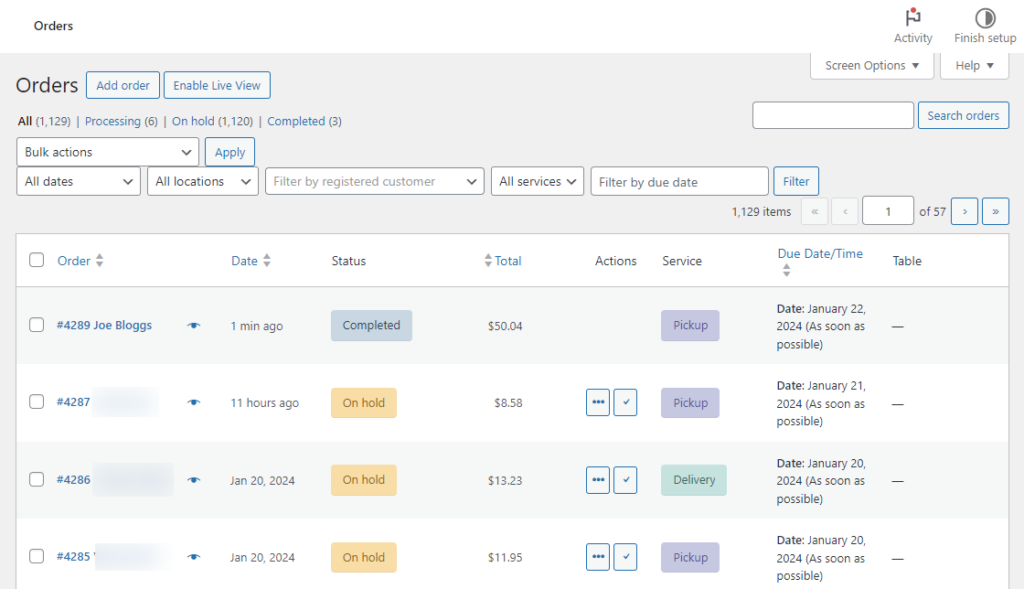
- From your WordPress dashboard, go to WooCommerce > Orders and click to edit the order you want to change.
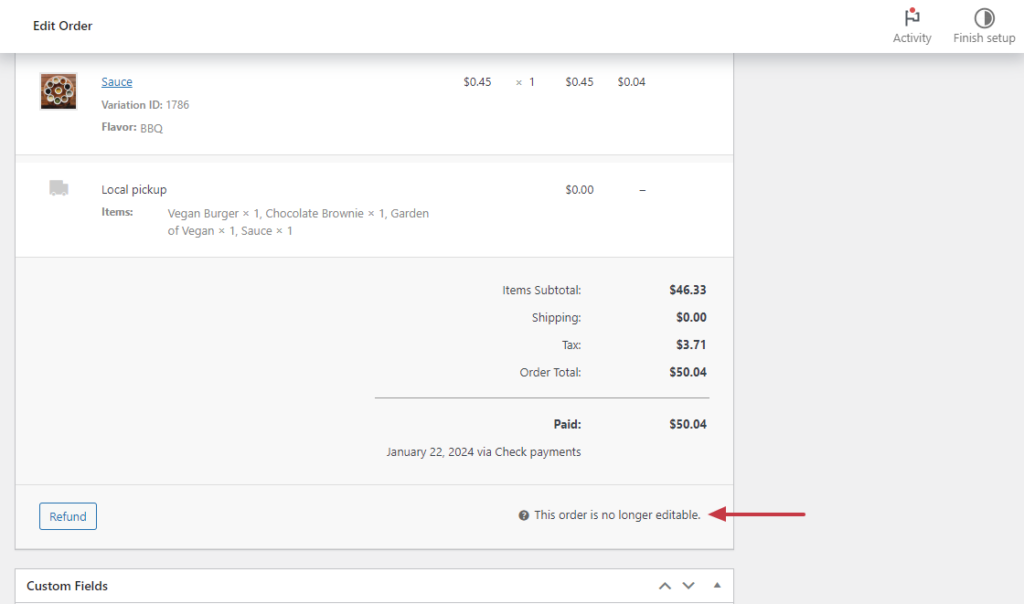
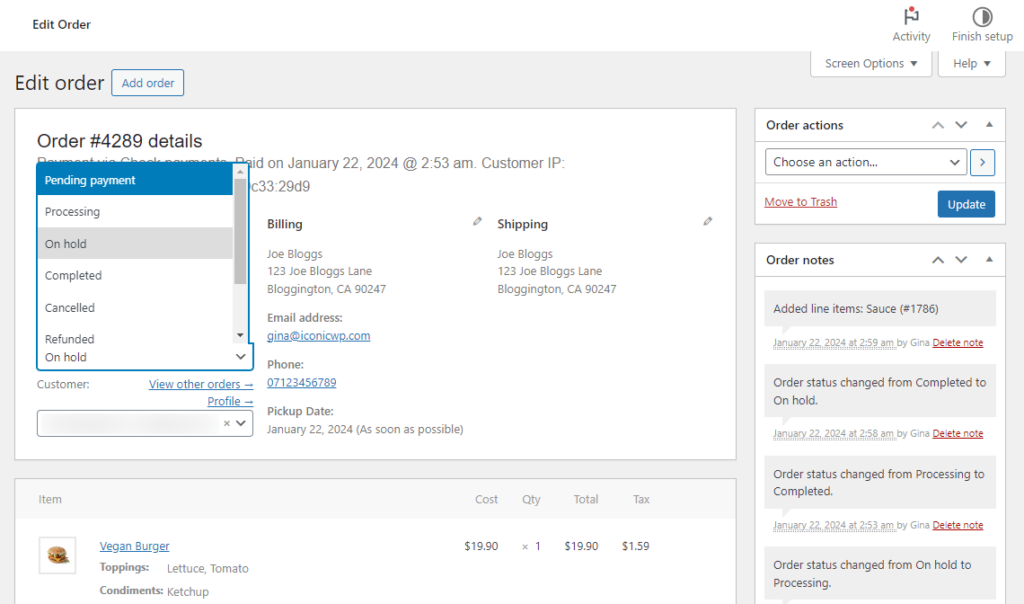
- On this page, you’ll see you can no longer edit your order.
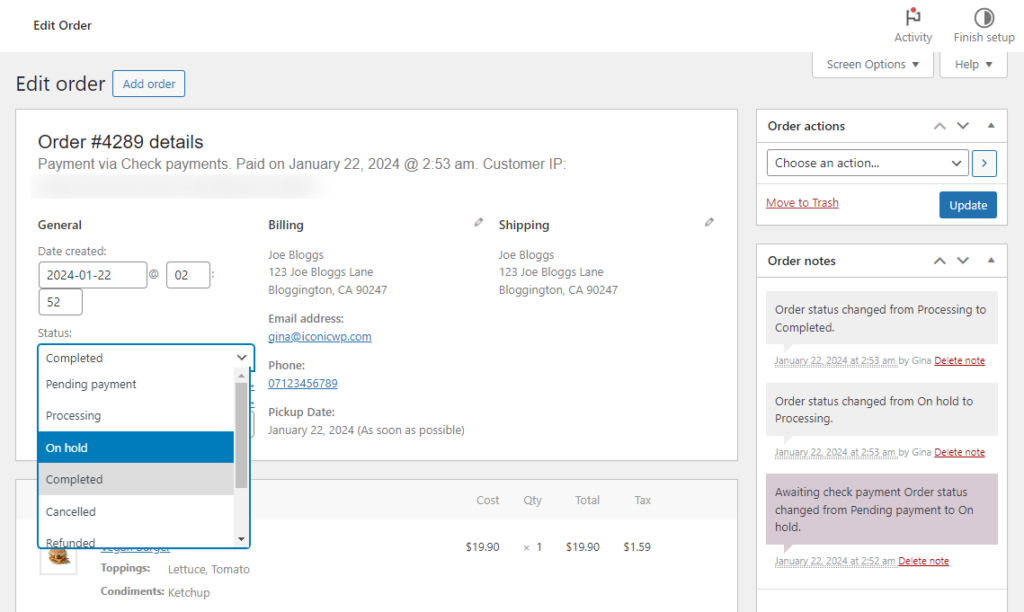
- So, the first thing you’ll need to do is change the order Status to On hold and click the blue Update button.
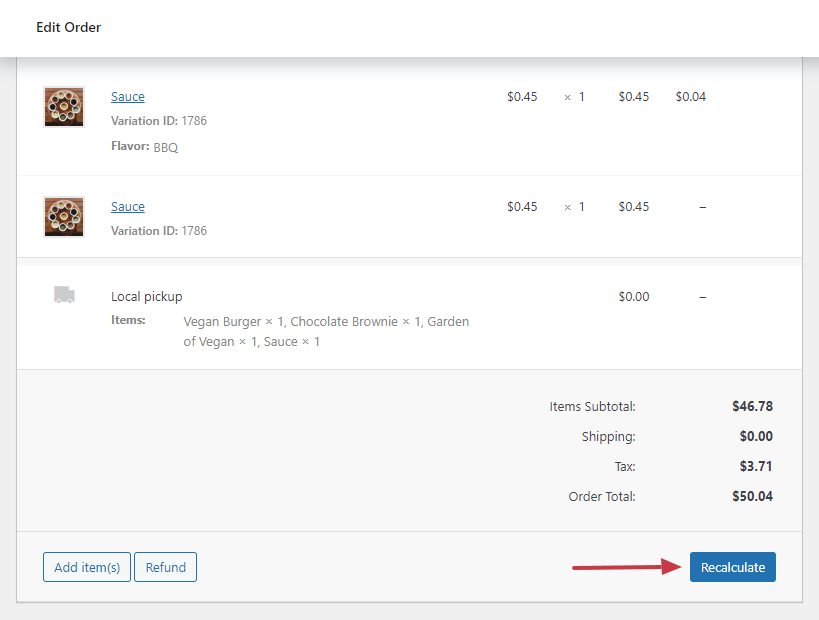
- With this changed, you’ll now be able to add additional items, remove existing ones, charge additional fees, and remove them.
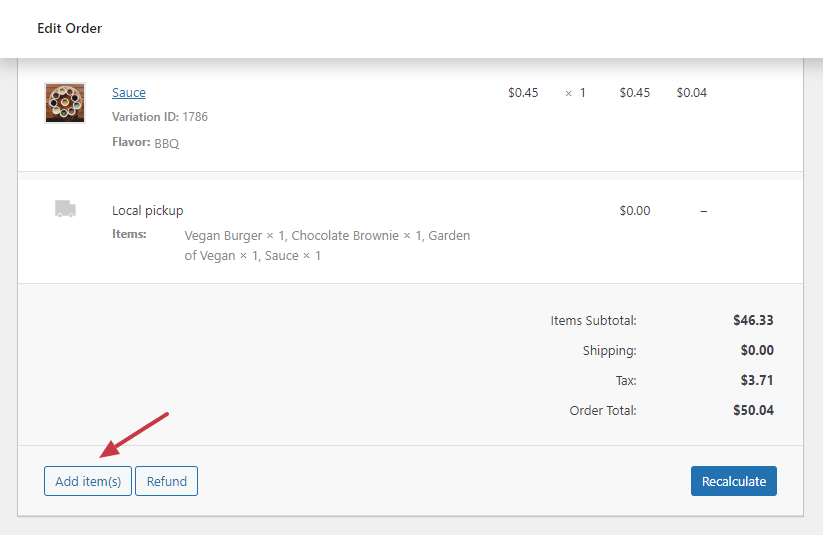
- Once you’re happy with your changes, click the Recalculate button to get your customers’ new total.
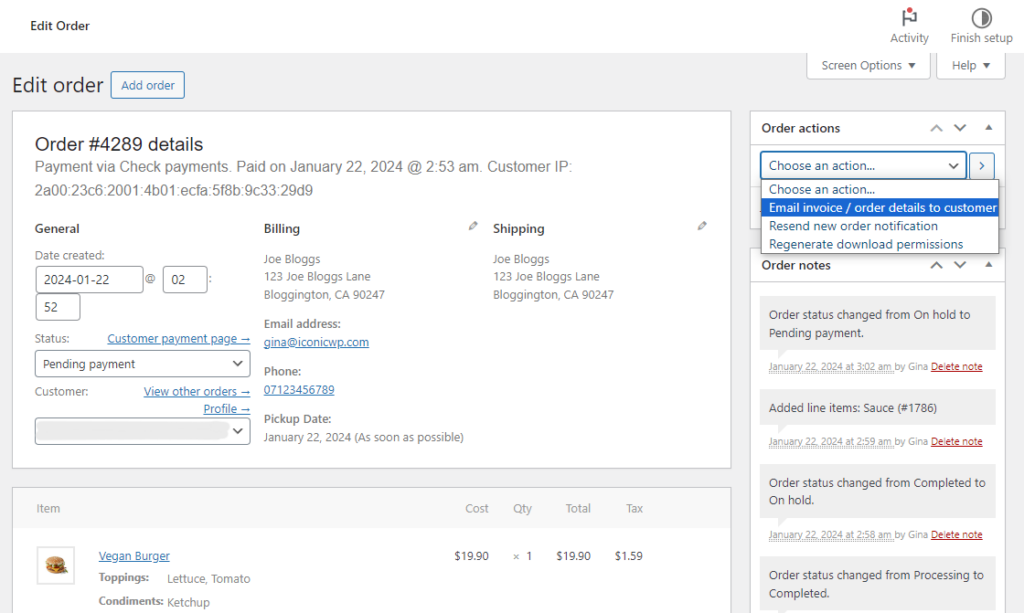
- Next, change the order status to Pending payment and again, click the blue Update button.
- Next, we’ll need to send the customer a copy of their order so they can pay the additional balance. To do this, in the Order actions box on the right, pick Email invoice/order details to customer and click Update.
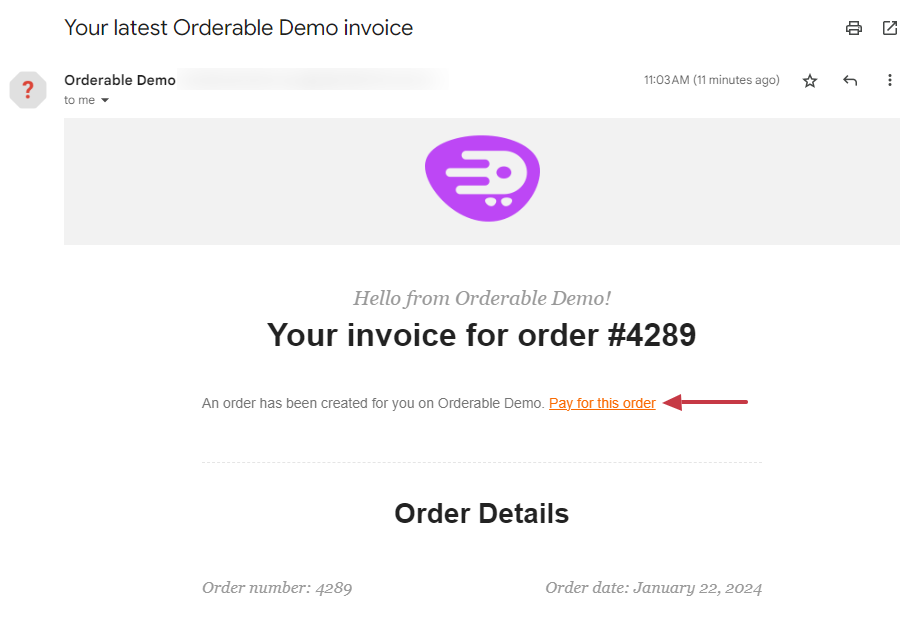
- The customer will then be sent an email for them to pay for their additional items. Once they’ve done this, you can fulfill the order.
- Alternatively, they can pay for their order in their My Account page if they login. In the Actions tab of the table, they will now have a Pay button they can click on.
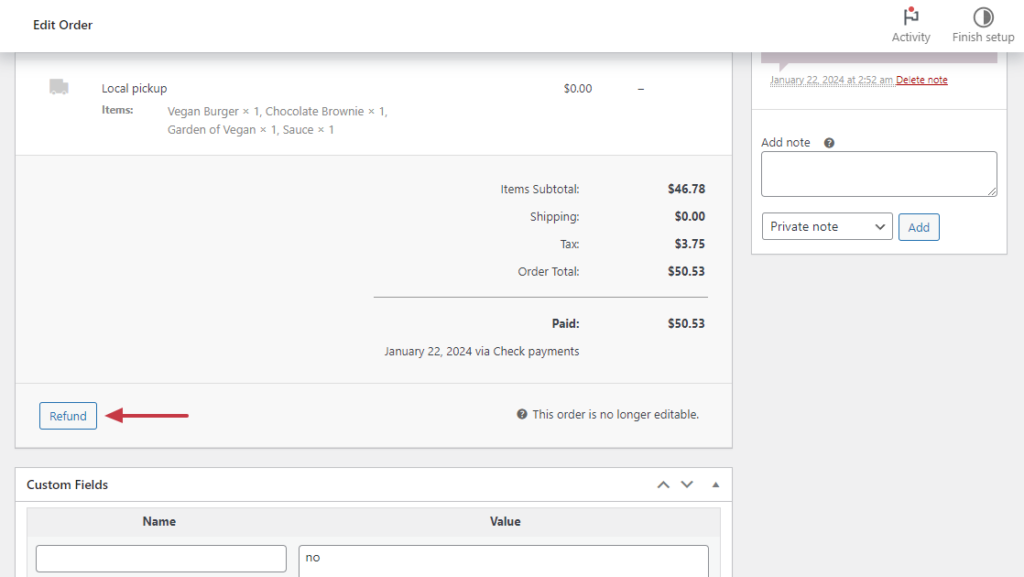
How to edit an order (partial refund)
If your customer added too many items to their order and wants to remove some, they’ll likely need a partial refund for their order. Here’s how you do that.
- From your WordPress dashboard, go to WooCommerce > Orders and click to edit the order you want to change.
- On this page, you’ll see you can no longer edit your order.
- Scroll down until you get to the bottom of the order summary table, and click the Refund button.
- In the Qty field of the order summary table, select which items to refund by increasing their number. This will then update the number in the Refund amount field below.
- Enter the reason for the refund if you like, and click the Restock refunded items checkbox if you want to keep your stock up to date.
- Once happy, click the Refund $XX.XX via [your gateway] button below.
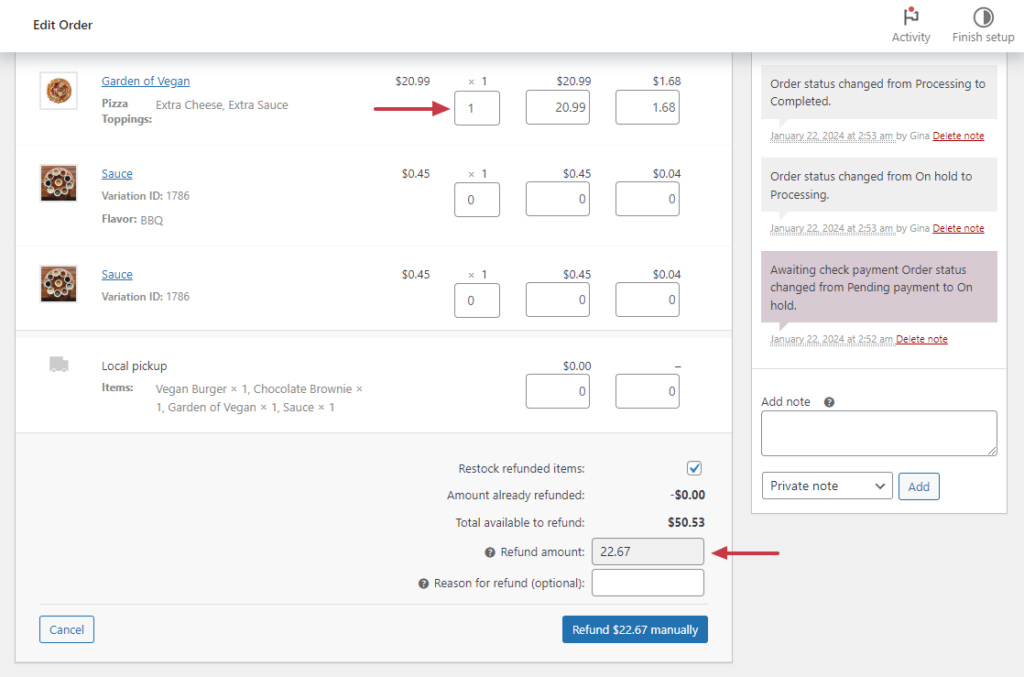
Note: Depending on your payment gateway setup, the refund might need to be done manually. Please refer to the official WooCommerce documentation for details.
Get Your Restaurant Online With Orderable
The WooCommerce plugin designed to help restaurants take orders online – with no added fees!
View Pricing
