

Learning how to process and manage orders when they come through is incredibly important, so we’ve made it as simple as possible. This guide will show you how to process and manage your orders as they appear.
To view and manage your orders, take the following steps:
- From your WordPress dashboard, go to Orderable > Live Order View.
- This will then take you to a page that shows all your store’s orders. Here you’ll be able to see everything from the order number and customer name, to the type of service (Delivery or Pickup), the order status and of course, the selected delivery/pickup time slots.
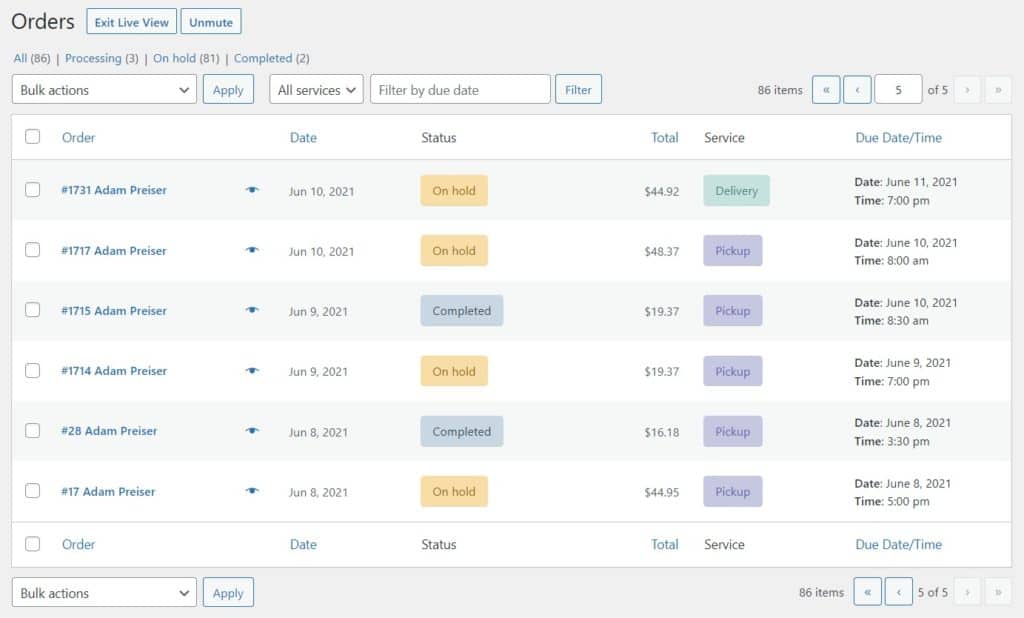
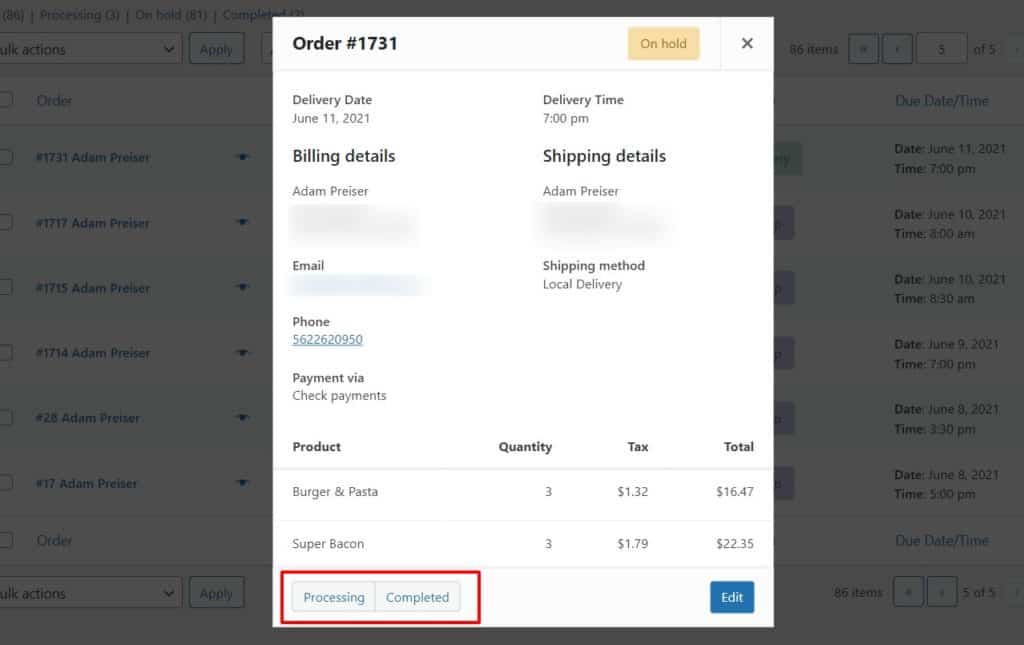
- To manage each individual order, click the eye icon in the table. This will open a popup containing the order information. At the bottom left you’ll see some options.
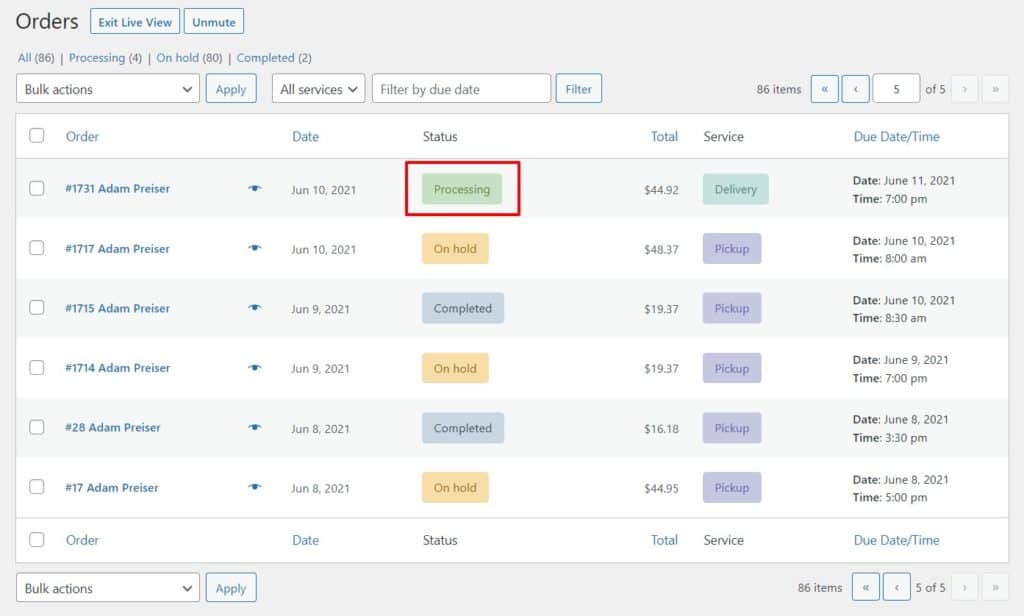
- Processing – By clicking this option, you’ll let customers know via email that their order is being processed. This is especially useful when you’re prepping or creating a food order and want to keep customers up to date.
- Completed – By clicking this option, you’ll let customers know via email that their order is complete.
The Live Order View allows you to filter orders by the due date, pickup, delivery, and more. Just select the options you want to see above the table to make managing your orders, easier.
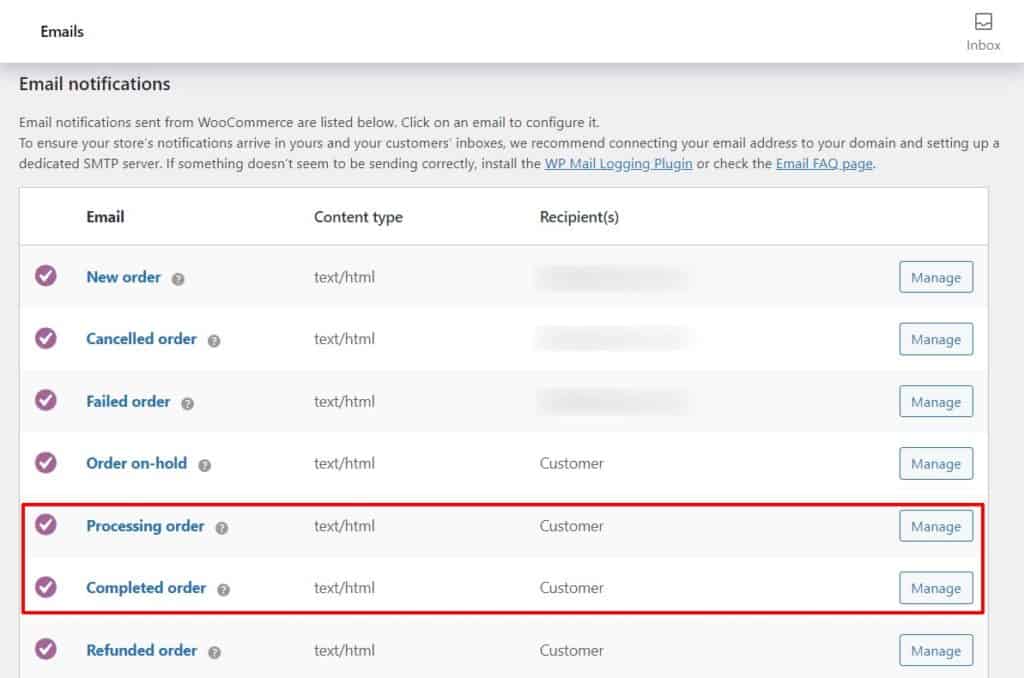
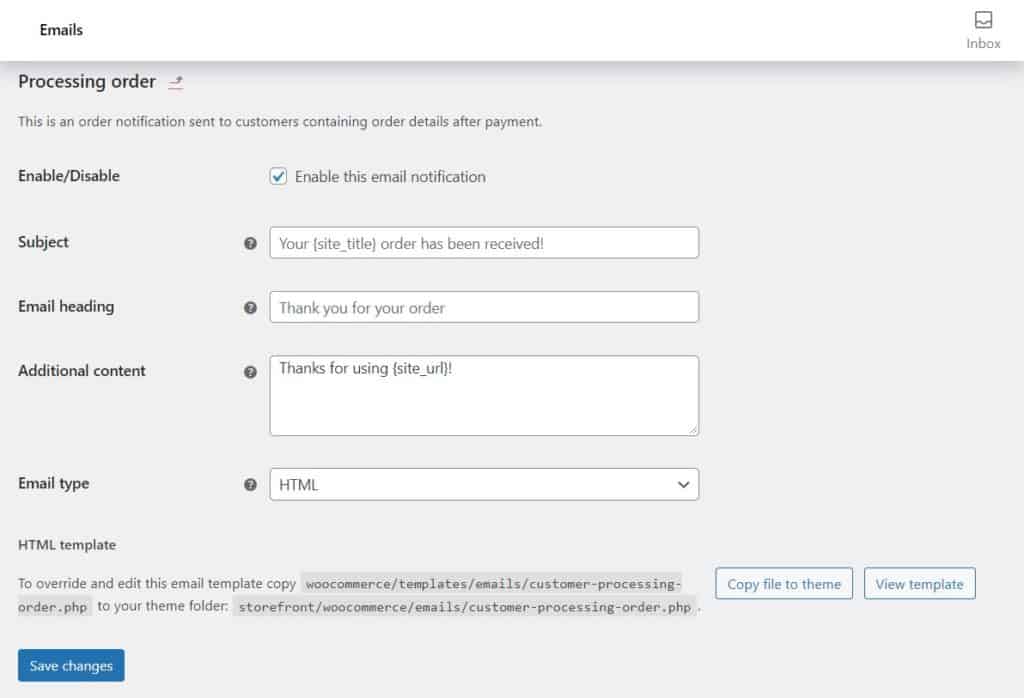
You can enable and disable the emails that are sent to customers when you switch the order status. You can also edit the contents of these emails.
To edit your status change emails, take the following steps:
- From your WordPress dashboard, go to WooCommerce > Settings and click the Emails tab at the top.
- On this page you’ll find a table full of emails your customers are sent. Locate the Processing order and Completed order emails and click the Manage button at the end of each one.
- On this page you’ll be able to edit the email contents to suit your store.
Get Your Restaurant Online With Orderable
The WooCommerce plugin designed to help restaurants take orders online – with no added fees!
View Pricing
