

If you’d like to send WhatsApp order notifications to your customers, you can do so with Orderable.
Note: This requires you to have set up a Custom Order Status first. See our Custom Order Status doc for more information.
To set up these notifications, you’ll first need to sign in to your Facebook developer account and create an access token. This will allow you to link WhatsApp and Orderable together.
Step 1: Create the Meta app and generate an access token
To get started, we’ll log in to Facebook for Developers and create a way to link Facebook and WhatsApp together.
To do this, take the following steps:
- First, log in to developers.facebook.com.
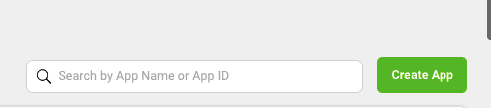
- Then click on the My Apps link in the top menu. Once done, click the Create App button on the right-hand side of the page.
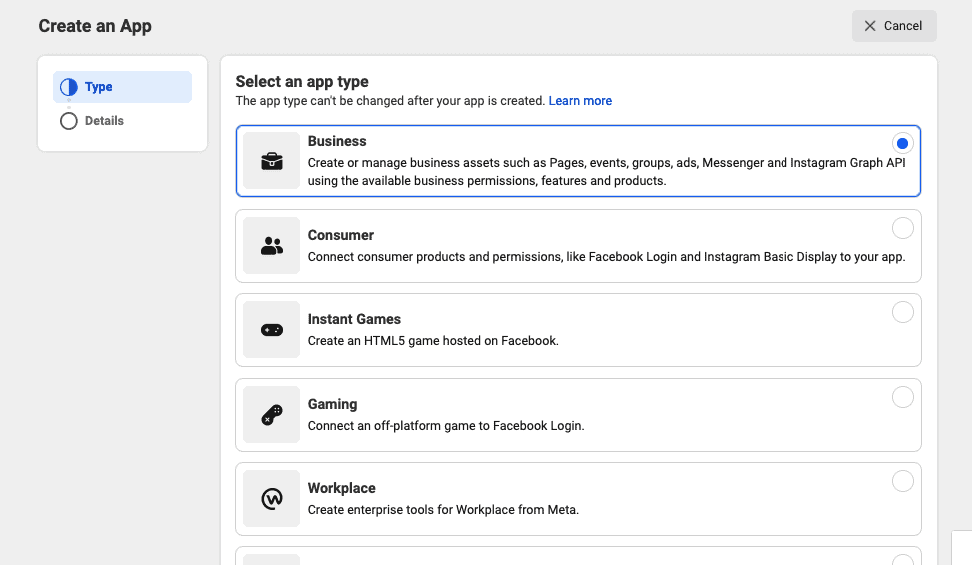
- On the page that appears, click Business and the Next button.
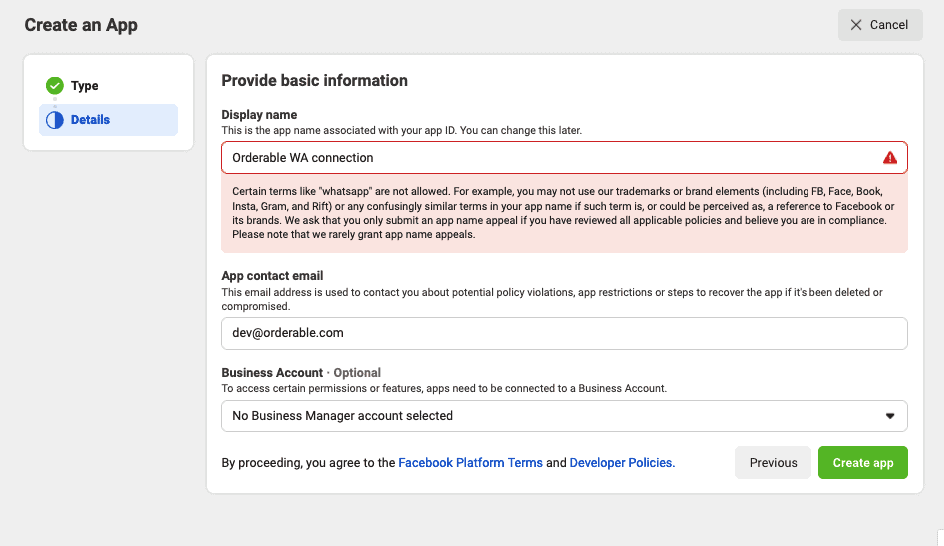
- In the next step, enter the app name and email (these are for admin purposes). Then select a Business Account. If you don’t have a business account, Facebook will create one for you. Next, click the Create App button
- Once done, enter your Facebook account password in the confirmation popup.
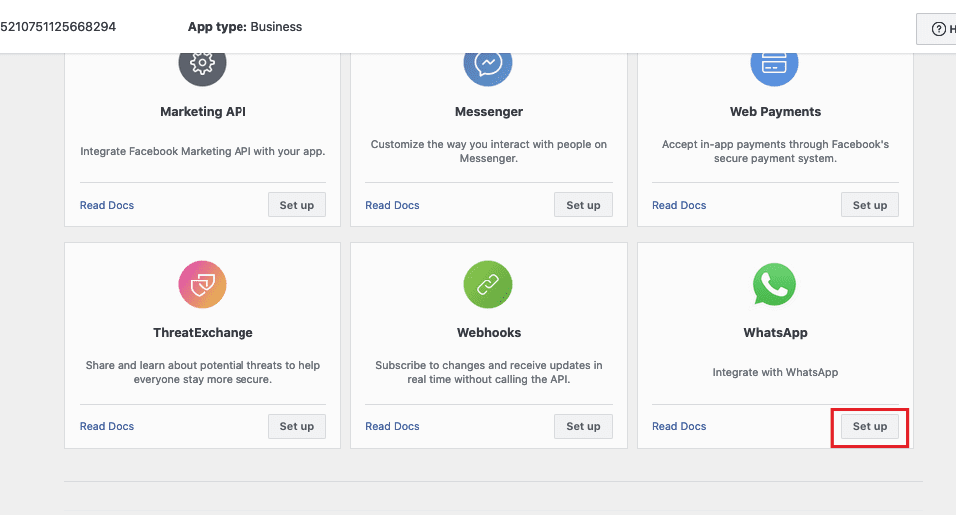
- The app will then be created and you’ll be asked to select products that you want to add to the app. Scroll down until the end and click on the Set up button under Whatsapp.
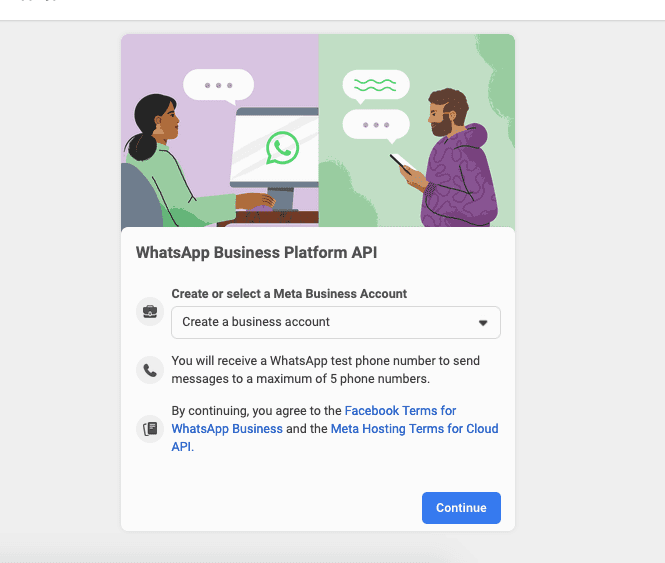
- On the next page, Select or Create a Meta Bussiness account using the dropdown. Then click continue.
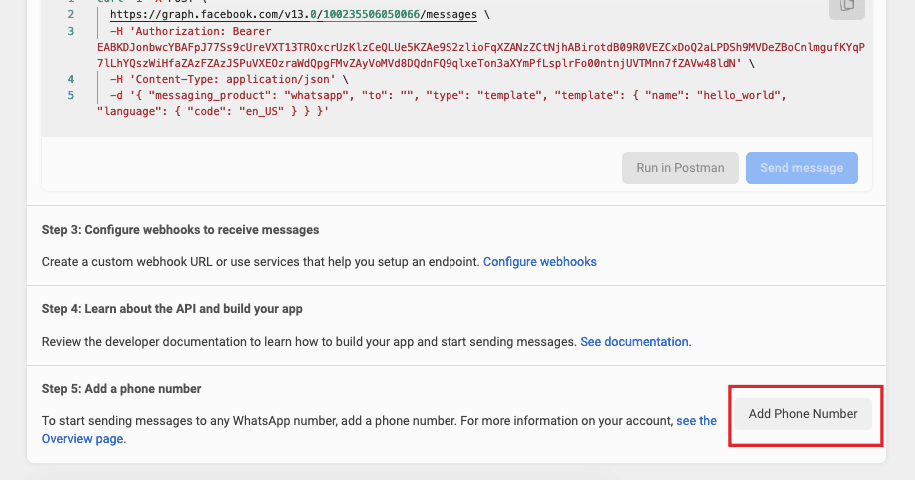
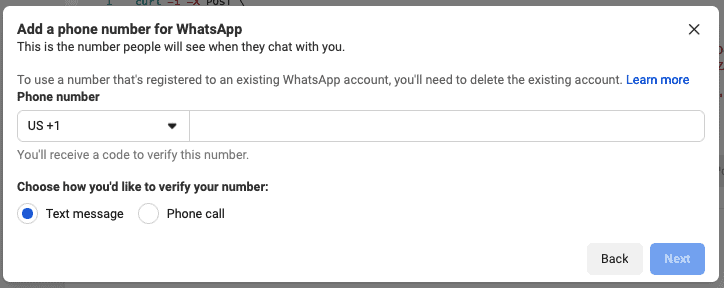
- It will redirect you to the Getting Started page. Now you only need to add your phone number to the WhatsApp API. This will be the number from which the messages will be sent.
Notes:
- This number cannot be already associated with an existing WhatsApp account.
- Once you migrate a phone number to the WhatsApp Business Platform, you cannot use that number on the WhatsApp Messenger or WhatsApp Business App concurrently. For further reading, refer to the WhatsApp documentation.
Not ready to use a real number?
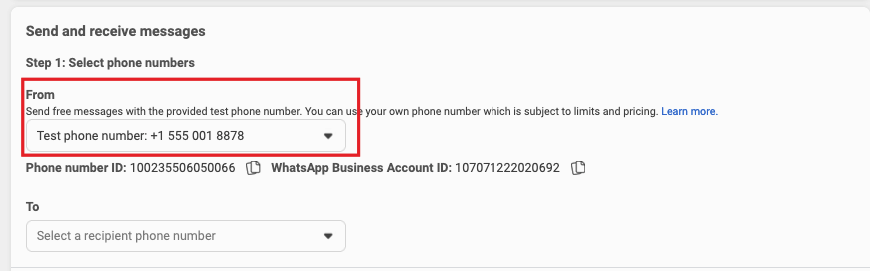
If you are not ready to link your phone number with WhatsApp API, you can use the Testing number provided by WhatsApp.
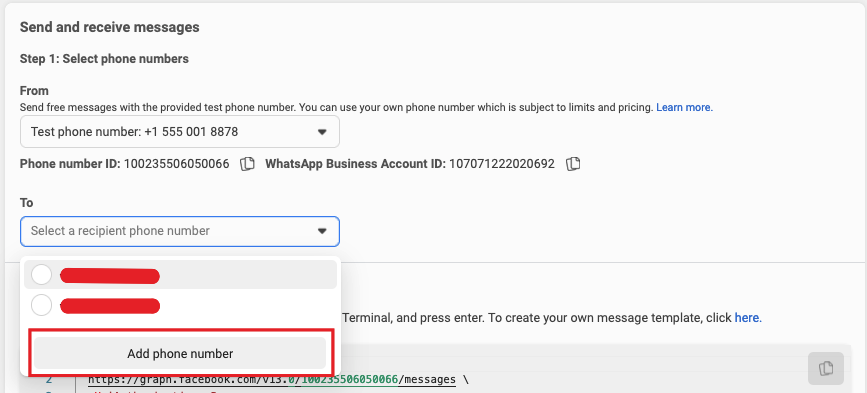
Please note that you can only send messages to the approved recipients while using the test number. To add a recipient, click on Add phone number button under the To dropdown. Enter your number in the popup and verify it with the received verification code.
- Once clicked, you’ll need to enter the details for your WhatsApp profile.
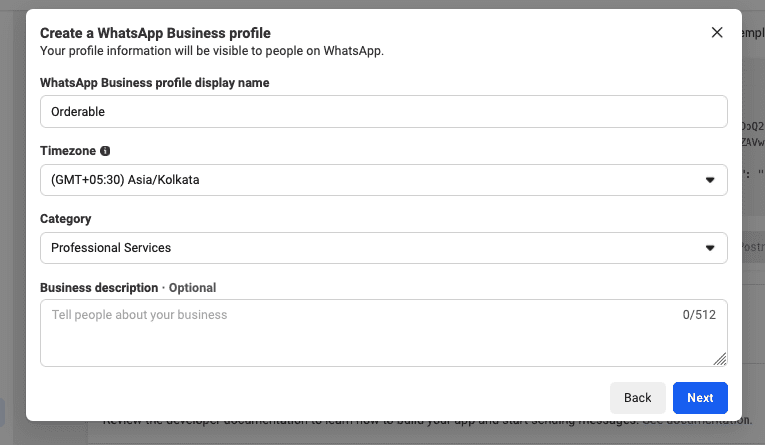
- Finally, enter the phone number and verify it by entering the verification code received.
- Now the WhatsApp app is all set up, we need to copy the Access Token, Phone Number ID, and Business Account ID and paste these into Orderable.
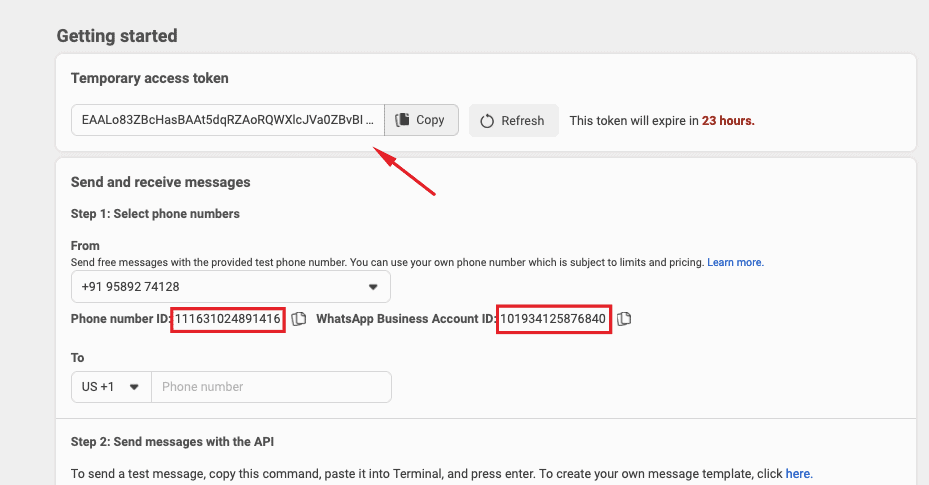
Creating a permanent access token
Note that this is a temporary access token. This means for security reasons, the token expires in less than 24 hours. You can use it for testing.
To generate a permanent access token, refer to the WhatsApp documentation.
Step 2: Connect WhatsApp to Orderable
Now we’ve set up the technical part in Facebook, let’s connect WhatsApp to Orderable. To do this, take the following steps:
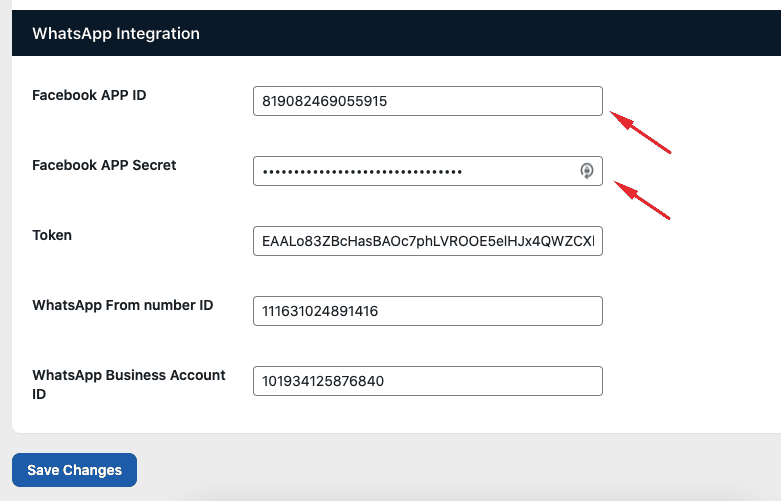
- From your WordPress dashboard, go to Orderable > Notification > WhatsApp Integration.
- Then, paste your Token, Phone Number ID, and Business Account ID into the relevant fields.
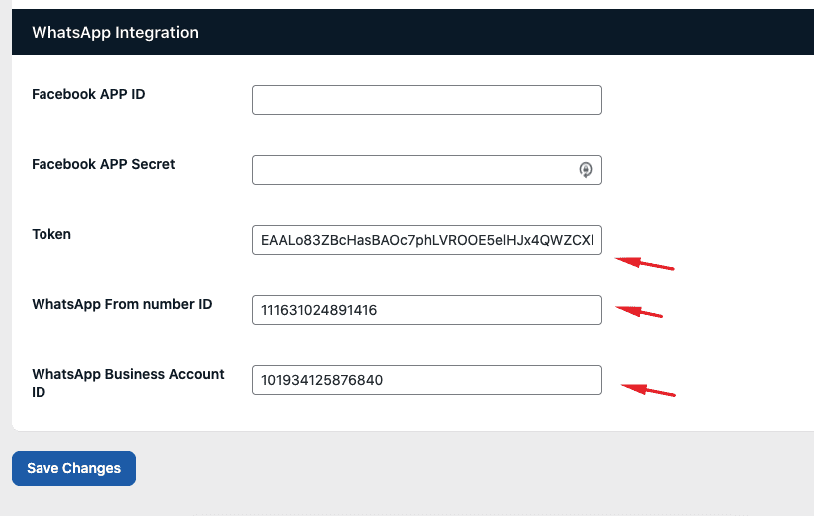
- Then, from the Facebook app, click on Settings > Basic. Copy App ID and App Secret.
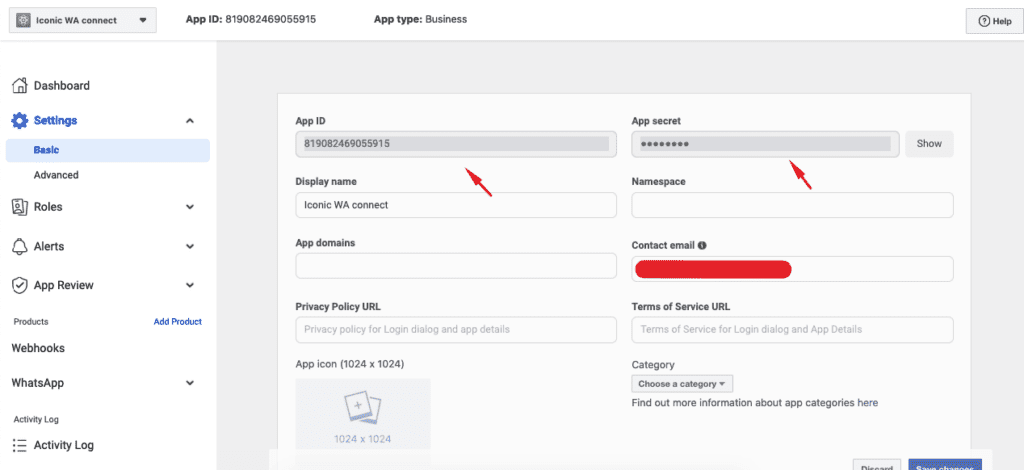
And paste them into the WhatsApp settings in Orderable.
Now we’ve connected the two services together, let’s create our order notification in Orderable.
Step 3: Create an WhatsApp order Notification
To create your WhatsApp order notification, we first need to create an order status. Then we can create any number of order notifications or WhatsApp messages for those statuses.
To do this, take the following steps:
- From your WordPress dashboard, go to Orderable > Order Statuses, and click Add New.
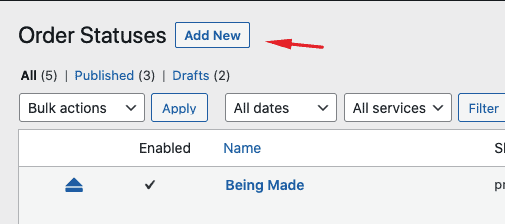
- Give your order status a name and slug. If you want you can customize it with color and an icon too. For a more detailed tutorial on order statuses, view our order status doc.
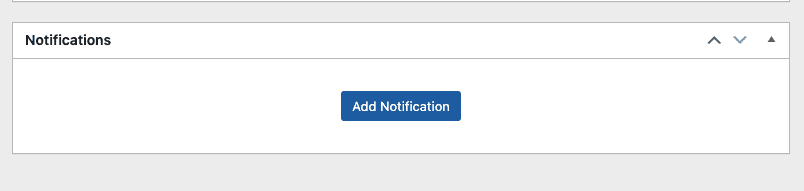
- Next, scroll down the page to find the notifications box and click on the Add Notification button.
- For Type select WhatsApp and select a Recipient. You can choose to send the message to the customer, admin, or to any custom number (for example, if you have a delivery driver).
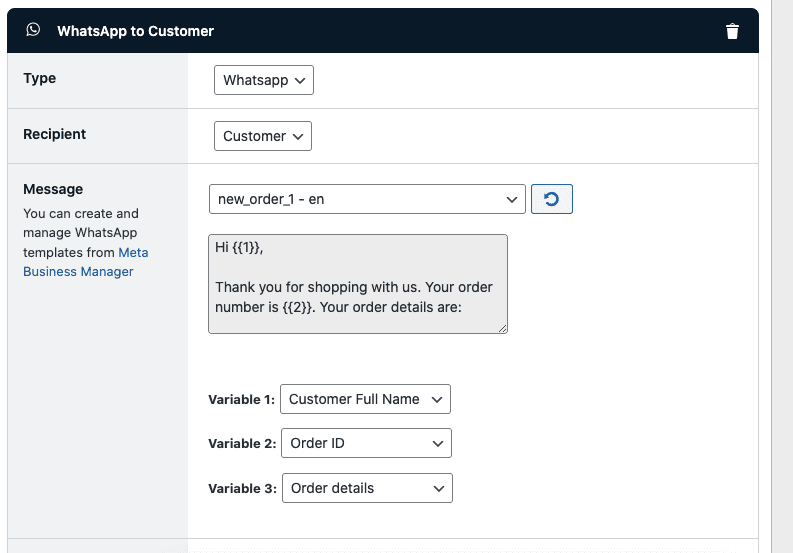
- Select a message template from the dropdown menu. If you want to create a new message template, you can create it from the Meta Business manager.
Note: You would need to click on the Refresh button right beside the template selector dropdown to load new templates.
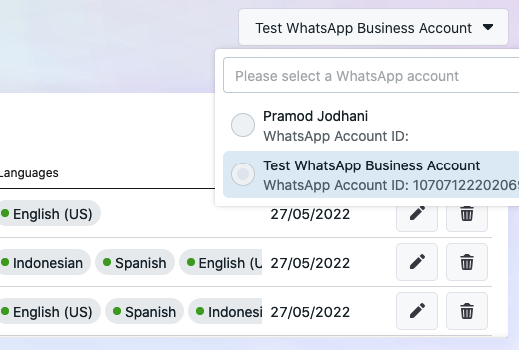
Troubleshooting: Not able to see the created templates?
Double-check if you have created the templates inside the correct business account in Meta business manager. You can view and switch accounts from the control in the top-right corner.
- Select the value for the variables. For example, if you want {{1}} to be replaced with the customer’s name, select Customer Full Name in the Variable 1 dropdown.
- Once you’re happy with your settings, click the Publish button at the top of the page.
Get Your Restaurant Online With Orderable
The WooCommerce plugin designed to help restaurants take orders online – with no added fees!
View Pricing
