How to Add Product Addons to WooCommerce
How to Add Product Addons to WooCommerce


Gina Lucia


In this guide, we’ll walk you through how to add product addons to your WooCommerce store. Plus, we’ll help you do it in a few simple steps using the WordPress online ordering plugin, Orderable.
Product addons can be varied, so in this tutorial, we’ll also explain what they are and why they’re beneficial for your ecommerce store.
First, let’s get the basics right, what are WooCommerce product addons?
Get Your Restaurant Business Online With Orderable
Orderable is a user-friendly WordPress plugin that adds online ordering to your restaurant website.
Add your dishes, create your online ordering menu, customize your delivery schedule, and manage orders with ease.

What are WooCommerce product add-ons?
WooCommerce product addons are additional elements you can add to your products that don’t come with a typical WooCommerce store.
They can include any of the following:
- Additional options or extra product options for customers to add to their order (toppings, sides, accessories, etc).
- Additional fields for the customer to fill in.
- A variety of checkboxes, dropdowns, text fields, file uploads.
- and more.
These product add-on options aren’t the same as the additional options you get with product variations. They’re not variable product dropdowns, swatches, or options. The WooCommerce product options we’re talking about in this guide are additional elements that can be added to your WooCommerce products.
These elements don’t come with the standard WooCommerce install, so we’ll need the help of a plugin to add them.
Include product add-ons with the WordPress plugin, Orderable
Orderable is a WooCommerce product addons plugin that not only allows you to add product addons to your WooCommerce store but creates an entire online ordering system that’s completely customizable.
With Orderable, you’ll be able to offer delivery date and time slots to the customer at the checkout. With an upgraded checkout page, you’ll also be able to include tipping and reduce checkout abandonment at the same time.
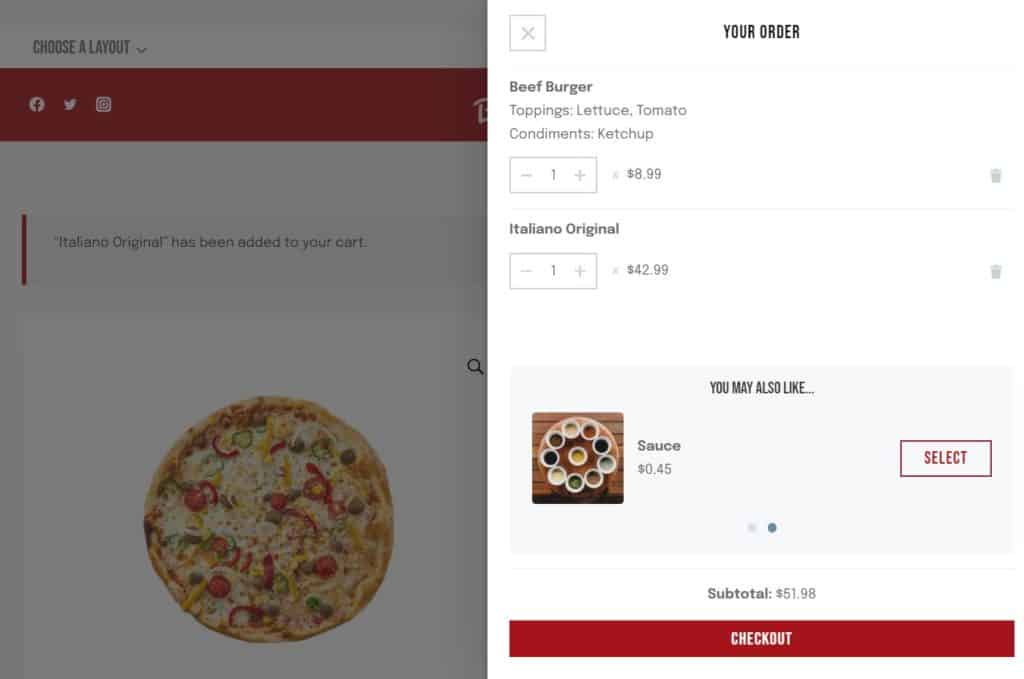
Plus, Orderable allows you to add cross-sell features to your cart page to increase your average order value at the same time.
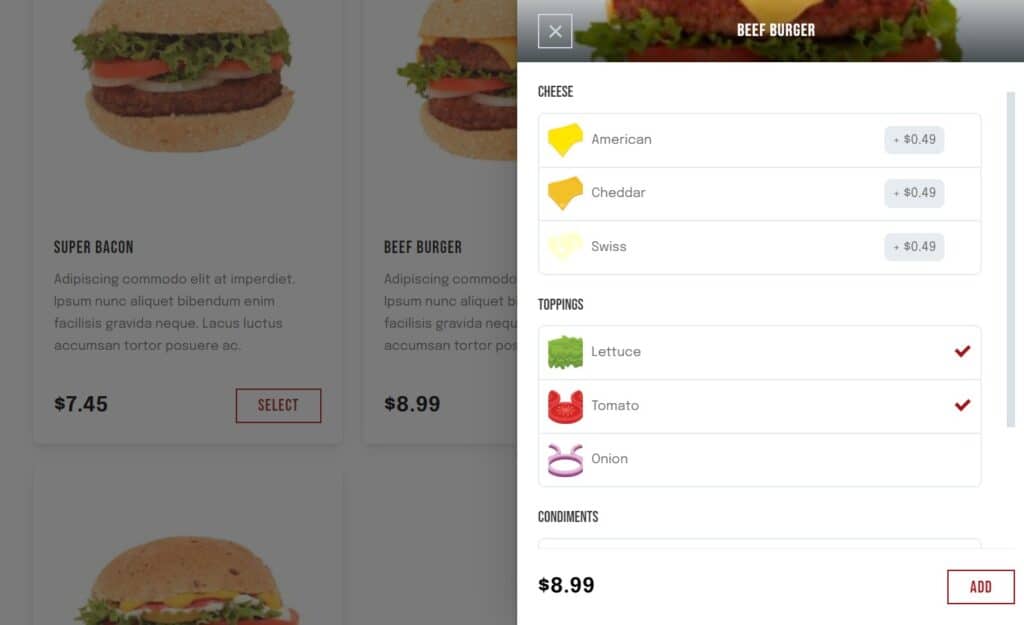
Of course, one of its best features is the product addons. With Orderable you’re able to create any number of product addons that are visible on the frontend of your site. You can customize the pricing options, allow customers to select multiple options with checkboxes/radio buttons, and have all of these displayed on the product page and flyout cart that comes with Orderable.
So now we’ve taken a look at what Orderable has to offer, let’s see why WooCommerce product addons are so beneficial.
The benefits of using WooCommerce product add-ons
WooCommerce product addons have some major benefits for your online store. Here are just a few:
You’ll increase your average order value
If you add product addons to your WooCommerce store for one reason alone – it’s because they increase your average order value.
Offering additional options to your customers that include a small additional fee is a great way to boost sales. Whether it’s extra toppings, sauces, an extended warranty, or complementary accessories, by giving your customer options, you’re increasing the likelihood of an additional sale.
You’ll improve useability
Boosting sales using product addons is a great reason alone, but let’s not forget the useability side of things.
When customers browse your store, they can either find what they’re looking for and customize their order quickly. Or they can spend far too long trying to get what they want, and abandon their cart out of frustration.
By using user-friendly product addons, you can help your customer navigate through your store with ease. All so that they get to the checkout page as quickly and enjoyably as possible.
So now we know what product addons are and why they’re beneficial for your store, let’s get to adding them.
How to add WooCommerce product add-ons to your store
In this section, we’ll walk you through how to add WooCommerce product add-ons to your store with the WordPress plugin, Orderable.
Step 1: Install Orderable
The first thing you’ll need to do is install the Orderable plugin on your website.
For the purposes of this guide, we’ll be using the Pro version of Orderable and well as the free version. This is so we can add product addons, revenue-boosting features, tips, and more.
To get Orderable Pro, you can purchase it from the Orderable website:
Get Your Restaurant Business Online With Orderable
Orderable is a user-friendly WordPress plugin that adds online ordering to your restaurant website.
Add your dishes, create your online ordering menu, customize your delivery schedule, and manage orders with ease.
Once you’ve purchased Orderable Pro, you’ll be sent two plugins. Orderable (free plugin) and Orderable Pro(premium version).
To add Orderable to your WordPress website, take the following steps:
- From your WordPress dashboard, go to Plugins > Add new.
- Click on the Upload Plugin button at the top of the page.
- Then upload the .zip file you were sent containing Orderable. Click Install Now. Then click Activate Plugin.
- Repeat the steps for Orderable Pro.
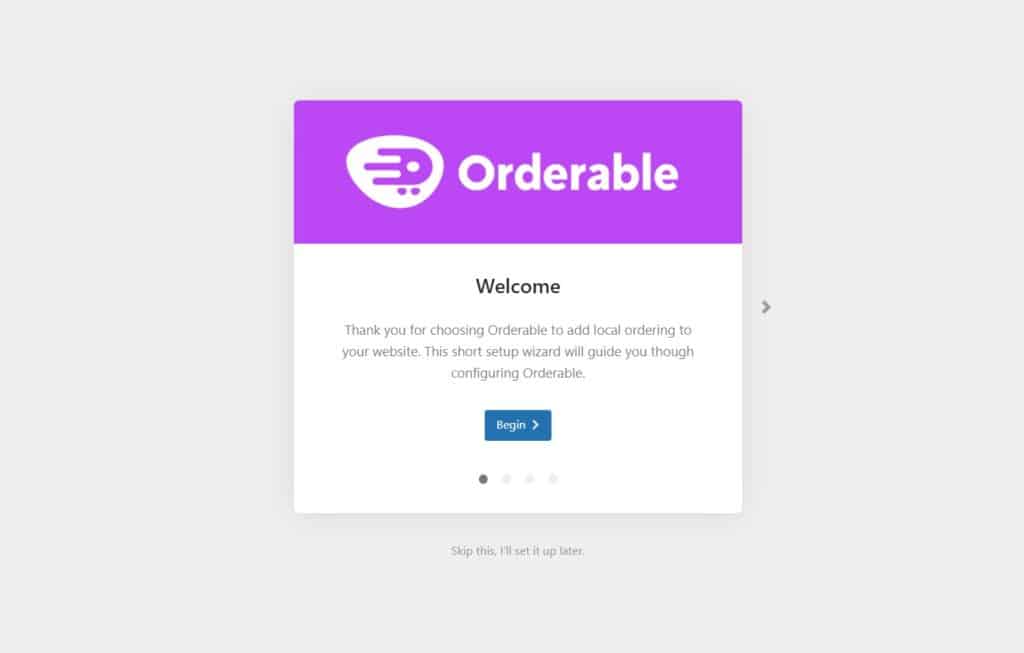
Once done, you’ll be shown a setup wizard – this will walk you through the basic steps to get Orderable up and running. Including your store’s opening hours, if you’re accepting pickup or delivery, and more.
Now we have Orderable installed on your site, let’s get to creating your product addons.
Step 2: Create your WooCommerce product addons
For the purposes of this guide, we’re presuming you’ve already added your store’s products. If not, you can follow our online ordering system guide.
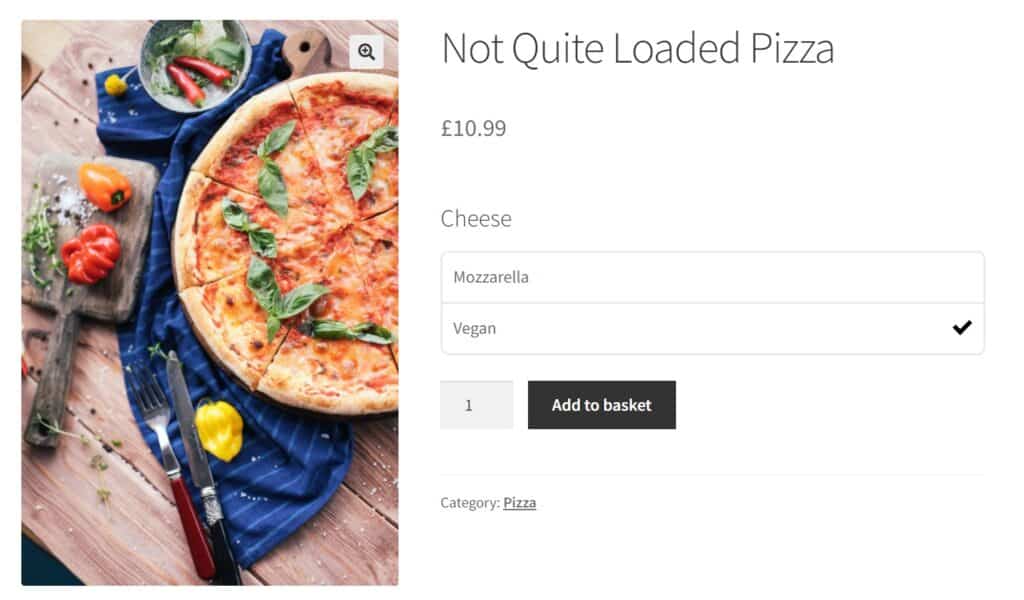
In the next few steps, we’re going to create a hypothetical pizza restaurant. Our pizzas need to offer additional cheese types among other things, so let’s get to adding them.
Note: This feature isn’t exclusive to restaurants. You can use the product addons feature in Orderable to allow customers to customize their order, include accessories, added items, and more.
To set up your product options/addons, take the following steps:
- From your WordPress dashboard, go to Orderable > Product Addons.
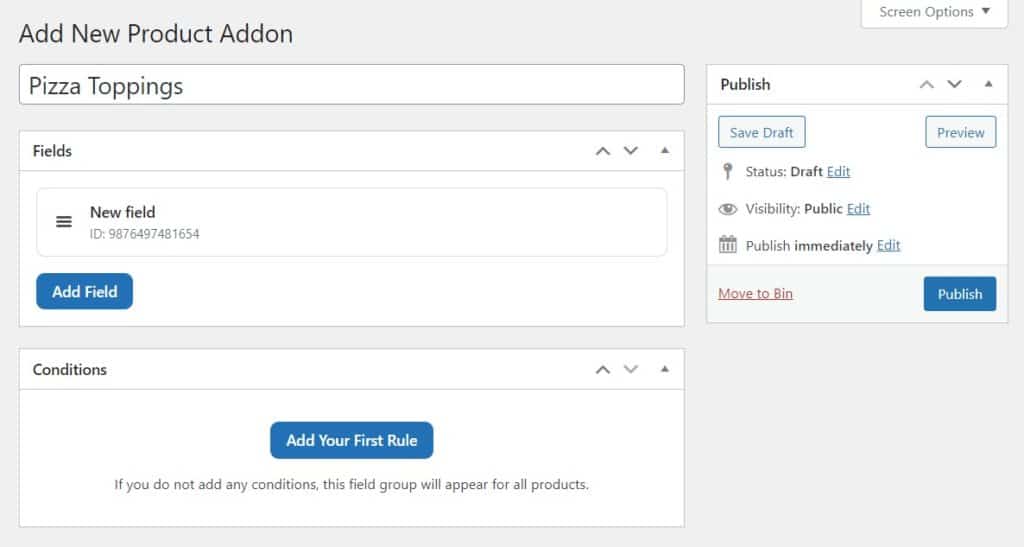
- Next, click the Add New button at the top of the page.
- We’re going to give this set of product options/addons a name in the Add title field (in this case, Pizza toppings).

- Then click the blue Add Your First Field button. Your New Field will now appear.
- Click New Field and it will show you all the options you can customize in this new custom field.
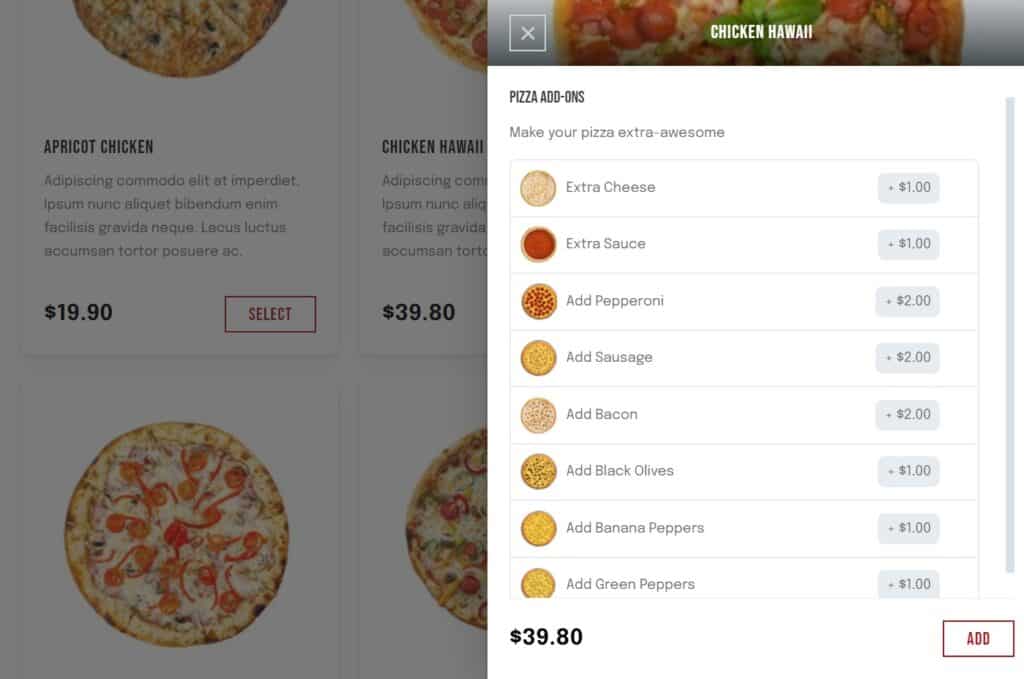
- In Type, choose which type of field you want. For example, if you want customers to be able to only select one option, choose a dropdown or radio button. If you want them to be able to select multiple options, choose the checkbox option.
- Give the set of addons a name in the Title/Label text input section (eg ‘Cheese’).
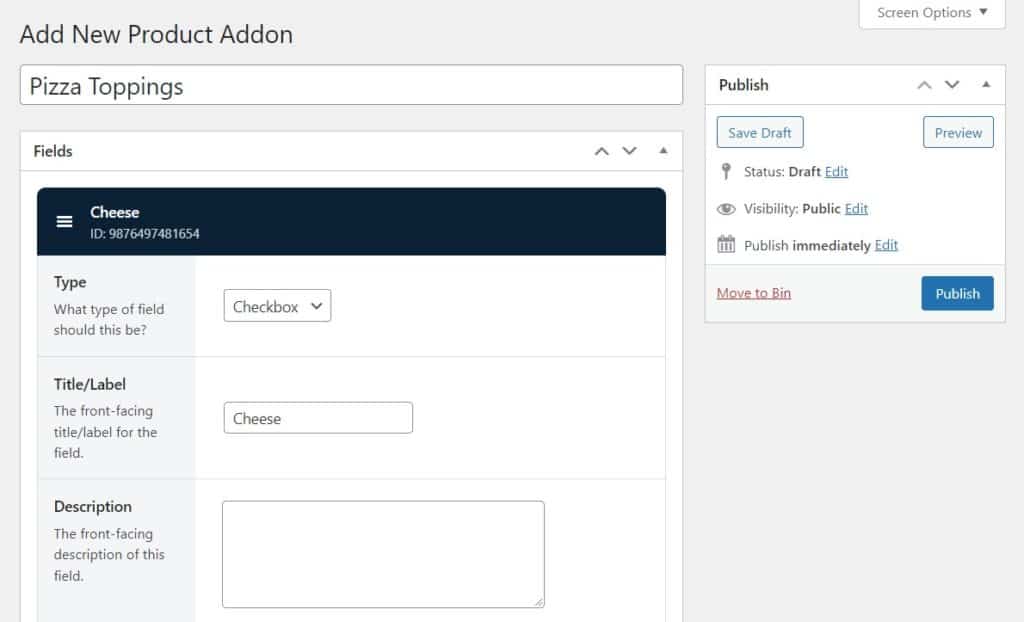
- Add a Description below this if needed, and choose whether this custom product field is Required to be selected by your customers.
- Add your options by clicking the blue Add Option button (eg ‘Swiss, Cheddar, Vegan’). You can give these a custom price and depending on the field types you’ve chosen (step 6), you can change a few additional settings:
- Include an add-on product image.
- Include a color swatch by using the built-in color picker/selector.
- Allow the customer include additional information or comments in a text area/s (input fields).
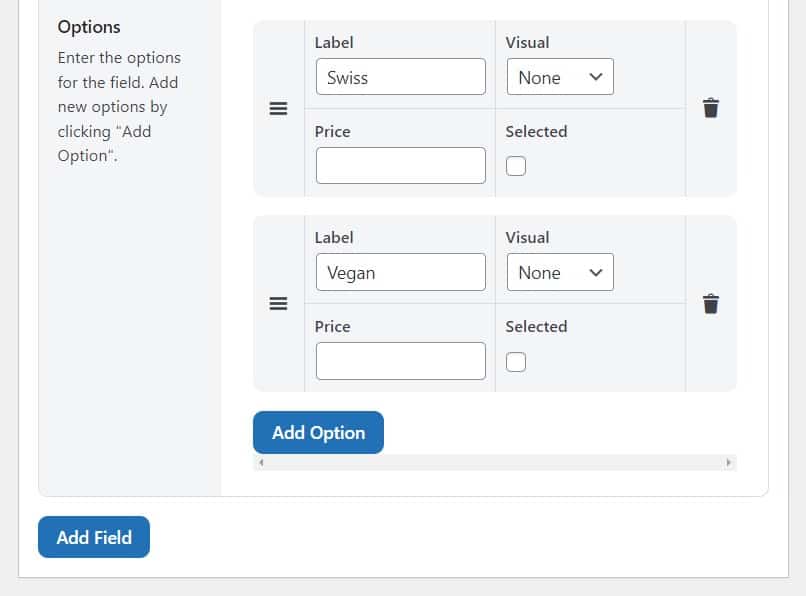
- You can change the order of your custom product options by using the drag and drop feature on this page.
- Once you’ve added your custom product price and options, next, scroll down to the Conditions section and click the blue Add Your First Rule button.
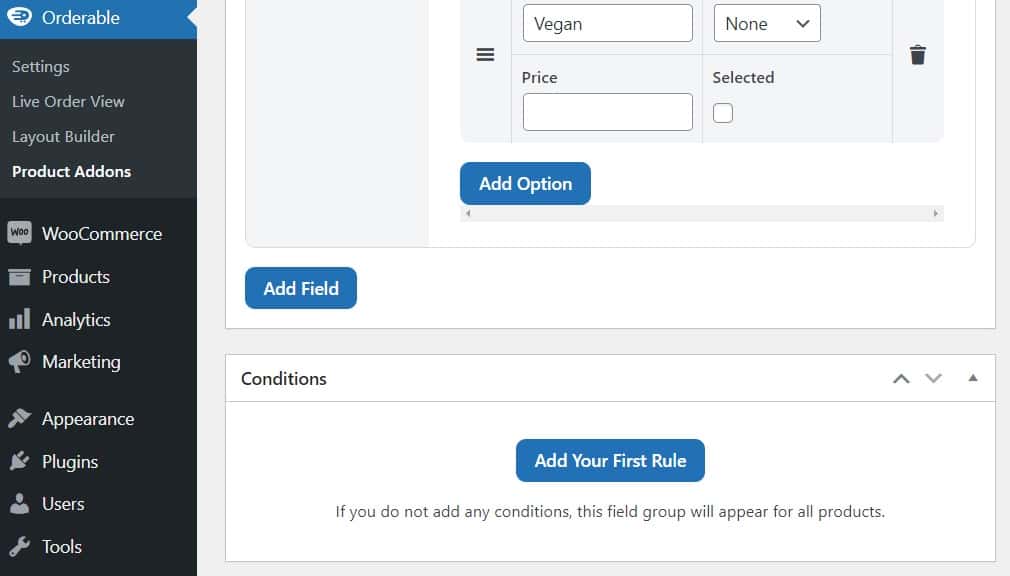
- Add your conditions here (conditional logic) – this will determine if these product addons show on the single product page or in the flyout cart or not. (eg ‘Product Category > is equal to > Pizza’).
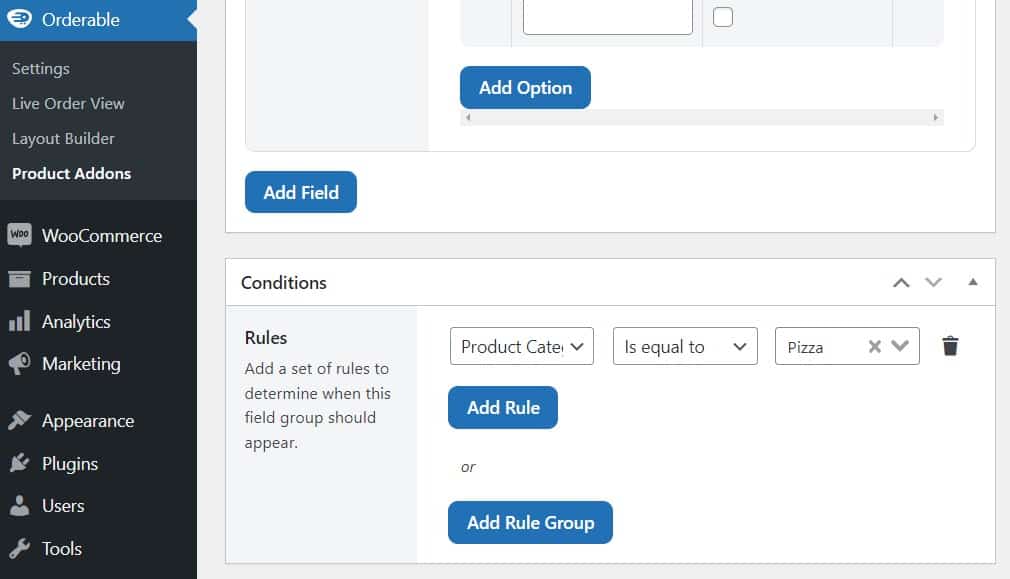
- Once you’re happy with all your product addons/options, scroll up to the top of the page and click the blue Publish button.
That’s it! You’ve included product addons in your WooCommerce store. You can add as many of these product add-ons as you like. Customizing them to match your store and your needs.
Showcase product addons in WooCommerce today
In this guide, we’ve walked you through how to add WooCommerce product addons to your store with the help of the online ordering plugin, Orderable.
Customizing your product pages and giving customers additional options shouldn’t be a hard task. Make it a quick and easy one with Orderable.
Get Your Restaurant Business Online With Orderable
Orderable is a user-friendly WordPress plugin that adds online ordering to your restaurant website.
Add your dishes, create your online ordering menu, customize your delivery schedule, and manage orders with ease.
Gina Lucia is our in-house Content Manager at Orderable. She writes articles, user guides, technical documentation, and creates videos on everything WooCommerce and Orderable.
Gina has been working in the WordPress/WooCommerce space since 2012 when she developed WordPress websites for clients large and small.
For the past 8 years, she’s been writing about everything WordPress and WooCommerce, becoming an expert in what makes a WooCommerce store succeed.
When not writing, Gina loves to tend to her vegetable garden, read, or travel to mainland Europe.
Don’t miss out on the latest Orderable news!
Sign up for our newsletter to receive the latest news from the blog, you’ll get pinged every week with a digest of the latest updates.
[fluentform id=”6″]

Related Articles

Restaurant Food Photography Tips for More Sales

7 Quick-Service Restaurant Best Practices for 2026

How to Build Hype for Your New Menu Launch (In-House & Online)
Get Your Restaurant Online With Orderable
The WooCommerce plugin designed to help restaurants take orders online – with no added fees!
View Pricing
