Contactless Ordering: How to Add it to Your Restaurant (in 2026)
Contactless Ordering: How to Add it to Your Restaurant (in 2026)

Gina Lucia


If you’re looking to add contactless ordering to your website in 2026, then this guide is for you.
In this guide, we’ll walk you through the following:
- What contactless ordering is.
- The benefits of contactless orderings.
- How to add contactless ordering to your restaurant website.
- How to promote contactless ordering so your customers start using it.
Adding contactless ordering to your restaurant business shouldn’t be difficult. There are plenty of tools out there that will help you do it. In this guide, we’ll be focusing on one – Orderable.
Get Your Restaurant Business Online With Orderable
Orderable is a user-friendly WordPress plugin that adds online ordering to your restaurant website.
Add your dishes, create your online ordering menu, customize your delivery schedule, and manage orders with ease.

But before we get into the ‘how,’ let’s address the what and why.
What is contactless ordering?
Contactless ordering, in its basic form, is where customers place an order without the need for direct human interaction or contact.
This food ordering experience usually involves a customer using some kind of digital platform (a website, an app, their smartphone, etc.) to browse a digital menu. They can then select their food items from the online menu and place an order.
Once the customer has placed the order, it will then be prepared and delivered to their table, outside for curbside pickup/takeout, or delivered to their home.
Contactless ordering has been around for years but has become a more popular and well-used option due to the pandemic.
So now we know what contactless ordering is, let’s take a look at the benefits.
Why add contactless ordering to your restaurant?
As a restaurant owner, you’re probably researching the benefits of implementing contactless ordering. After all, it requires setup, buy-in from your staff, and it needs to have a return on investment.
In that case, here are some reasons why contactless ordering will benefit not only you but restaurant staff too.
Improved customer convenience
Contactless ordering allows customers to place orders from the comfort of their homes or offices, without waiting in long queues or engaging in face-to-face interactions.
Because of this, customers are more likely to order more frequently, resulting in more sales and potentially larger orders.
Improved order accuracy
With contactless ordering, customers can review their orders before submitting them, reducing the chances of miscommunication and incorrect orders.
Because your online ordering system is digital, there’s also less room for error not only from wait staff (who will be delivering the order to tables if customers dine-in), but from kitchen staff too. This is because, with an online ordering system, you can set up a kitchen display system that will directly alert the kitchen staff of the next order. No lost paper, no mistakes.
Increased sales
Offering contactless ordering can increase sales, as it provides an additional channel for customers to place orders and may attract new customers who prefer this method.
It will also give you, the restaurant owner, the option to include upsells to the customer. You’ll be able to encourage customers to buy sides, drinks, dips, dish customization, and more, all through your contactless ordering solution.
Better customer data
By using a contactless ordering system, you can collect valuable customer data, such as preferences and order history, which can help improve your marketing efforts and enhance the overall customer experience.
You simply don’t have this with the dine-in customer experience alone.
Easier menu updates
With a digital contactless ordering system, updating your menu becomes simpler and more efficient. You can quickly add or remove items, adjust prices, and update descriptions without needing to reprint physical menus.
So now we know just some of the benefits of contactless ordering, let’s get it added to your website.
How to add contactless ordering to your restaurant
Adding contactless ordering to your restaurant website should be a straightforward and fuss-free experience. In this guide, we’ll walk you through it.
Note: This guide presumes you already have a restaurant website set up and running. If you don’t, we’ve created a restaurant website guide that will walk you through all the steps you need to set one up.
Step 1: Pick your contactless ordering system
The first thing we’ll need to do is pick the contactless ordering system we want to use. This system needs to be able to display your products (food and drink menu), allow customers to select items from the menu, and place orders either for table ordering, delivery, or pickup.
To achieve all of this and more, we recommend the WordPress plugin Orderable.
With Orderable, you can add an online ordering system directly to your restaurant website. This system will allow customers to order food directly from your website and will give you all the tools you need to fulfill those orders.
How Orderable works for customers
Let’s say a customer is in your restaurant and wants to order some food. With Orderable, you now have contactless dining in place. Here’s how the experience works:
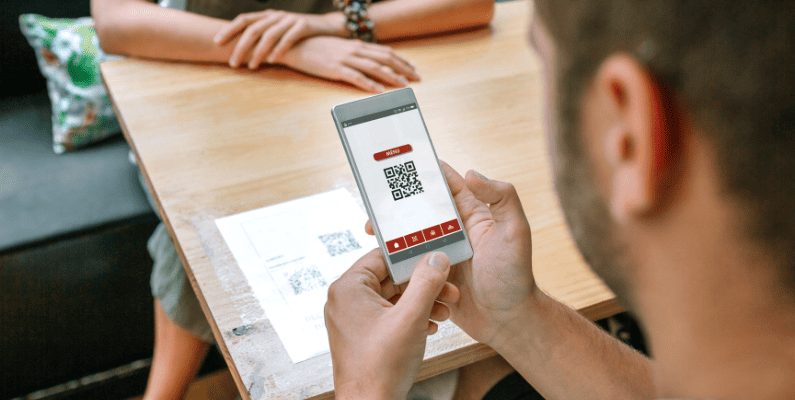
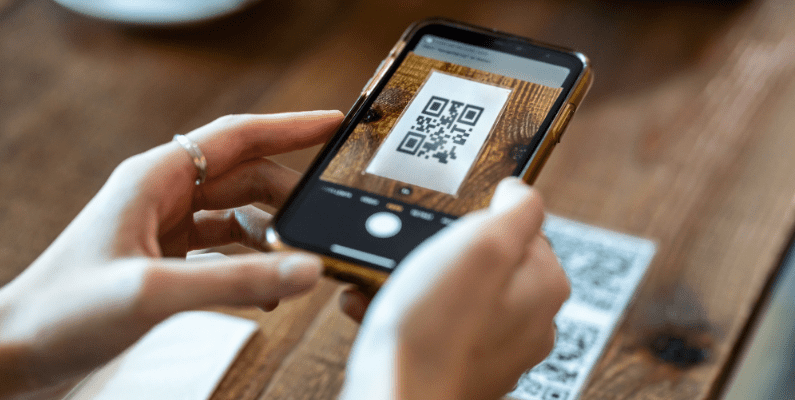
- A customer arrives at your restaurant and is either given a seat or finds their own.
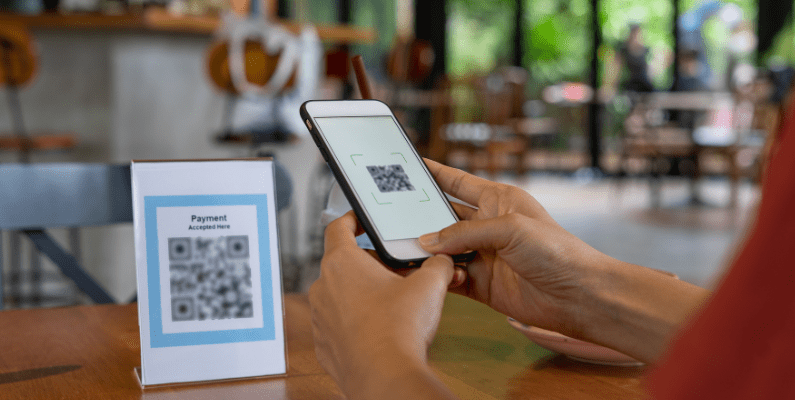
- On their table is a QR code. They scan it with their mobile device, and it opens up your website, which contains your online menu.
- They browse this menu, add menu items to their cart, pay, and place their mobile order.
- A notification is then sent to the kitchen, and they put the meal together.

- Once complete, the meal is delivered to the customer’s table.
If a customer is ordering for delivery or pickup, the ordering process is slightly different. There’s no QR code needed. They just visit your online menu, place their order and either pick it up, or have it delivered.
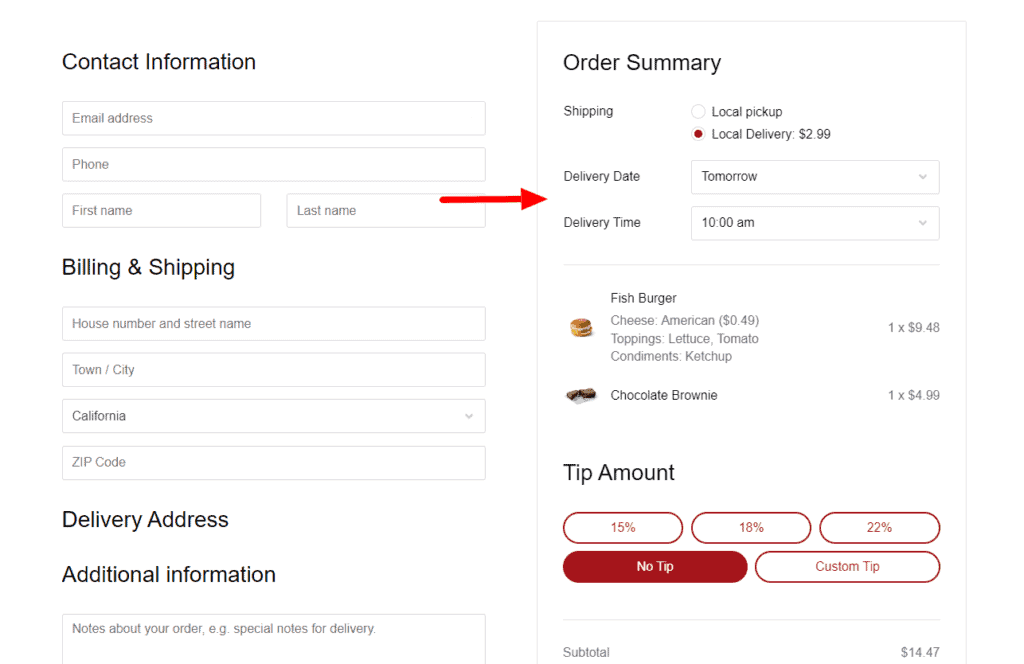
When selecting delivery or pickup, customers can either pick a time and date for this order (or ASAP should you allow it).
How Orderable works for restaurant staff
This streamlined ordering process is made possible by how you set up and customize Orderable to suit your online store.
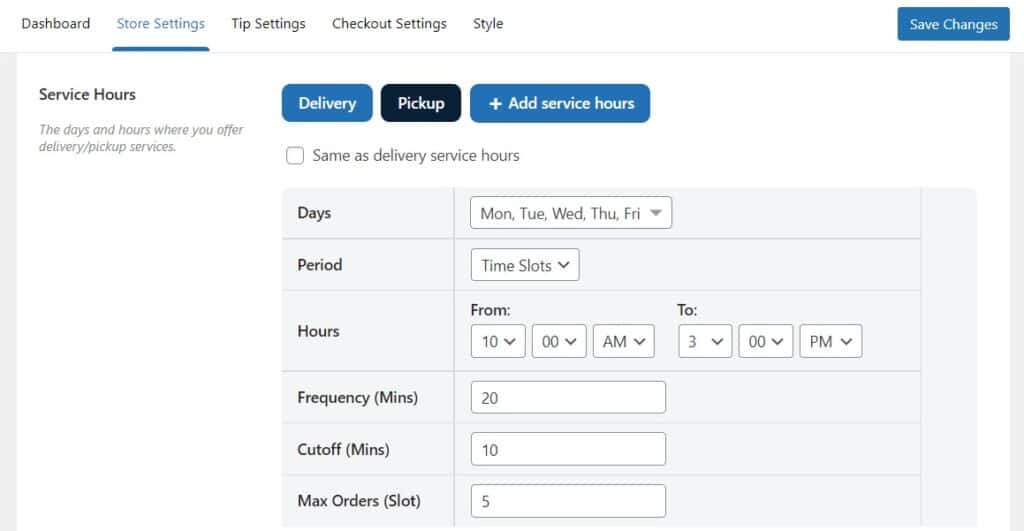
With Orderable, you’ll be able to create your own delivery/pickup schedule, add QR code ordering, set up order notifications, decide which payment options you’ll accept, create your online menu, and so much more.
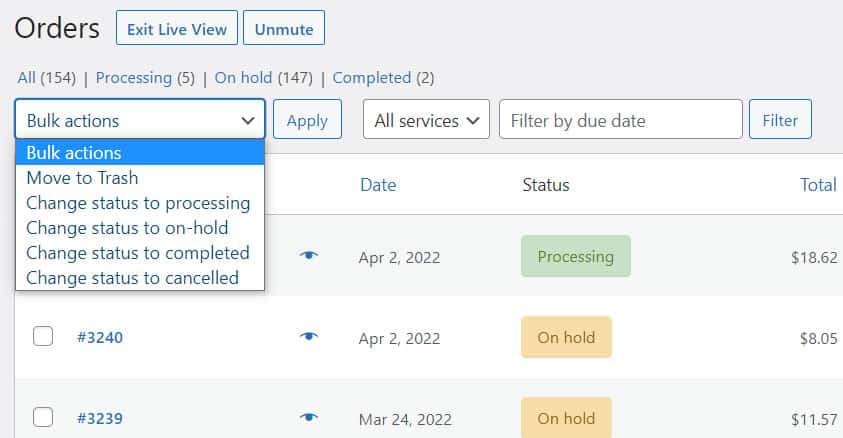
You’ll also get an orders dashboard, so all restaurant staff can see orders as they come in. Including if they’re in-house orders, delivery, or pickup. Using Orderable, you’ll be able to streamline your entire ordering process and add contactless ordering at the same time.
So let’s say you’ve purchased Orderable and installed it on your WordPress website. Next, let’s customize some settings.
Get Your Restaurant Business Online With Orderable
Orderable is a user-friendly WordPress plugin that adds online ordering to your restaurant website.
Add your dishes, create your online ordering menu, customize your delivery schedule, and manage orders with ease.
Step 2: Set up online ordering for your restaurant website
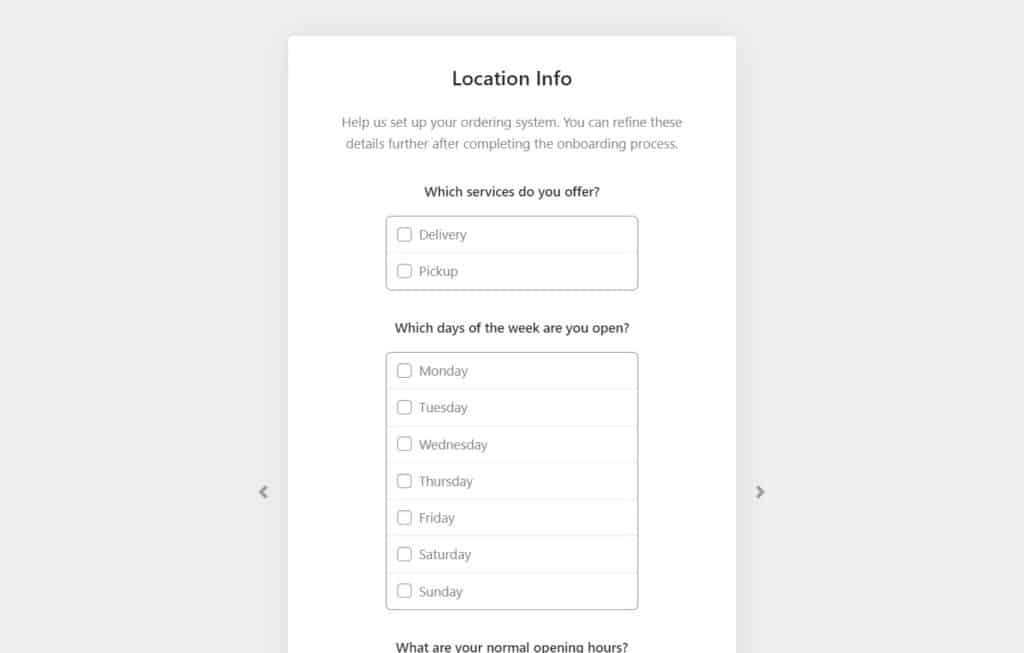
When you first install Orderable, you’ll be introduced to a startup wizard which will walk you through all the basic steps you need to add online ordering to your website.
It will ask you about the services you provide, your opening hours, and more. Once you’ve filled this out (which should take just a few minutes), you’ll be able to close the setup and customize some additional settings in WooCommerce.
Use this time to set up your contactless payment methods. This will be how customers pay for their orders. WooCommerce, by default, comes with some basic payment options like credit card, pay on delivery, and more.
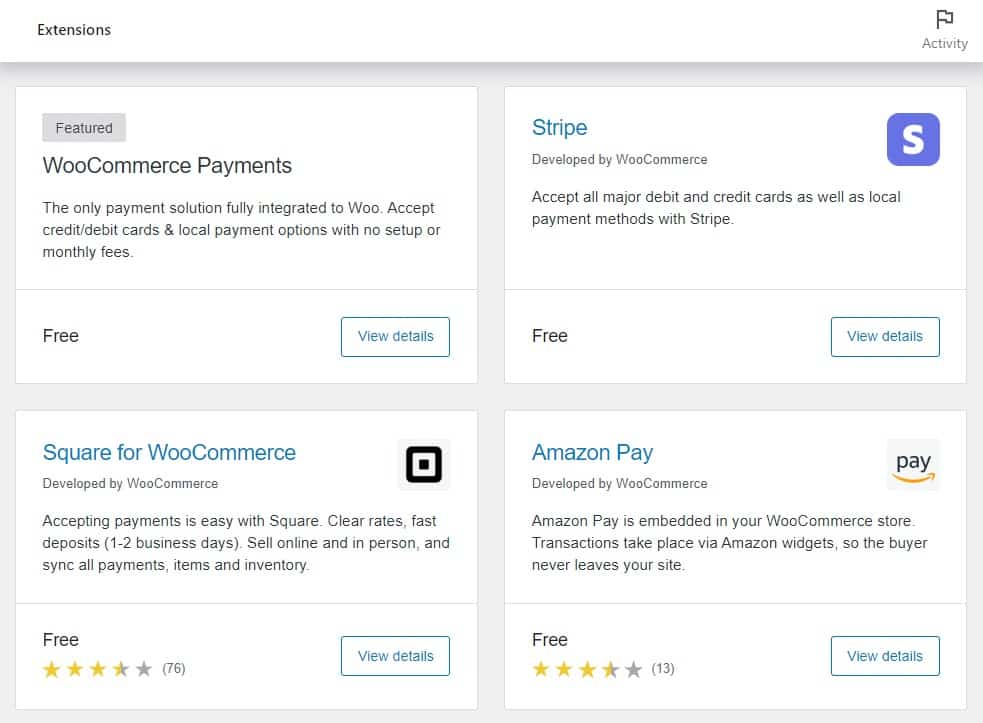
If you want to include additional payment methods (like PayPal, Apple Pay, etc), you can do so with WooCommerce’s many payment extensions.
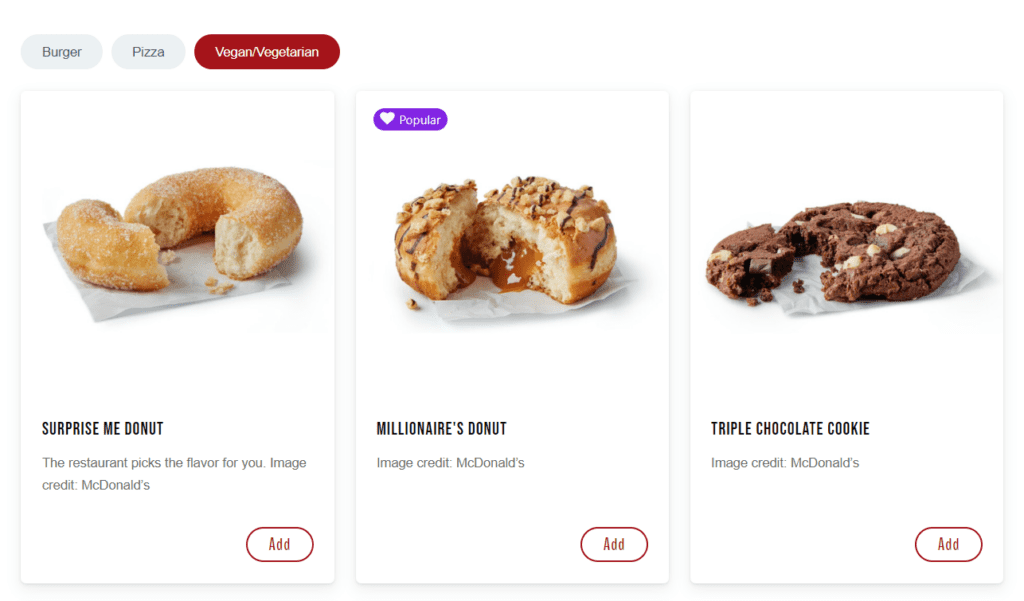
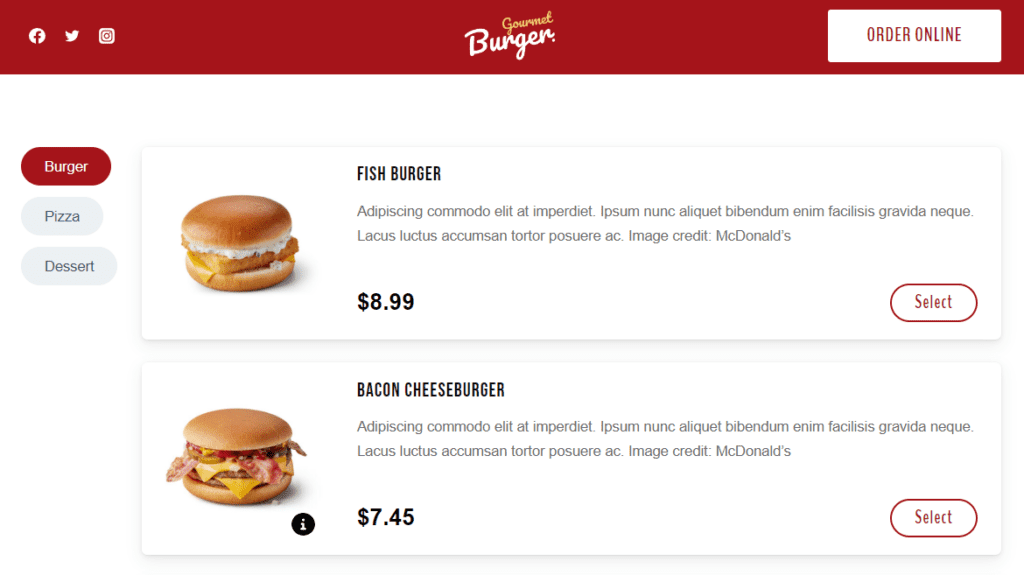
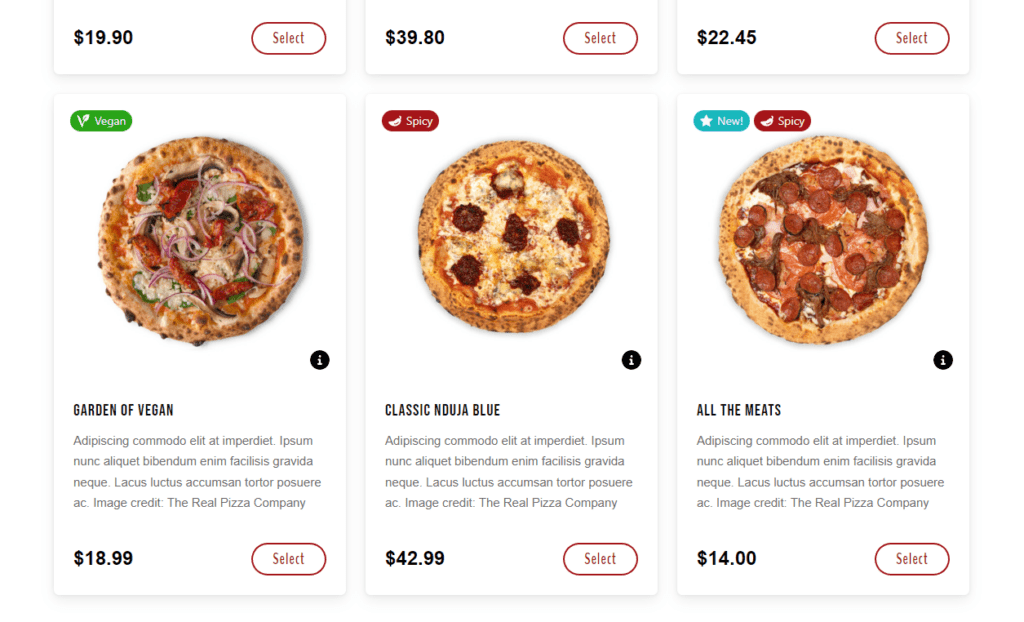
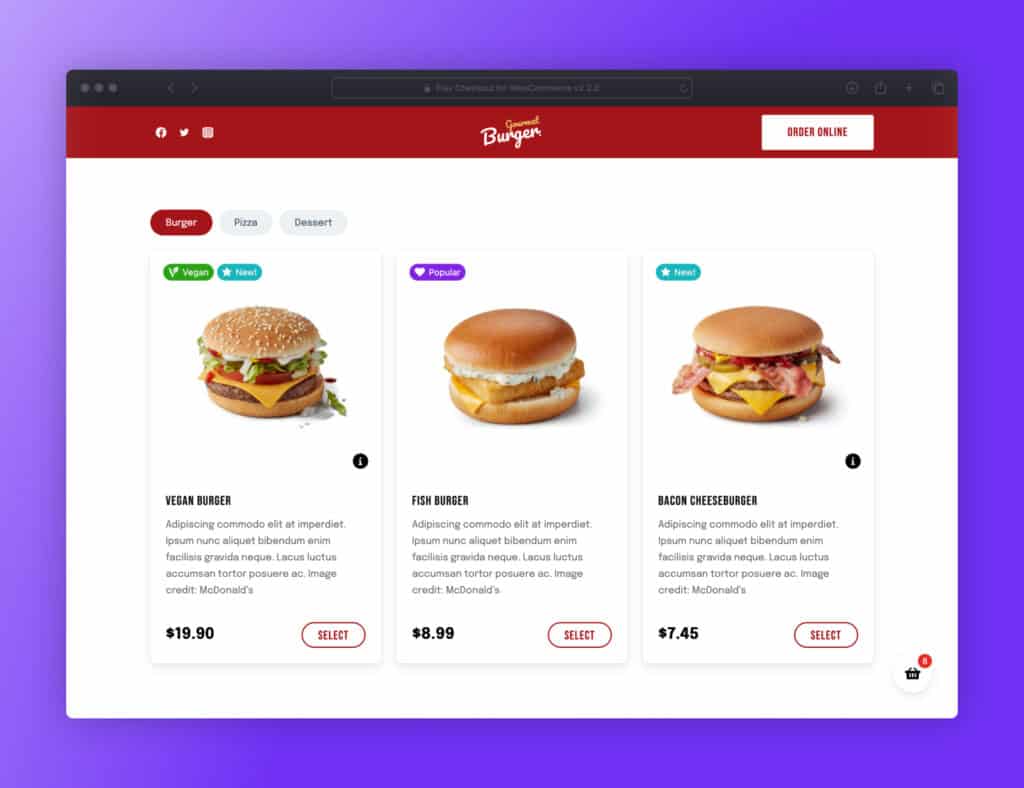
Step 3: Create your contactless menu
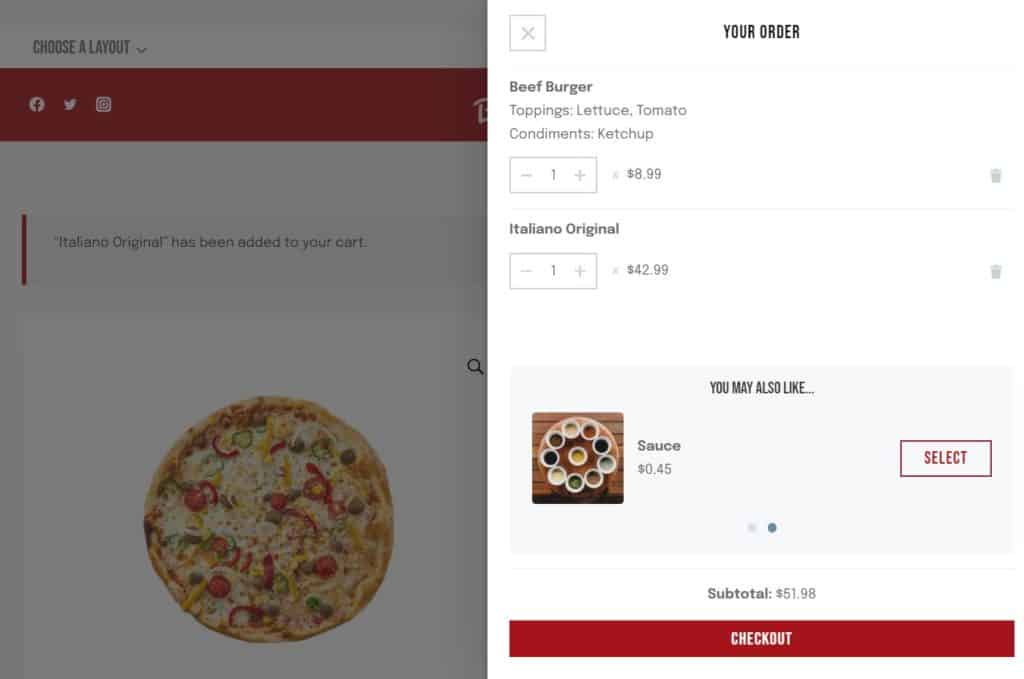
Next, we’ll create your online menu. This menu will host all your dishes, drinks, and more. It will allow you to display dishes in categories, add dietary labels, nutritional information, descriptions, photographs, and more.
Add your menu items
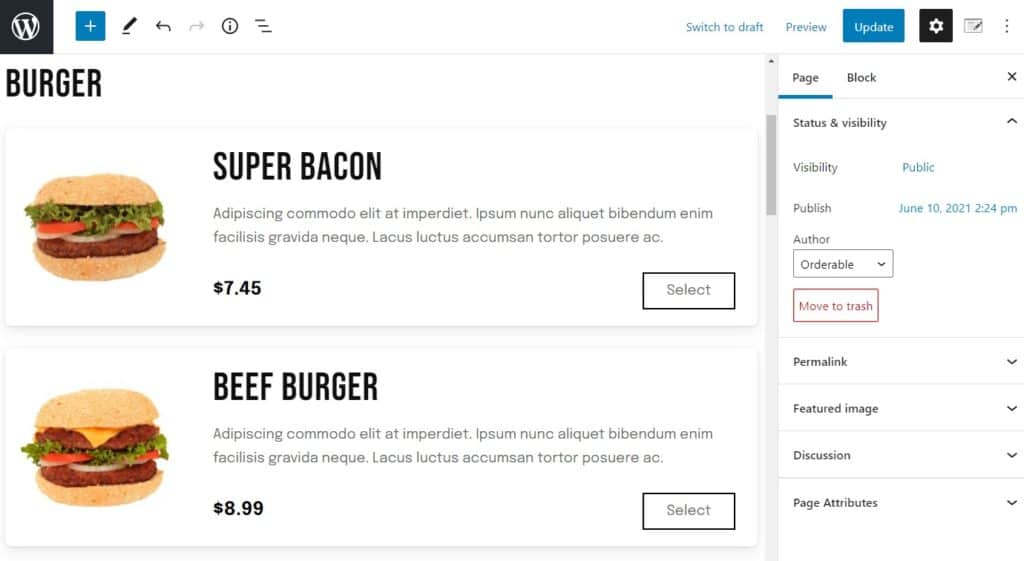
The first thing we’ll need to do is create the menu items themselves. To do this, take the following steps:
- From your WordPress admin area, go to Products > Add New.
- On this page, you’ll be able to give your dish a title, a description, create and assign categories to it, add images, and more.
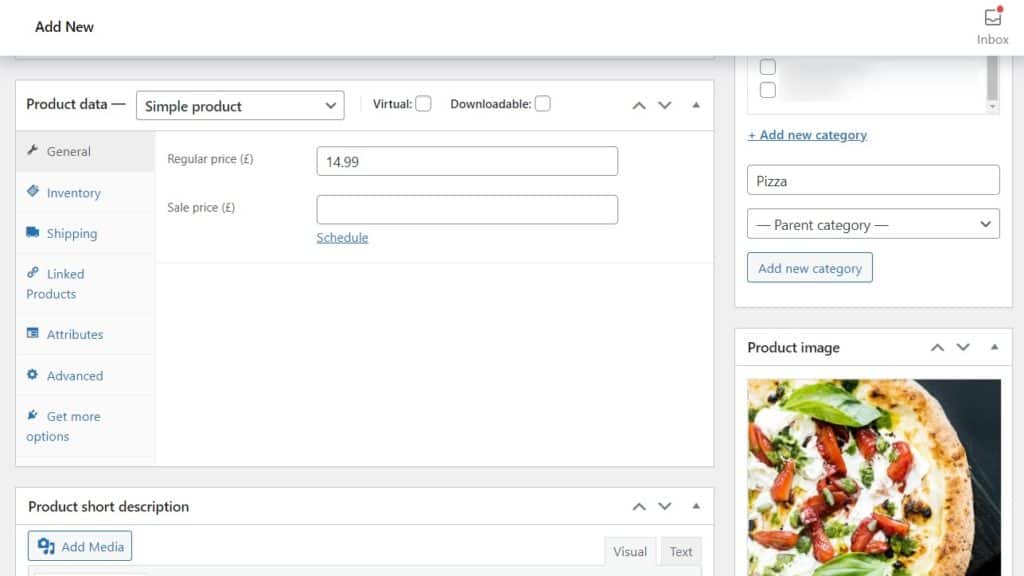
- Take your time getting used to this page. WordPress has a slight learning curve, but once you’ve used it a few times, it becomes second nature.
- Scroll to the top of the page and click the Publish button when you’re happy with your dish.
- Repeat this process for all the dishes on your menu.
Create your menu layout
Now we’ve created our dishes. Next, we’ll create our menu layout. To do this, take the following steps:
- Go to Orderable > Layout builder > Add New.
- Add a title and select the display type (Grid/List), and select if you want to show images and if you want the whole menu to be clickable.
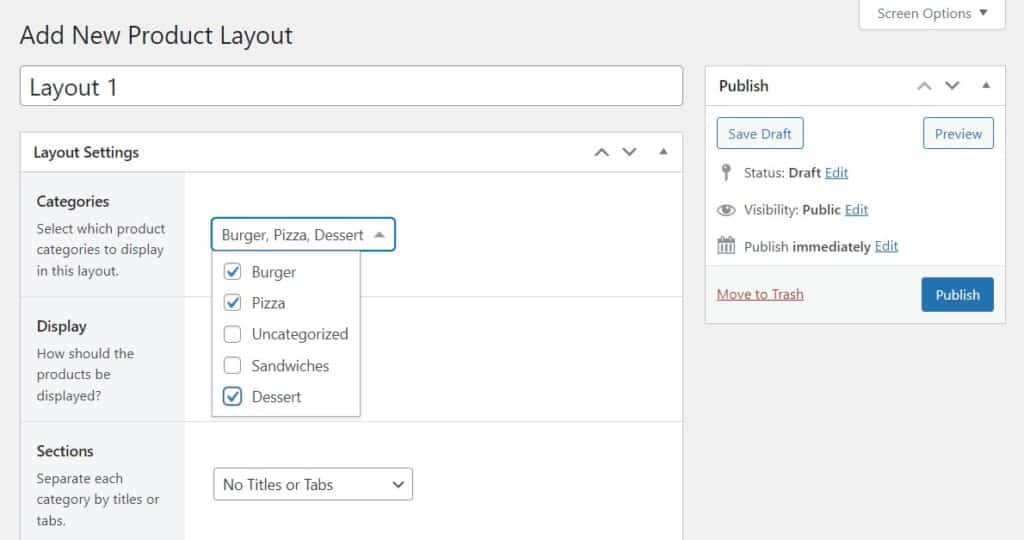
- On this page, you’ll also be able to decide if you want dietary labels to show and which categories you want to be displayed and where.
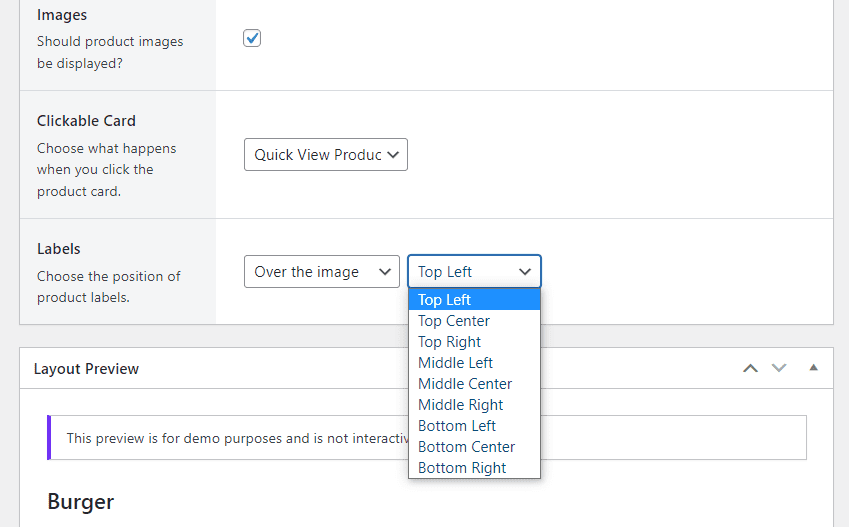
- You’ll be able to see a preview of all your design changes at the bottom of this page.
- When you’re done, click Publish.
Add your menu to a page
We’ve created our menu layout. Next, we’ll need to add this to a page in WordPress and display it on your site so customers can order.
To do this, take the following steps:
- Create a new page by going to Pages > Add New from your WordPress dashboard.
- Name this page ‘Menu’ and click the plus(+) sign to add a new block.

- Search for the Orderable: Product Layout block and select it when it appears. This will cause a generic product menu to appear on the page.
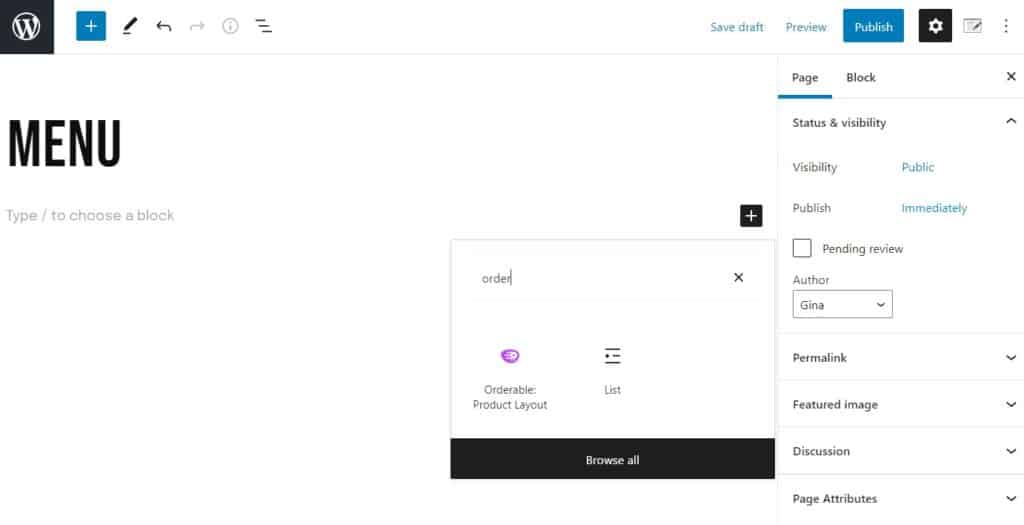
- Click on the generic product menu, then select the menu you’ve just created from the Blocks tab on your right.
- Click Publish when you’re done.
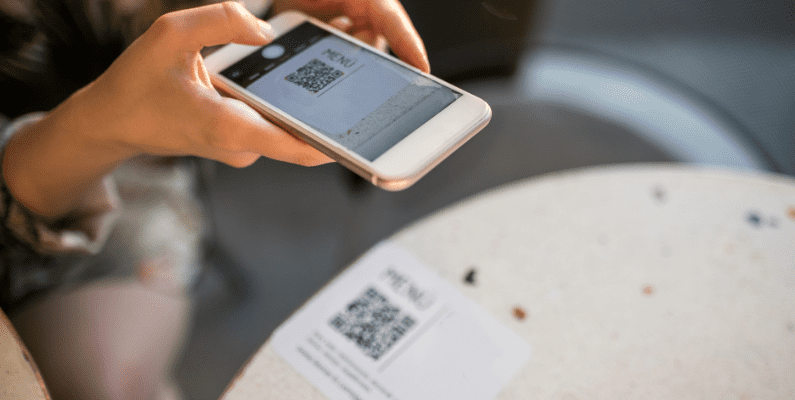
Step 4: Add QR code ordering
This step is optional. If you’d like customers to be able to order in-house with a contactless guest experience, here’s how to add QR code ordering using Orderable.
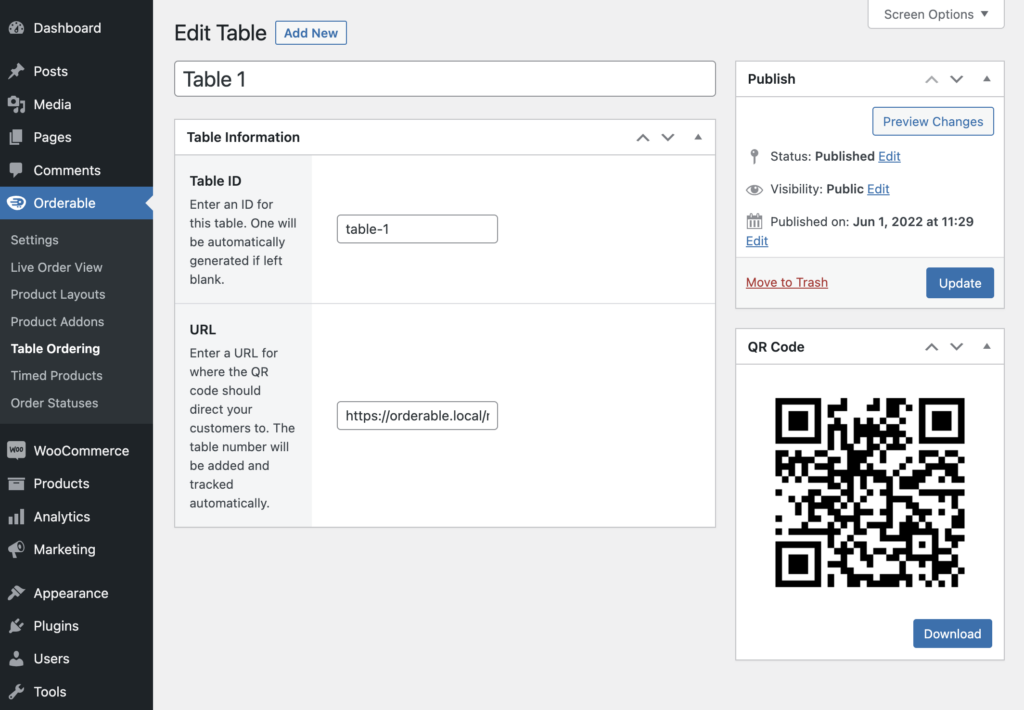
- From your WordPress dashboard, go to Orderable > Table Ordering.
- Click Add New at the top of the page to add a new QR code.
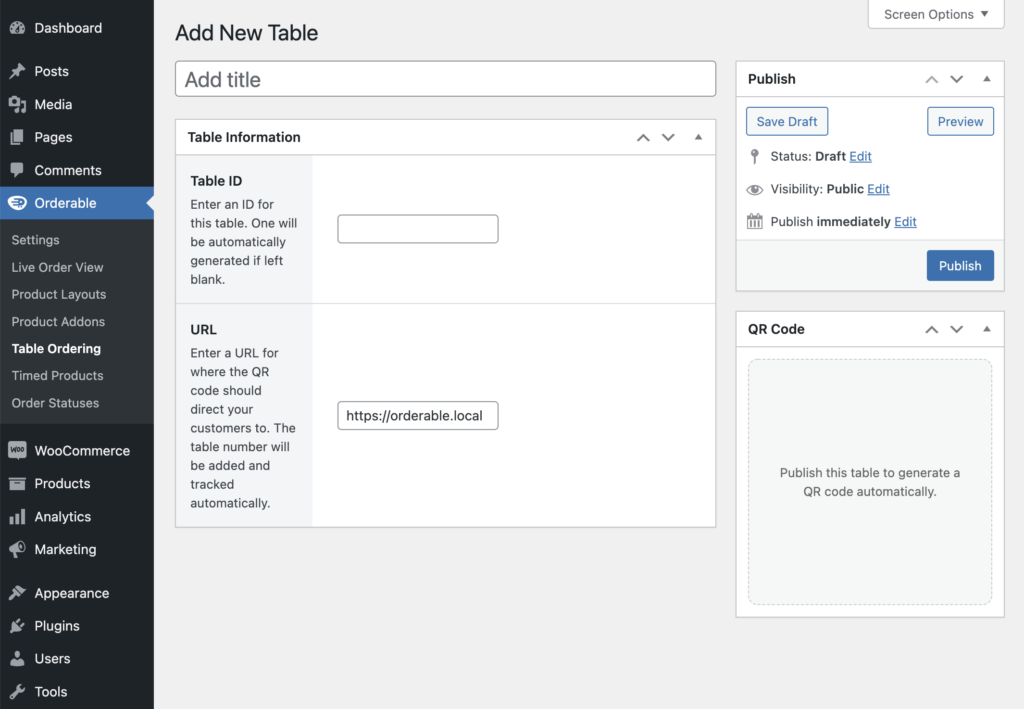
- Give your table a title – usually the table number and add a Table ID.
- Then, include a URL customers will be sent to once they scan the QR code. This will be the URL of the menu page you just created.
- Click Publish to see your QR code in the QR Code section. Click the Download button to save it to your computer.
All you’ll need to do next is print your QR codes and stick them to the appropriate tables in your restaurant.
Then, when customers place an order after scanning it, their order will be automatically assigned to the correct table number.
Tips for promoting and getting customers used to contactless ordering
So let’s say you’ve followed the steps in this guide and have contactless ordering set up and running. Now what?
The next step is to promote it to customers and get staff used to using it. Here are some tips to help with that.
- Update your website: As well as adding contactless ordering to your website, it’s also worth making it more obvious by adding banners, text, and prompts to encourage customers to use it.
- Provide clear instructions: It’s important to offer step-by-step instructions, both online and in-store, for using the contactless ordering system. We want your ordering process and wait times to be as smooth as possible. So make this step a priority.
- Staff training and encouragement: For the best dining experience possible, staff should be trained and encouraged to be onboard with contactless ordering. Explain to them the benefits of using the system, and don’t leave them in the dark. At the same time, staff will need to be trained to explain and promote the system to customers, so everyone can be on board.
- Offer special deals and promotions: Encourage customers to try contactless ordering by providing exclusive discounts, offers, or freebies for first-time users or for placing orders through your contactless platform.
- Leverage social media: Use your restaurant’s social media accounts to inform customers about your contactless ordering options. Share visuals, such as videos or images, demonstrating how easy and convenient the process is.
Set up contactless ordering for your restaurant website today
Contactless ordering isn’t just something that came and went due to the pandemic. It’s a valuable tool the restaurant industry can use to encourage more sales, improve customer loyalty, reduce overheads, and improve customer experience.
Setting it up should also be straightforward and easy. With Orderable in hand, you’ll not only be able to add contactless ordering to your website in a few steps, but you’ll also have a whole host of tools at your disposal to make your restaurant a success.
Get Your Restaurant Business Online With Orderable
Orderable is a user-friendly WordPress plugin that adds online ordering to your restaurant website.
Add your dishes, create your online ordering menu, customize your delivery schedule, and manage orders with ease.
Gina Lucia is our in-house Content Manager at Orderable. She writes articles, user guides, technical documentation, and creates videos on everything WooCommerce and Orderable.
Gina has been working in the WordPress/WooCommerce space since 2012 when she developed WordPress websites for clients large and small.
For the past 8 years, she’s been writing about everything WordPress and WooCommerce, becoming an expert in what makes a WooCommerce store succeed.
When not writing, Gina loves to tend to her vegetable garden, read, or travel to mainland Europe.
Don’t miss out on the latest Orderable news!
Sign up for our newsletter to receive the latest news from the blog, you’ll get pinged every week with a digest of the latest updates.
[fluentform id=”6″]

Related Articles
How to Create a WooCommerce Custom Order Status
15 Creative Food Business Ideas to Start in 2026
How to Create an Online Pizza Ordering System
Get Your Restaurant Online With Orderable
The WooCommerce plugin designed to help restaurants take orders online – with no added fees!
View Pricing
