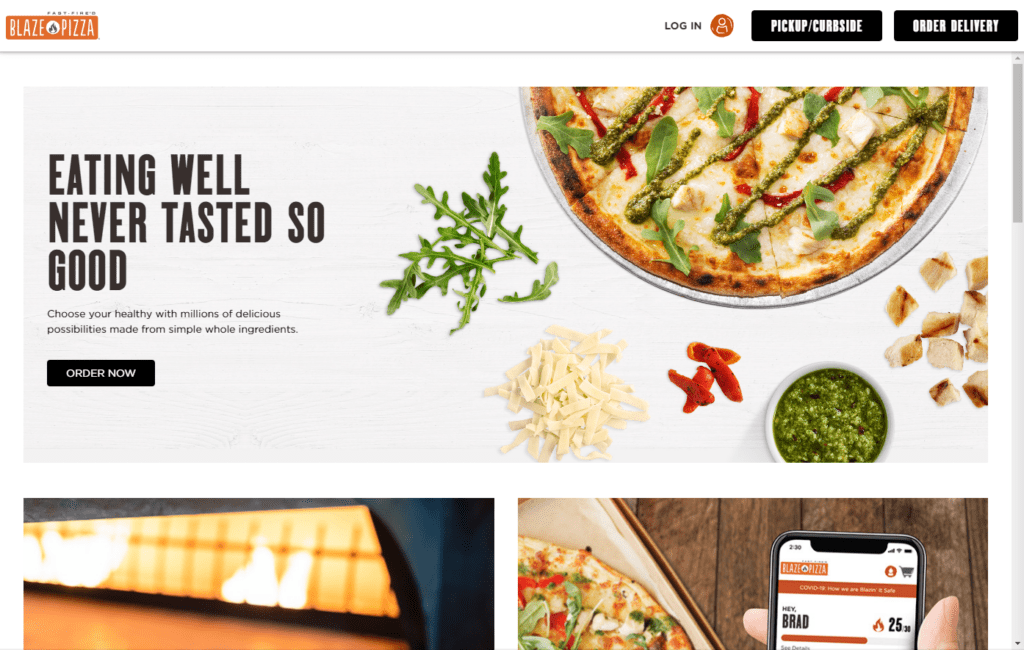
Restaurant Food Photography Tips for More Sales
Restaurant Food Photography Tips for More Sales

Gina Lucia


If you want to attract more customers and get more sales in your restaurant, then high-quality restaurant food photography is the way to do it.
Taking and presenting quality pictures of your food makes it more appealing and attractive to customers. This makes customers want to order and as they do, your sales will go up.
👋 In this guide, we’ll look at how you can create the best food photography for your restaurant. We’ll walk you through the benefits of improving your food photography, tips for improving your restaurant food photography, and a tool to help you display these photos best.
Let’s kick it off with how improving your restaurant food photography will benefit you.
Get Your Restaurant Business Online With Orderable
Orderable is a user-friendly WordPress plugin that adds online ordering to your restaurant website.
Add your dishes, create your online ordering menu, customize your delivery schedule, and manage orders with ease.

The benefits of better restaurant food photography
Improving restaurant food photography helps you showcase the best aspects of your dishes to make them mouth-watering to customers. This has several positive benefits for your restaurant business, such as the following.
It can attract more customers
High-quality, appetizing food photos can attract potential diners to your restaurant.
📈 In a recent study, 75% of customers revealed that the images they see on a restaurant’s website influence their decision to dine there.
This is because these images whet your customers’ appetite even before they take a bite of your food. It increases their excitement and anticipation for your food and they’ll want to visit your restaurant to dine or order from it.
It increases sales
Great photos of your food can sell it. They make your food look delicious and customers will want to order and consume them.
📈 According to a study by Grubhub, restaurants that feature high-quality images of their food on their menus see a 30% increase in sales on average.
On the other hand, poor-quality images tend to have the opposite effect. Even if your food is tasty, it will likely deter customers from buying it if you present poor-quality images of it.
It helps to build trust with customers
Customers like to know what they’re going to get. High-quality professional photos of your food items give customers a more accurate idea of what they will experience when they dine with you. This way, they can make a more informed judgment of your business, encouraging them to trust your brand.
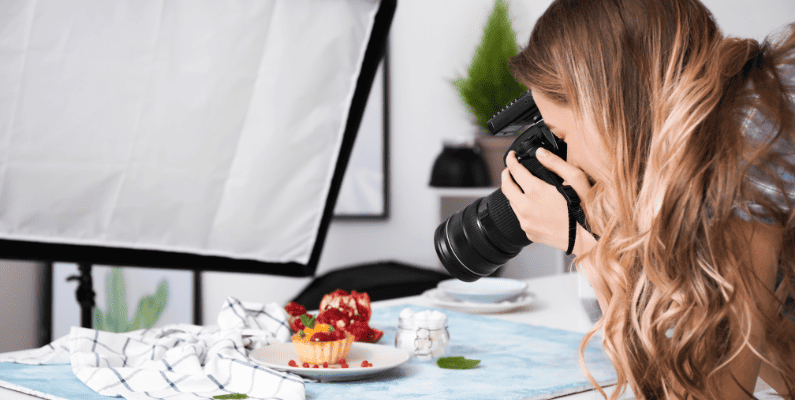
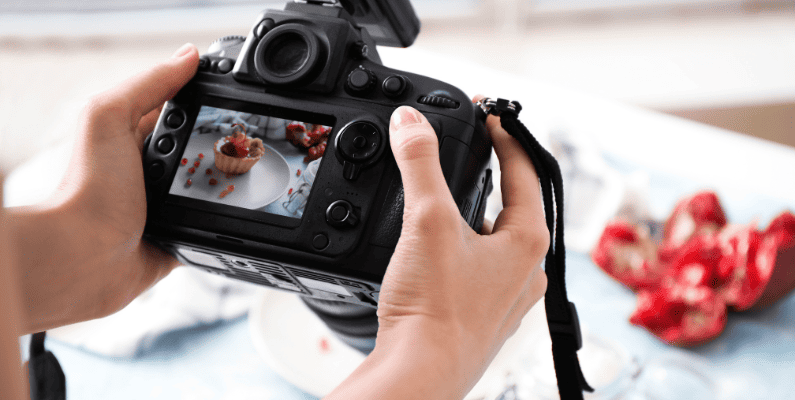
Getting great shots of your delicious food should be as easy as aiming your camera and capturing the photo, right? Unfortunately, it’s not that simple. Creating the best food photography for your restaurant requires a lot more input than that.
Luckily, we’ve gathered five useful tips on improving restaurant food photography. We’ll break down each strategy, discussing the benefits and how to implement them.
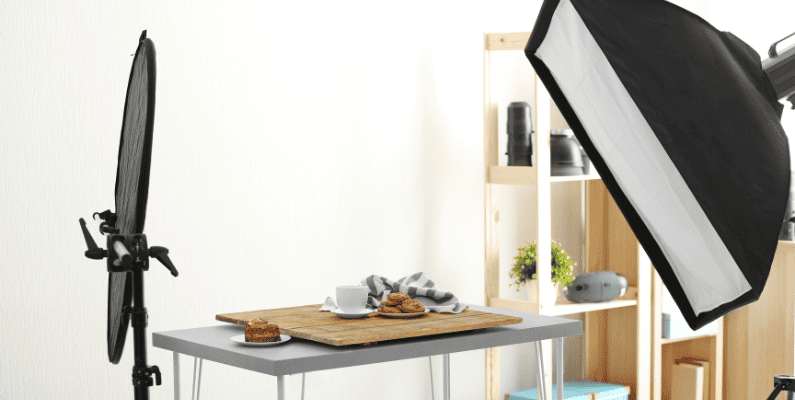
Tip 1: Use natural light as much as possible
This involves utilizing sunlight as the only source of light when taking photos of your food. It can either be direct sunlight or one that has been diffused naturally using clouds or artificially using umbrellas, reflectors, a white wall, or a window.
Why using natural light makes for better restaurant food photography
Natural light is the best light source for restaurant food photography because, first, it is abundant in most parts of the world, and you can use it for free. In addition, it brings out your food’s natural colors in the best way possible to give it a softer, more appealing look.
You can make just about any food look mouth-watering with natural light. This includes colorful food like pizza, burgers, curry buffets, and other cuisines, or food with dull colors like tortillas and mac ‘n’ cheese.
With natural light, it is easier to get color-correct food shots and you won’t have to spend too much time balancing it out. You can feature high-quality food photos, thanks to natural light.
📈 Studies show that high-quality food images can increase your orders by 25%.
How to use natural light for your food photos
Natural indirect sunlight works best for restaurant food photography. Direct sunlight can create harsh shadows and glares or strange bright spots that could wash out some of your food’s color. This is why you should avoid it.
Ideally, you should take photos of your food 2 hours after sunrise or 2 hours before sunset. This is a great technique used by professional photographers to use the softest light of the day.
Just because it’s called natural light, doesn’t mean that you can’t play around with it to get better results. Place the dish by a window with a reflector card on the opposite side to balance it by filling in shadows. This will give you beautiful, well-lit photos without harsh shadows or highlights.
What if natural light isn’t available?
Sufficient sunlight is not always available in all parts of the world or in seasons like winter. In this case, you’ll need to make artificial lighting from lamps look like natural light.
You can achieve this using softboxes and diffusers to make it less harsh, bouncing the light off a wall or ceiling to even it out, and using multiple light sources from different angles. Ensure to avoid flashes which will create harsh shadows.
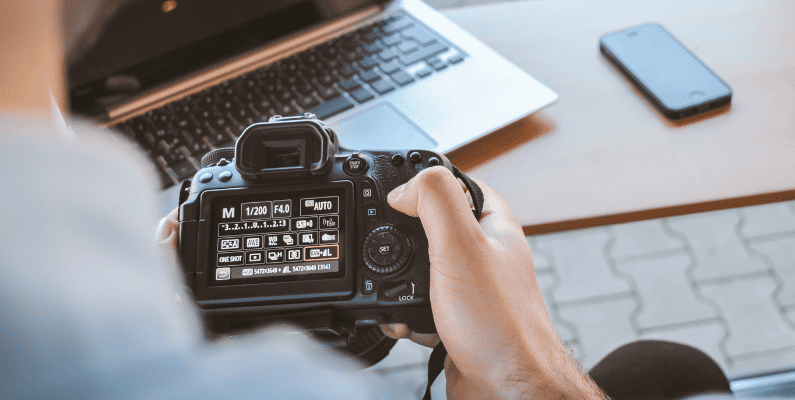
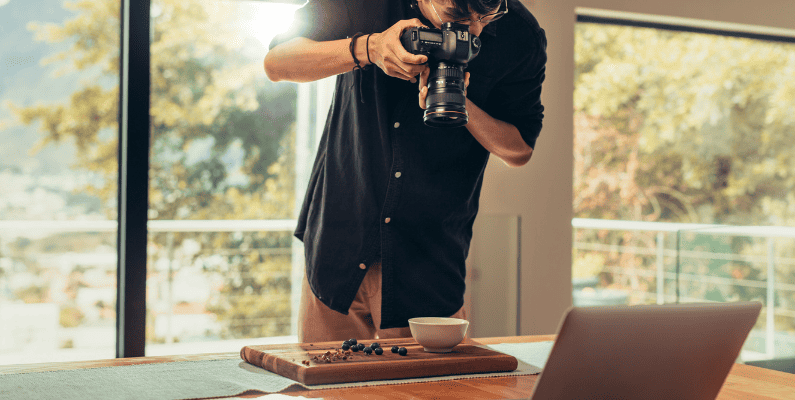
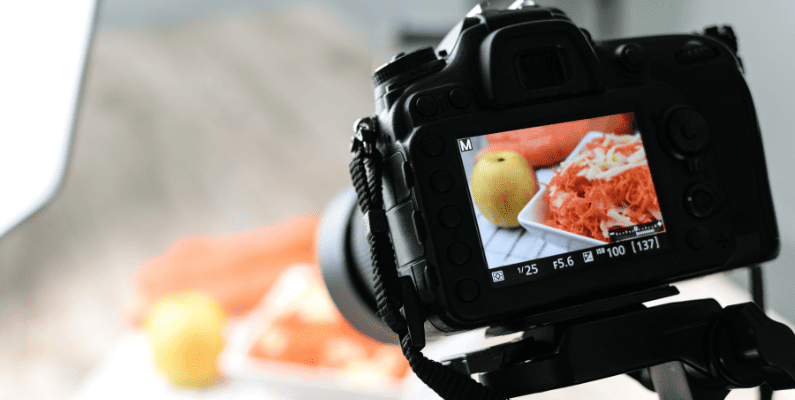
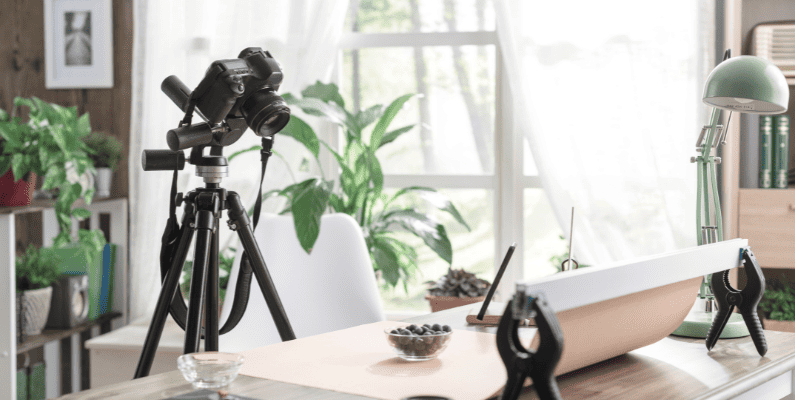
Tip 2: Focus on your camera settings
If you want to capture great food photos, then you’ll need to learn how to control your camera’s settings. Specifically, how to choose the right aperture, ISO, white balance, and more.
Why the right camera settings are important in food photography
Capturing a clear and striking photo is your goal as a food photographer – and the right camera settings can help you with that.
Getting the right white balance, depth of field, and ISO can drastically improve the quality of your food photo.
These settings will help you to get the image in focus, eliminate blur, capture your photos with the right amount of light, and get food images with the right colors.
How to select the right camera settings for food photography
Despite the push on iPhones being the new camera for photography, when it comes to restaurant food photography, nothing quite beats a DSLR camera.
This is because a DSLR camera gives you the freedom to adjust your camera’s settings to get the best results. However, there’s no single correct camera setting for all food photos. You’ll have to adjust it depending on factors like lighting, type of food, etc.
That being said, here are some settings you should focus on to capture striking food photographs for your restaurant.
- ISO and shutter speed – keep your ISO and shutter speed as low as possible. ISO represents your camera’s sensitivity to light, and the lower the number, the less sensitive it will be to light. A high ISO number for most cameras will generate a grainy image with more artifacts. When you’re shooting indoors, the ISO should be higher than when shooting outdoors because there is less light.On the other hand, a high shutter speed will introduce blurring on your images and this is why you should keep it low.
- Aperture (depth of field) – The aperture setting controls the depth of field. Depth of field refers to how much is in focus in front of and behind the food that you’re capturing. If you’re only taking pictures of one food item, you’ll want to keep your aperture low to focus on the single item. But if you have multiple food items, for instance, 3 to 4 plates of food, increase the aperture so that more items are in focus.
- White balance – Here, there are two options: Auto white balance and Manual. If you’re new to restaurant food photography, the automatic option can do a tidy job of correcting unwanted color casts on your food image. But it isn’t perfect. For more precise results, select the custom option. Most cameras have pre-set white balance controls for direct sunlight, cloudy, fluorescent environments, etc.
You also have a fully custom white balance setting. To use this, take a photo of a white sheet of paper and tell your camera to use it as the reference.
With these settings, you can create beautiful but realistic images of your food for your customers to see.
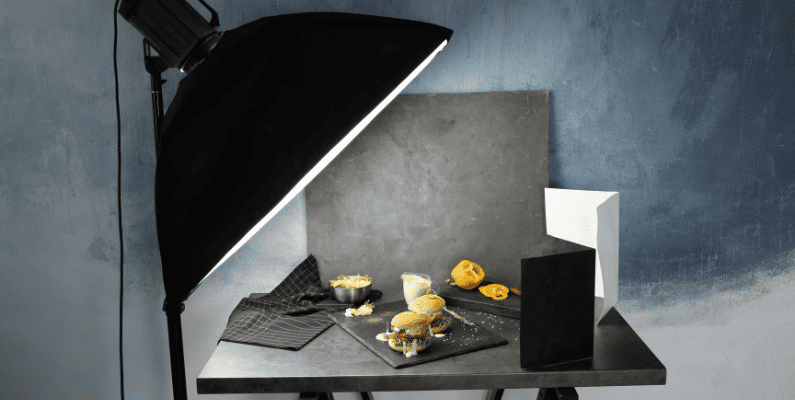
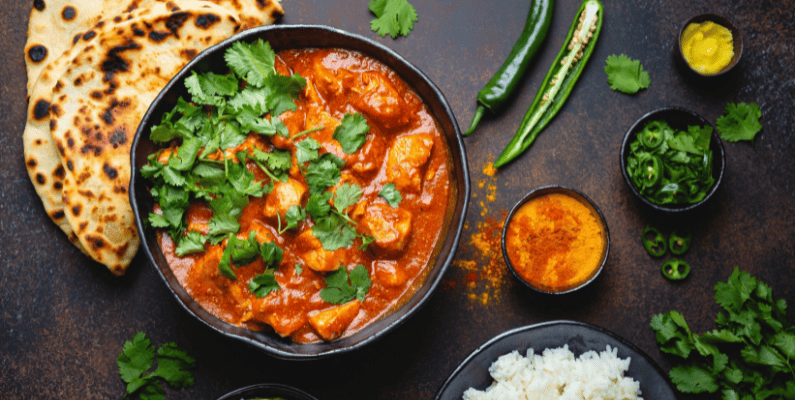
Tip 3: Think like a food stylist
Thinking like a food stylist is all about applying simple styling principles to improve the presentation of your food. This can be anything from using cutlery or garnishes as props to altering the arrangement of food items.
Why food styling improves your food’s presentation
Food styling can be just as important as restaurant food photography in making your food look appetizing to potential customers. It enhances the visual appeal of food, making your dishes look their absolute best.
Food styling involves arranging and presenting food in a way that brings out its most attractive qualities. This makes the food enticing to potential customers.
Food styling can also help you build a stronger and more recognizable brand. Customers can easily recognize your brand when you consistently present your food across your menu, social media channels, or other marketing materials.
Discuss the importance of presentation in making food look appetizing.
How to use food styling to improve your food’s presentation
There are several ways to improve how your food is presented in photos and boost its visual appeal. Here are a few ways to set the scene before taking photos of your food.
- Create a complementary backdrop – Use a backdrop that enhances the presentation of your food without taking from it. Preferably, you should use a dark, non-reflective backdrop to help your food’s colors stand out.
- Include garnishes – You can utilize pieces of other food as props to the main dish without upstaging it. Some examples of garnishes include chopped herbs, fruit slices, sauces, and vegetable bits.
- Arrangement – Place the garnishes nicely around your main dish. If you have several plates or dishes, arrange them neatly. For instance, you can have french fries and chicken next to each other and then a bottle of soda right behind them.
- Dig in – Take a bite out of your dish. This adds the human element to your images.
Lastly, you can use cutlery as props to give your images a classy look. Picture this: you have your food and its garnishes on one side and classic silverware right next to it on top of a well-folded napkin.
It shows potential diners that your restaurant is fancy and that they’re in for a luxurious dining experience.
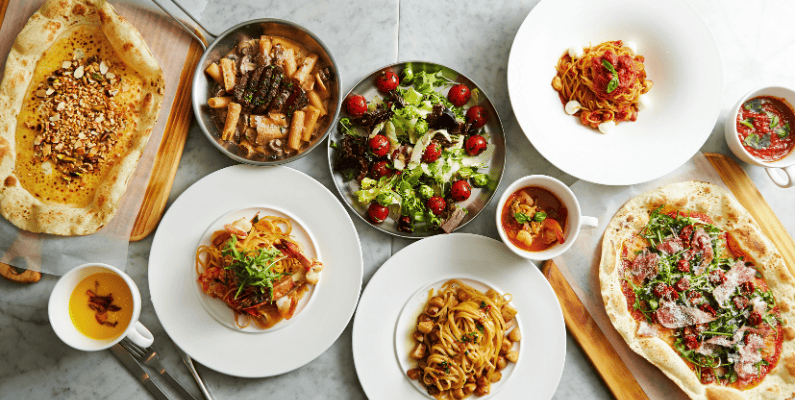
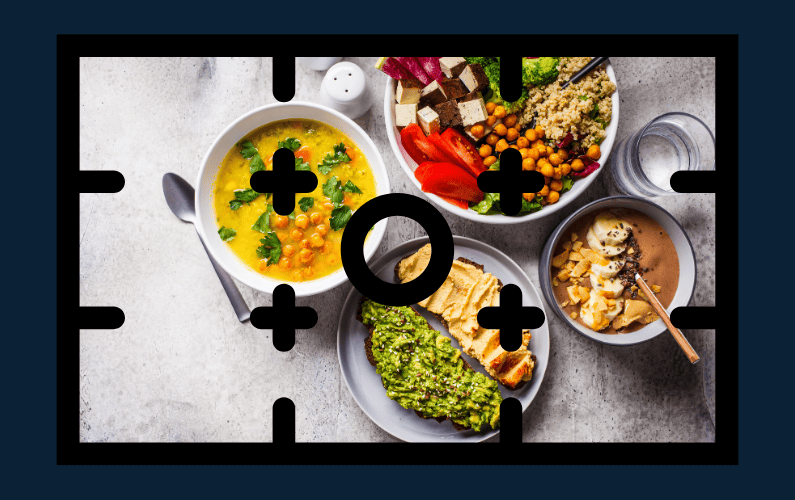
Tip 4: Take multiple photos from different angles
Don’t just limit yourself to one photo from a single angle for each food. Take as many as necessary and from different angles, such as the top, sides, and slanted angles.
Why multiple photos from different angles are important in food photography
Different angles can highlight various features of the food you’re capturing. If you’re taking photos of a burger, a side angle will reveal its layers, while a slanted (45-degree) angle will reveal its size.
Alternatively, suppose you have a cuisine on a plate with garnishes around it. A close-up shot will reveal specific details, such as the herbs or spices used to prepare the cuisine, while a wide-angle shot will capture the entire scene, including the garnishes.
Providing multiple images of your food from different angles gives your customers more information about it. This can directly influence their decision to dine at your restaurant or order from it.
📈 A Field Agent survey found that 60% of online shoppers In the US need to see 3 – 4 images of a product before making a purchase decision. The same applies for food.
How to take multiple food photos from different angles
When taking food photos for your restaurant, there are several different angles you can try out to reveal different qualities of your food.
While doing this, it is important to note that certain types of food will look better when shot from specific angles.
- The overhead angle – The top-down angle is good for highlighting the overall presentation of food. It works great for plated dishes and flat food like pizza.
- Slanted (45-degree) angle – This provides a balanced view of the dish, capturing both its top and side. You can use this to show the size of your food.
- Side angle – Use this angle to show customers how the layers stack on top of each other on foods like burgers, cakes, and sandwiches.
- Close-up versus wide-angle shots – Use wide-angle shots to capture the entire scene, including props like cutlery and garnishes. On the other hand, use close-up shots to focus on specific details of the food, like its texture.
With a variety of photos of your food, you can provide sufficient visual information on your food to capture your customers’ interest and reduce their uncertainty about it.
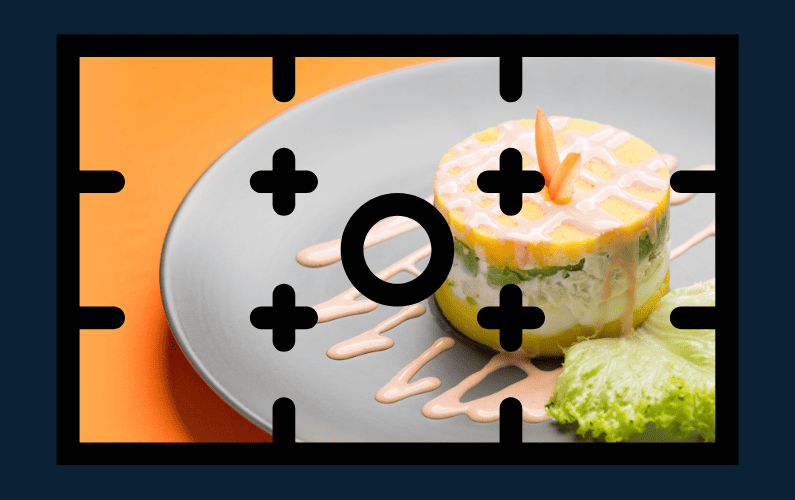
Tip 5: Rule of thirds
When planning to take photos of your food, you don’t have to guess where your food will appear in the final image. You can leverage the rule of thirds to plan what the final image will look like and where your food will be placed on it.
The rule of thirds is a photography guideline for composing well-balanced images. It involves separating your picture’s frame into 9 equal rectangles using 2 vertical and 2 horizontal lines.
You can then place your main dish (subject) where the lines intersect or near these points. These are the key points of interest that the customer’s eyes will naturally navigate to.
Why the rule of thirds helps to create good food photos
The rule of thirds can improve the composition of your photo, generating a visually appealing and interesting image. Using the rule of thirds, you can draw your customers’ attention to the key points of interest in the food photo even if there are other things going on around it.
As a result, your customers can maintain focus on the main dish, even if there are garnishes or other props around it.
By placing your main dish off-center, you’ll create a more interesting photo, compared to placing it right in the middle. Apart from that, this technique also comes in handy in creating a more dynamic composition in your food images that draws the customer’s attention to other parts of the image.
How to use the rule of thirds to compose great food photos
You can implement the rule of thirds when planning to determine how you’ll position your food in the shot and also when capturing the picture.
When planning for your photos, you’ll need first to determine the following:
- The angle you’ll shoot your photo at.
- The main subject (food).
- Where you’ll place food in the photo to have the most impact.
Once you’ve answered these questions, sketch out your photo before you start. Carefully think about the composition of your photo and the intersections you will place your food on. Create a sketch of your photo with grid lines.
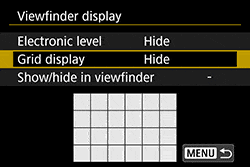
Before taking the photo, enable the grid display setting under the shooting information display in your DLSR camera’s menu. With this setting enabled, you can now take your photo while applying the rule of thirds.
NOTE: Remember that the rule of thirds is just a guideline. You might discard it and still create great-looking food photos. Also, throughout the photo shoot, ensure to clean your camera lens to remove smudges.
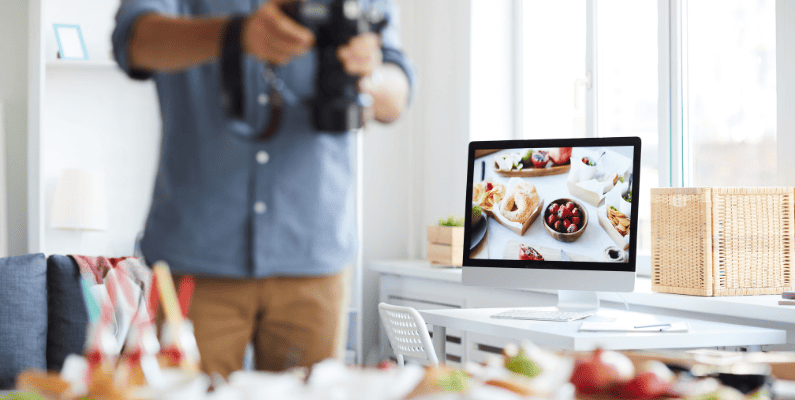
We’ve looked at 5 different tips to help you create amazing food photos for your restaurant. So after shooting great food photos, what next? You’ll want to display them where they have the most impact in attracting potential customers to your restaurant.
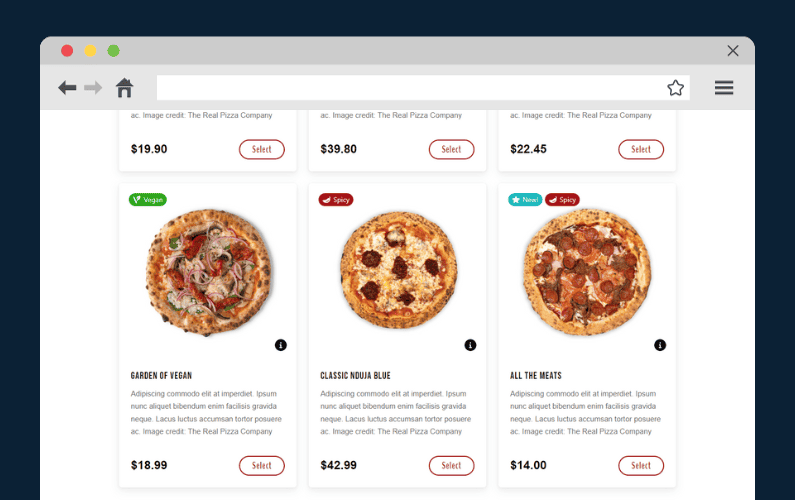
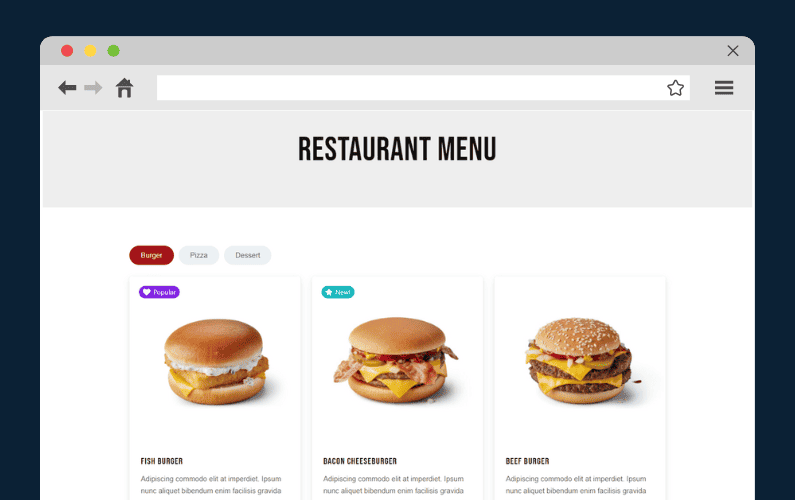
How to display your restaurant food photography
Once you’ve improved your restaurant’s food photography, you’ll want to make the most out of your restaurant photo shoot. You can do this by displaying your new food images on your physical restaurant menu as well as your digital one.
Before displaying these photos on your digital menu, you’ll have to first create it. To do this on your WooCommerce store, you’ll need the Orderable plugin.
Create great-looking menus to display your photos easily, with Orderable
Orderable is the WooCommerce plugin for restaurant owners who want to create attractive and user-friendly digital menus right from their WordPress site. Using Orderable’s product layouts feature, you can create great-looking menus effortlessly and without any coding experience.
All you have to do is create your food products, add the striking food photos from your photoshoot, and create a menu-style layout to display them.
Get Your Restaurant Business Online With Orderable
Orderable is a user-friendly WordPress plugin that adds online ordering to your restaurant website.
Add your dishes, create your online ordering menu, customize your delivery schedule, and manage orders with ease.
Orderable’s menu layouts are fully customizable. From appetizers and entrees to desserts you’ll be able to add any type of meal course to them to present different culinary experiences to your customers.
After creating your menus, you can display them on any page of your choice. Your menus will look great on any page and any device thanks to Orderable’s mobile-first design. Customers will have a smooth ordering experience regardless of the device they use.
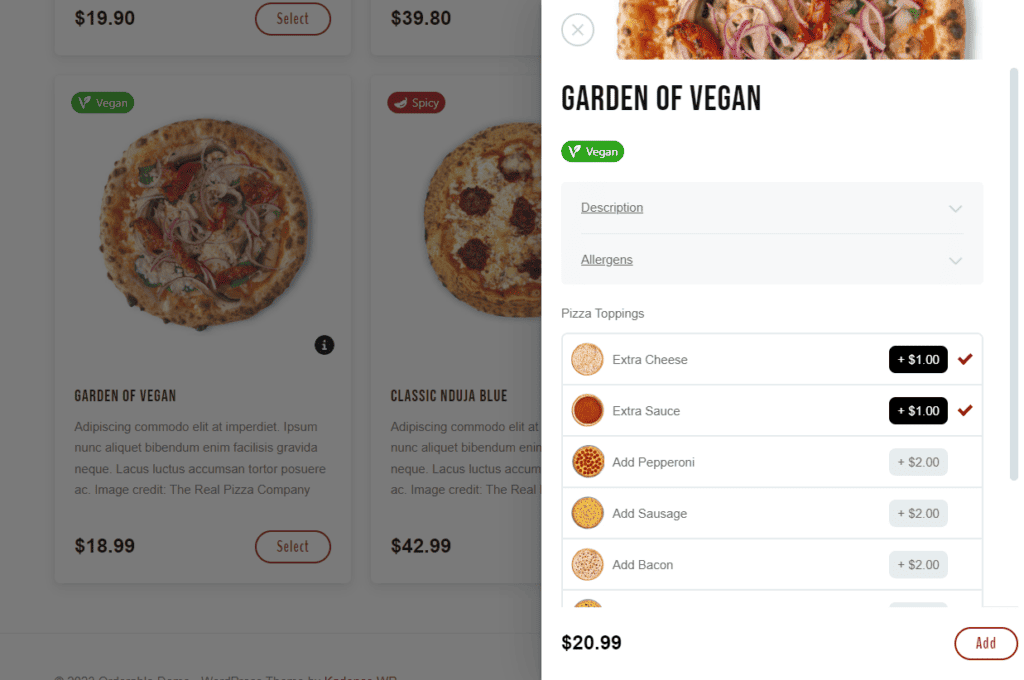
They can select menu items, customize them with product add-ons, and check out with their preferred payment gateway.
With these features, Orderable takes the work out of menu creation, allowing you to focus on what matters – preparing and serving good food.
Apart from all this, what else do you get with orderable?
Orderable, a robust online ordering system for WooCommerce
Great-looking and user-friendly menus aside, Orderable is a complete ordering solution for WooCommerce restaurant businesses. It takes care of everything, including:
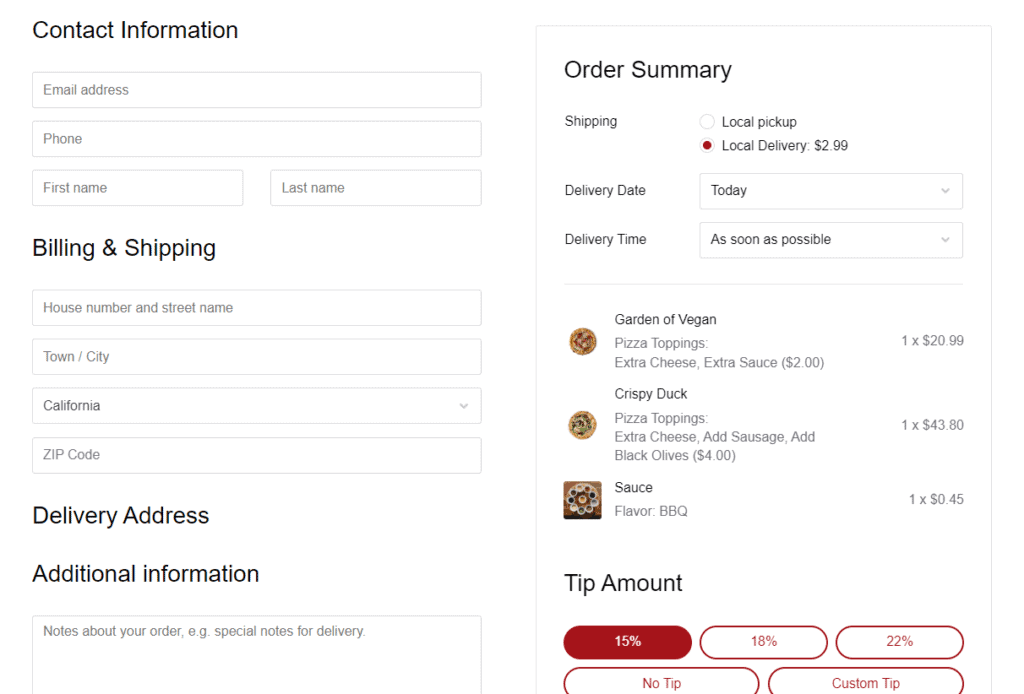
- Order management – it has a central page for order management. You’ll receive notifications once a new order comes in and easily change the status of the order as you process, package, or ship it.
- Sending customers order update notifications – notify customers when their orders have been dispatched via WhatsApp, SMS, or email.
- Creating a pickup and delivery schedule – use Orderable’s timeslots feature to create a pickup and delivery schedule that suits your customers and your available staff.
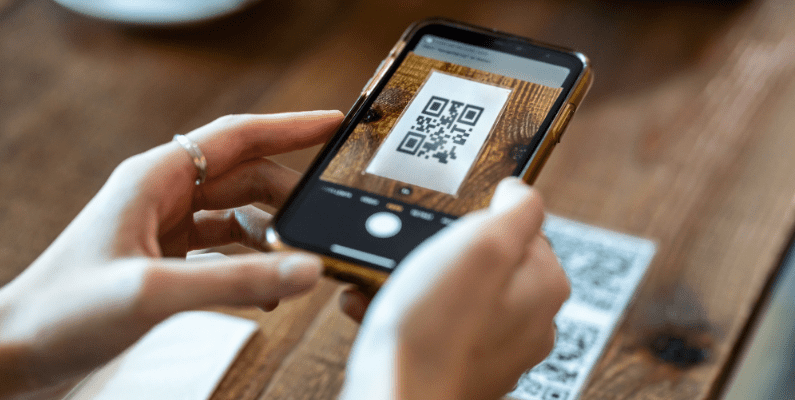
- Setting up table ordering – assign QR codes to your tables and allow customers to access your menu by scanning these codes.
- Improving sales – with order bumps and checkout tipping.
The best part? Orderable enables you to handle all this without charging you extra fees. You’ll keep all your earnings while offering good food and great service.
Improve your restaurant food photography today
High-quality restaurant food photography is essential for attracting potential customers and boosting sales. Thankfully, with the tips in this guide, you have a solid idea of what you need to do to create great food photos.
You can combine high-quality restaurant food photography with the Orderable plugin to display these photos on your digital menu. This is where they’ll have the greatest impact in attracting potential customers.
Combine these restaurant photography tips with Orderable’s attractive and user-friendly menus today, and watch your sales increase.
Get Your Restaurant Business Online With Orderable
Orderable is a user-friendly WordPress plugin that adds online ordering to your restaurant website.
Add your dishes, create your online ordering menu, customize your delivery schedule, and manage orders with ease.
Gina Lucia is our in-house Content Manager at Orderable. She writes articles, user guides, technical documentation, and creates videos on everything WooCommerce and Orderable.
Gina has been working in the WordPress/WooCommerce space since 2012 when she developed WordPress websites for clients large and small.
For the past 8 years, she’s been writing about everything WordPress and WooCommerce, becoming an expert in what makes a WooCommerce store succeed.
When not writing, Gina loves to tend to her vegetable garden, read, or travel to mainland Europe.
Don’t miss out on the latest Orderable news!
Sign up for our newsletter to receive the latest news from the blog, you’ll get pinged every week with a digest of the latest updates.
[fluentform id=”6″]

Related Articles

How to Handle Restaurant Complaints in 2026
How to Create a QR Code for Your Restaurant Menu

Introducing Orderable Multi-Vendor Compatibility
Get Your Restaurant Online With Orderable
The WooCommerce plugin designed to help restaurants take orders online – with no added fees!
View Pricing
