How to Start a WooCommerce Restaurant in 2026
How to Start a WooCommerce Restaurant in 2026

Gina Lucia


If you’re dreaming of stirring up success in the food industry, setting up your WooCommerce restaurant in 2026 is the secret ingredient to help your venture flourish.
👋 In this guide, we’ll walk you through the process of setting up your WooCommerce restaurant with the power of Orderable.
We’ll walk you through:
- The basic steps of setting up your WooCommerce Restaurant.
- The WooCommerce plugin to help you do it.
- How to create your WooCommerce restaurant (step-by-step).
Now more than ever, we live in a digital-driven era where online food ordering has become the norm. With a significant 63% of customers choosing to cozy up with their meals at home rather than dining out, there’s a vast online market ready to be served. This digital revolution in food service explains why companies like Uber Eats and GrubHub are growing at such an impressive rate.
To carve out your own slice of this booming market, you’ll need the right tools. That’s where WooCommerce and the innovative Orderable plugin come in. Designed to work seamlessly with WooCommerce, Orderable can take your restaurant’s online presence from a small bite to a big feast, sending your sales soaring.
Let’s look at the basic steps first.
Get Your Restaurant Business Online With Orderable
Orderable is a user-friendly WordPress plugin that adds online ordering to your restaurant website.
Add your dishes, create your online ordering menu, customize your delivery schedule, and manage orders with ease.

The basic steps of setting up your WooCommerce Restaurant
Setting up a WooCommerce restaurant typically involves the following key steps.
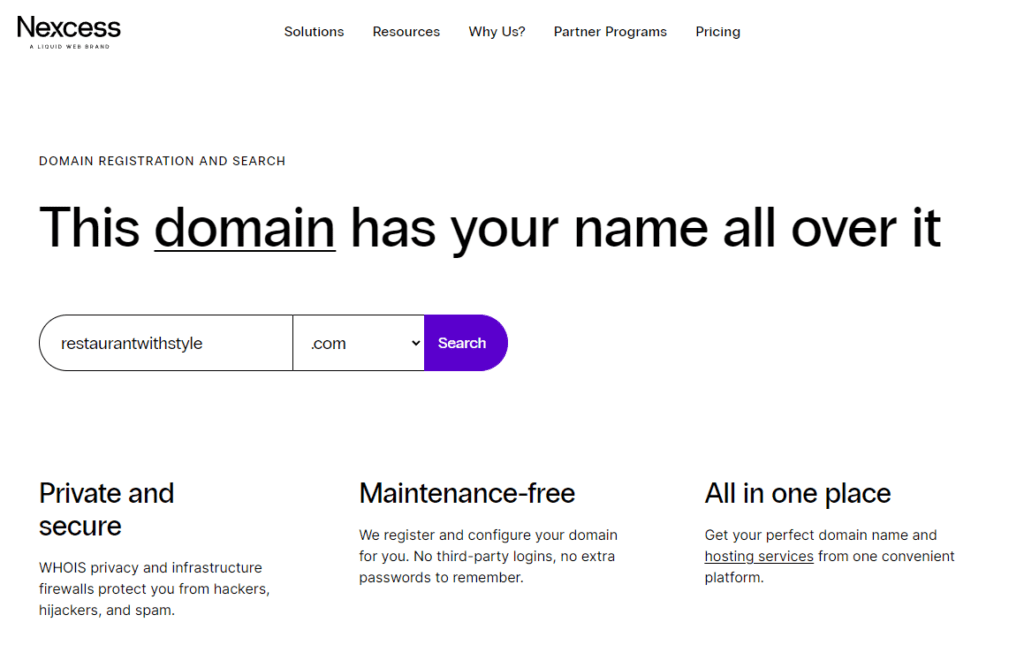
Registering for a domain name
Just like your physical restaurant needs a street address, your online restaurant needs a digital address – a domain name.
It’s the link your customers will type into their web browsers to reach your tasty offerings – something along the lines of yourtastybistro.com.
Choosing a hosting provider
The next thing on your WooCommerce restaurant to-do list is selecting a hosting provider. Take your time with this, as the provider you choose will play a big role in how well your site performs and how often it’s available to hungry customers.
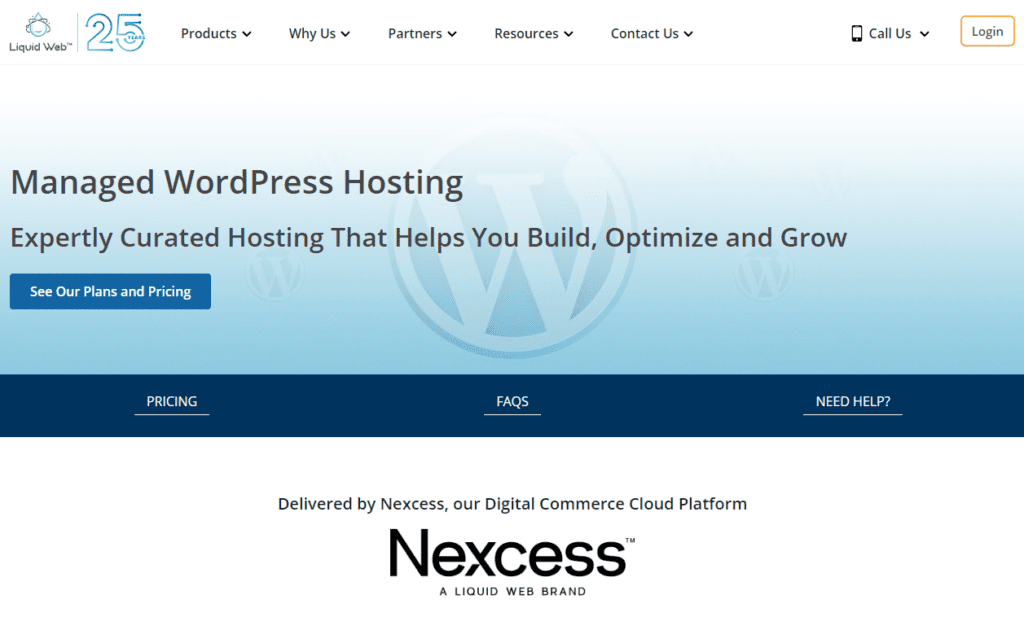
We usually suggest going for managed WordPress hosting, as it’s specifically designed to work seamlessly with WordPress.
💡 You can read more about getting managed WordPress hosting from our how to create a food store guide.
Picking a content management system(CMS)
Next, you’ll need a CMS, or content management system. This is the tool that helps you build, tweak, and manage your website’s content. We’re going to use WordPress and WooCommerce for this, and for good reason – they’re user-friendly, secure, and perfect for building a restaurant website.
📈 Did you know? WooCommerce is the backbone of over 160 million active websites, which equates to 8.7% of all sites on the web!
Plus, WooCommerce is a perfect match with the online ordering solution we’ll be using, the Orderable plugin.
Setting up WordPress and WooCommerce
Now it’s time for the nuts and bolts – getting WordPress and WooCommerce up and running. Despite how it may sound, it’s a pretty straightforward process.
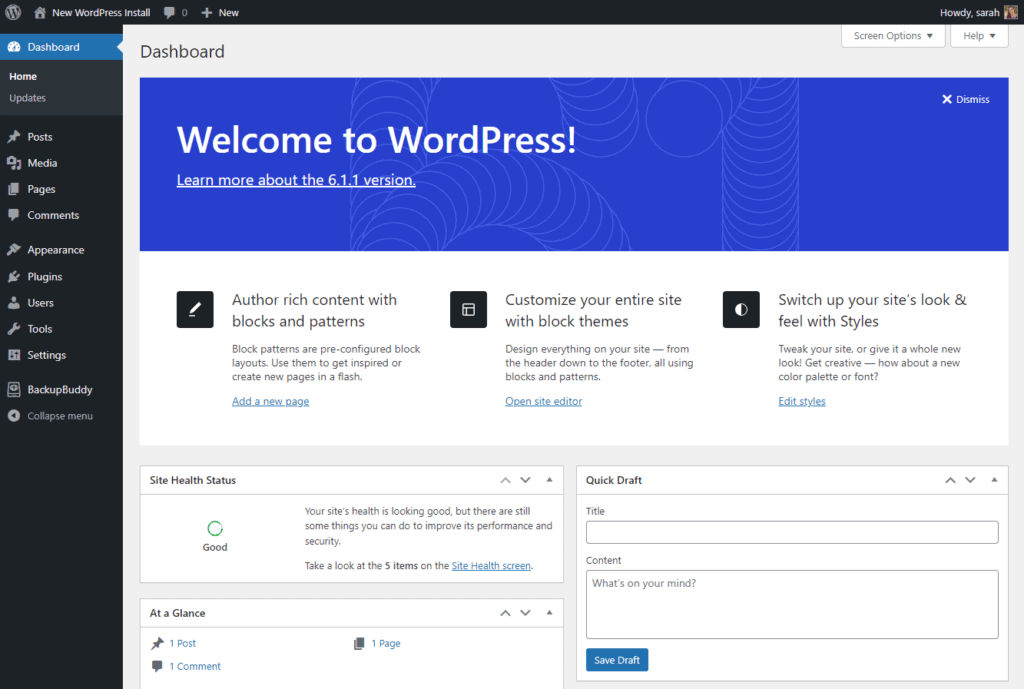
If you opt for a managed WordPress hosting plan, you’ll be able to install WordPress directly through your hosting provider’s dashboard – a convenient feature they offer.
Setting up WooCommerce can be just as simple, with some hosting providers offering direct installation. If that’s not an option, don’t fret. You can easily install it via the plugins section on your WordPress dashboard. You’ll customize some initial settings and input key store information here.
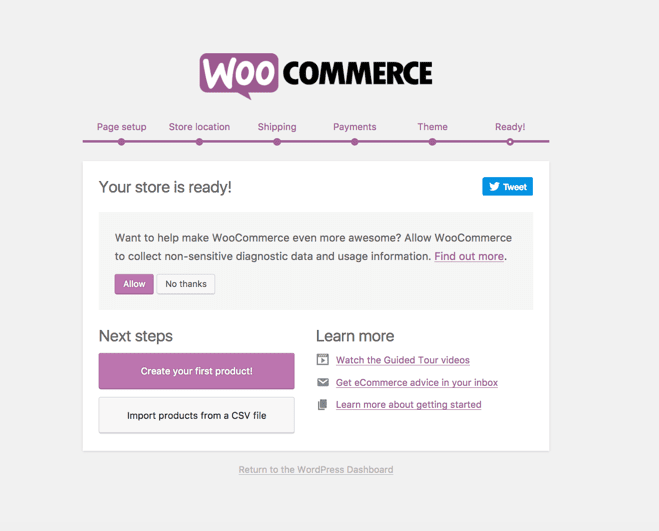
Once that’s squared away, you can choose a theme that suits your brand to give your site its initial appearance. Consider this as setting the base layout before you delve into the details of individual page editing. It’s all part of making your WooCommerce restaurant stand out.
Add your food ordering system
Next up on your WooCommerce restaurant journey: setting up a reliable food ordering system. This crucial step will empower your online store to seamlessly take and manage orders, making your customers’ dining experiences even more enjoyable.
Now, you might be wondering, “How do I pull this off?” The answer is a handy plugin, and we’ve got just the one for you – Orderable. This gem is not just another plugin. It’s your new best friend in streamlining your online food ordering operations.
Trust us, with this WooCommerce restaurant ordering plugin on your side. You’ll master the digital restaurant world in no time!
The WooCommerce plugin to help you do it
Orderable isn’t just a WooCommerce plugin; it’s your ace in the hole for managing orders at your online restaurant.

This plugin is all-inclusive, covering a multitude of features to help streamline your operations, including:
- Unified order management – Keep track of all your orders from one convenient hub, simplifying your day-to-day operations.
- Tailored delivery and pickup times – Craft your delivery and pickup schedule to suit your restaurant’s flow and offer your customers the convenience they crave.
- Ready-to-go menu layouts – Whether it’s delectable desserts, hearty main dishes, or delightful breakfast options, you can easily create and display a variety of menus anywhere on your site.
- Innovative table ordering system – Leverage the power of QR codes to auto-assign tables to dining orders, creating a seamless dining experience for your customers.
- Timed products feature – Perfect for showcasing special lunchtime or dinner menus, allowing you to cater to your customers’ cravings at any time of the day.
And there’s plenty more where that came from. With Orderable’s easy setup process, you’ll be up and running in no time. This one-stop solution eliminates the need to hunt down separate plugins for each feature.
Orderable goes the extra mile with unique features designed to boost sales, prioritize customer service, and manage multiple store locations. With this powerhouse plugin, you’ll have everything you need to make your WooCommerce restaurant a resounding success.
Get Your Restaurant Business Online With Orderable
Orderable is a user-friendly WordPress plugin that adds online ordering to your restaurant website.
Add your dishes, create your online ordering menu, customize your delivery schedule, and manage orders with ease.
Boosting sales with Orderable
Orderable is jam-packed with features designed to boost your sales transactions and elevate your online restaurant to the next level.
Here’s what you can expect:
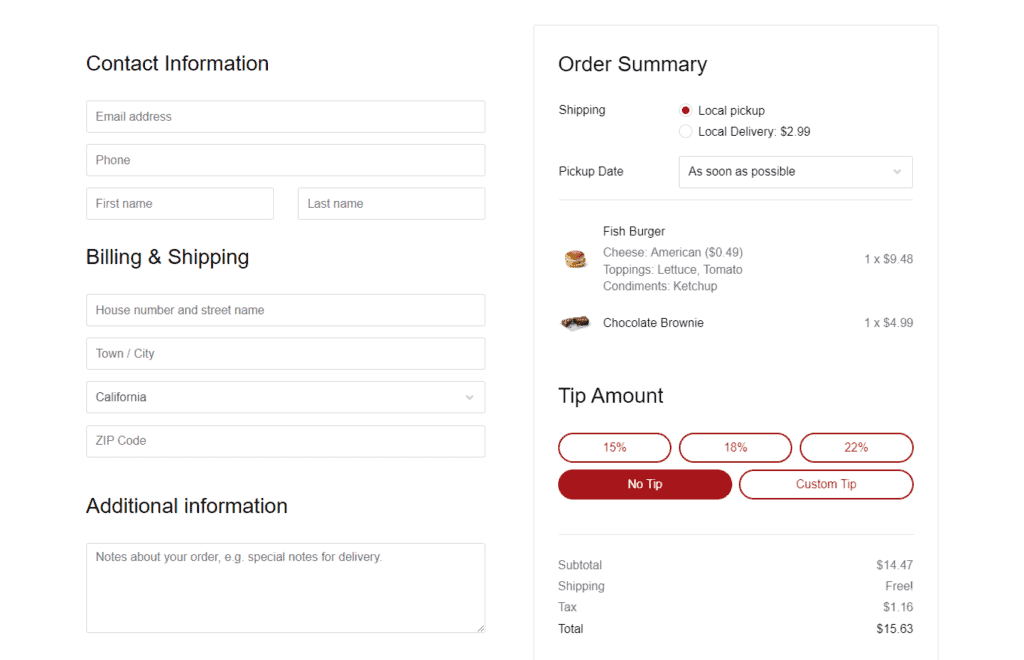
- Gratuity made easy – Add tip prompts at checkout. It’s a gentle nudge that could significantly enhance your revenue, rewarding your hard work with a little extra.
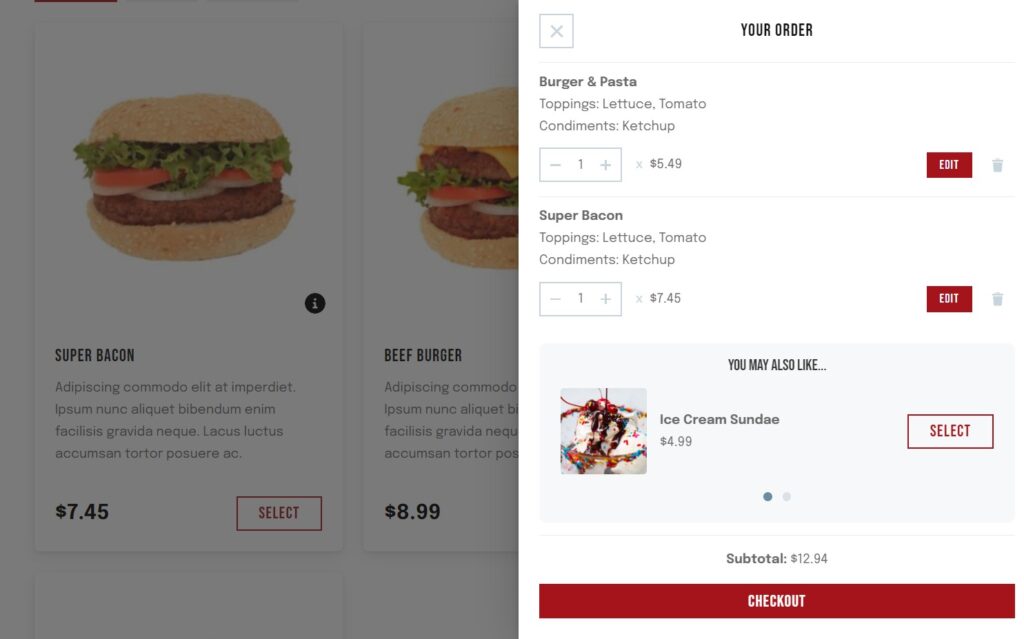
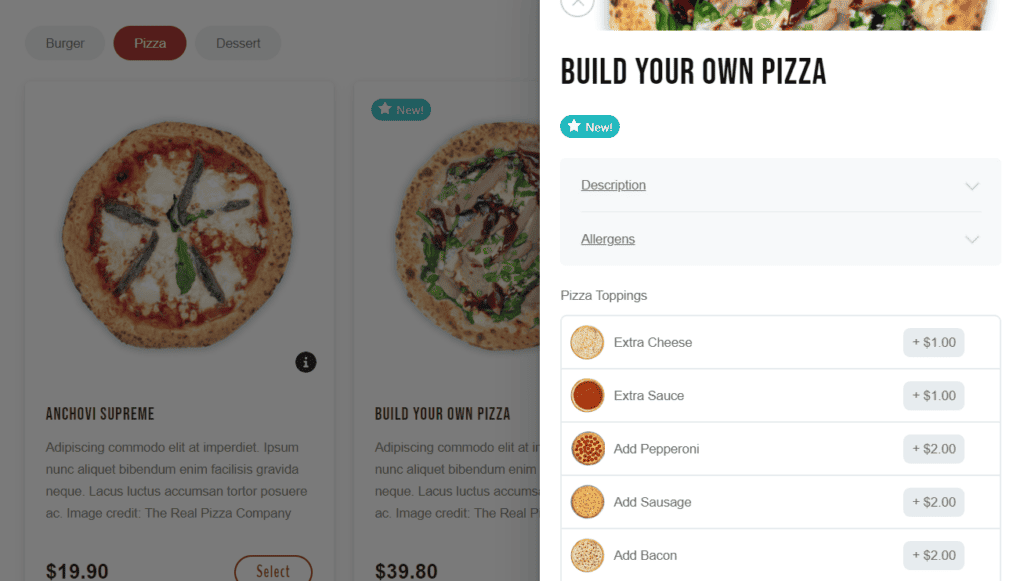
- Enticing add-ons – Allow your customers to personalize their orders with additional ingredients. It adds a unique twist to their meal and brings in an additional revenue stream for you.
- Order bumps – Suggest additional items, sides, or sauces during checkout to enhance the customer’s meal and increase your average order value.
And the cherry on top? You get to keep all the income from your sales. Orderable won’t charge any commissions on your hard-earned money, saving you from those pesky 20-30% deductions that often come with sales.
Prioritizing customers with Orderable
Orderable ensures your customers feel valued and satisfied from the moment they land on your website to when they receive their order.
Here are a few ways how:
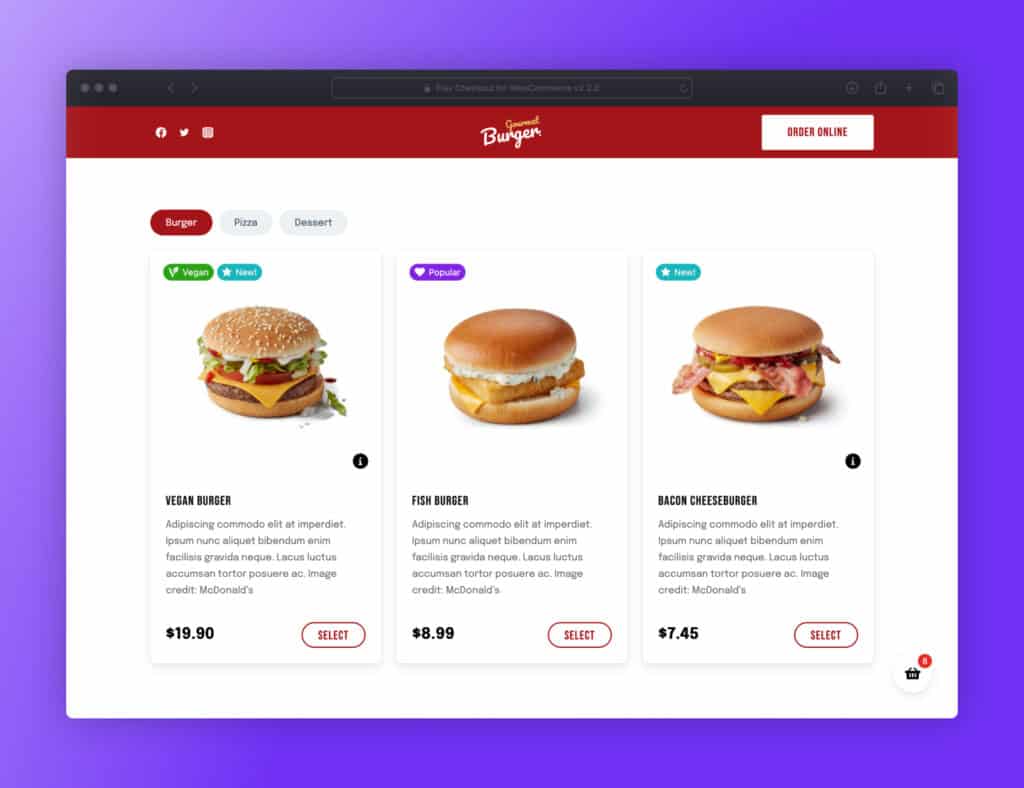
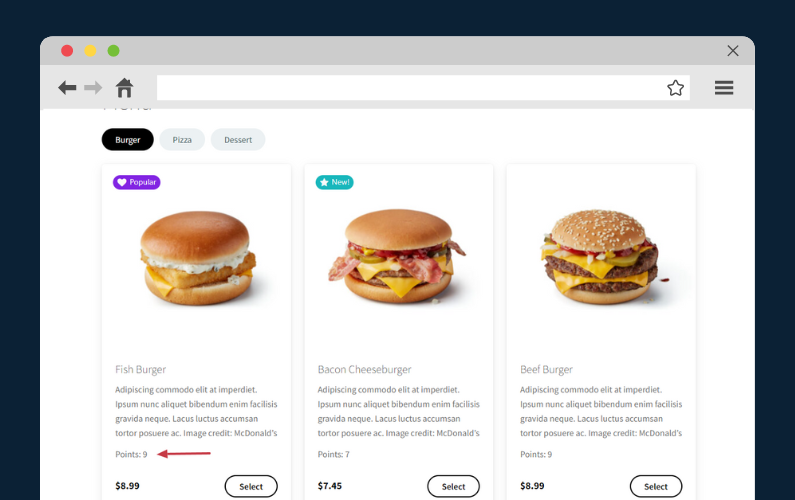
- Stellar design – Easy-to-navigate and visually appealing food menus make for an enjoyable browsing experience, regardless of whether customers use mobile phones or desktops.
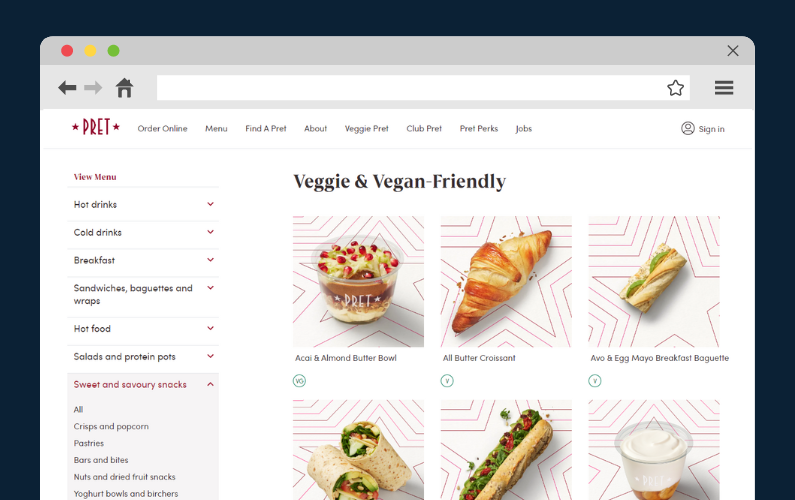
- Transparent labeling – Cater to all by highlighting vegan, gluten-free, kosher, halal, and more dishes. It’s about making sure everyone finds something they love with ease.
- Timely updates – Keep your customers in the loop about their order status via WhatsApp and SMS, platforms they are already comfortable using.
These strategies enhance customer experience and foster loyalty to your brand over time.
Managing multiple locations with Orderable
For those with restaurants dotted across different locations, Orderable has got you covered. Its multi-location feature allows you to cater to customers in each vicinity through a single website.
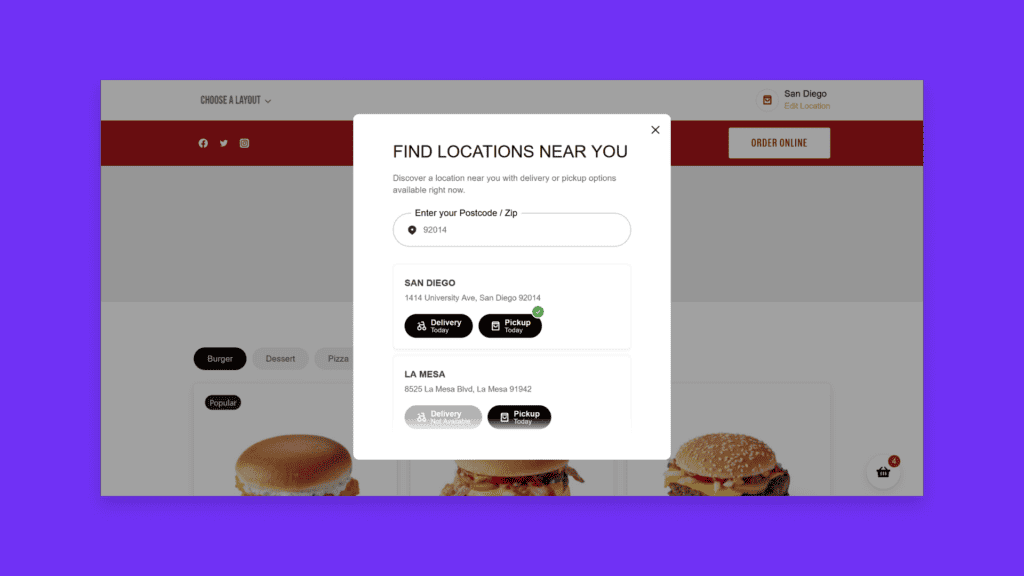
Customers can select their nearest branch at checkout, saving them on delivery costs. Alternatively, they can choose their location using a pop-up when they land on your site or specific pages.
You can offer customers multiple delivery options for each branch location – perhaps they prefer in-store pickup or local delivery. It’s all about providing the flexibility they appreciate.
Now that you’ve got a taste of how Orderable can revolutionize your online restaurant experience let’s dig into the process of setting it all up.
How to create your WooCommerce restaurant (step-by-step)
In this tutorial section, we’ll walk you through how to create a WooCommerce restaurant using WooCommerce, and Orderable step-by-step.
Step 1: Set up WordPress and WooCommerce
Creating an online restaurant starts with setting up WordPress and WooCommerce. Opt for a managed WordPress hosting provider, such as Nexcess, that can do the heavy lifting by automatically installing WordPress.
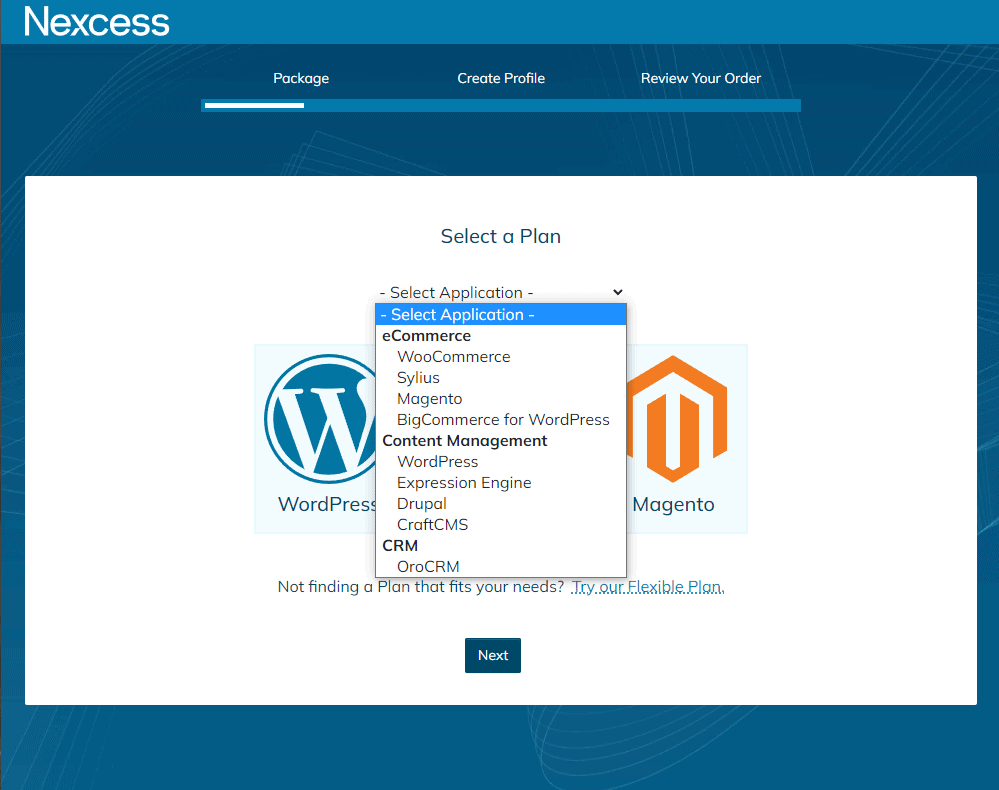
Why Nexcess? One key advantage is its ability to install WooCommerce, the e-commerce plugin, while you sign up for the managed WordPress hosting plan. A few minutes post-purchase, you’ll be equipped with login credentials that’ll give you access to your WordPress website.
Start your website customization by setting up essential ecommerce store details, such as:
- Basic information about your restaurant, including its address, operating hours, and general business specifics.
- Payment methods, tax details, pricing structures, etc.
Following this, it’s time to infuse personality into your website by choosing a WordPress restaurant theme. Themes set your site’s overall look and feel, meaning you won’t have to build from the ground up.
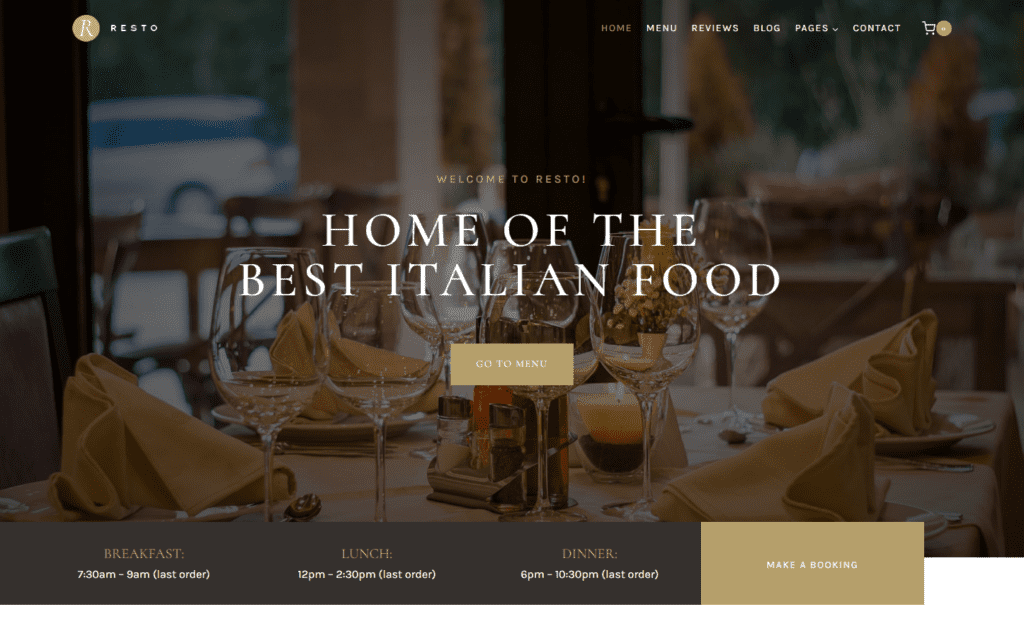
Kadence WP offers a selection of eye-catching free restaurant themes. For instance:
- Gourmet Burger: Ideal for fast food joints with burgers, fries, and pizza on their menu.
- Resto: A perfect fit for chic and sophisticated dining establishments.
To access these themes, install the Kadence Starter Templates plugin from the plugins section of your WordPress dashboard. Choose your desired template as your theme, and voila! You’ve completed the first step. Now, let’s move on to the next stage.
Step 2: Install and configure Orderable
For this guide, we’ll install and customize some basic settings for Orderable Pro (your online ordering system). You can purchase Orderable Pro from the Orderable website.
Then follow these simple steps to add Orderable to your WordPress site:
- Go to Plugins > Add new from your WordPress dashboard.
- Then click the Upload Plugin button at the top of the page to upload the .zip file you were sent containing the downloaded Orderable file.
- Finally, click Install Now and Activate Orderable on the next page.
- Repeat the same procedure for the Orderable Free version and activate it also.
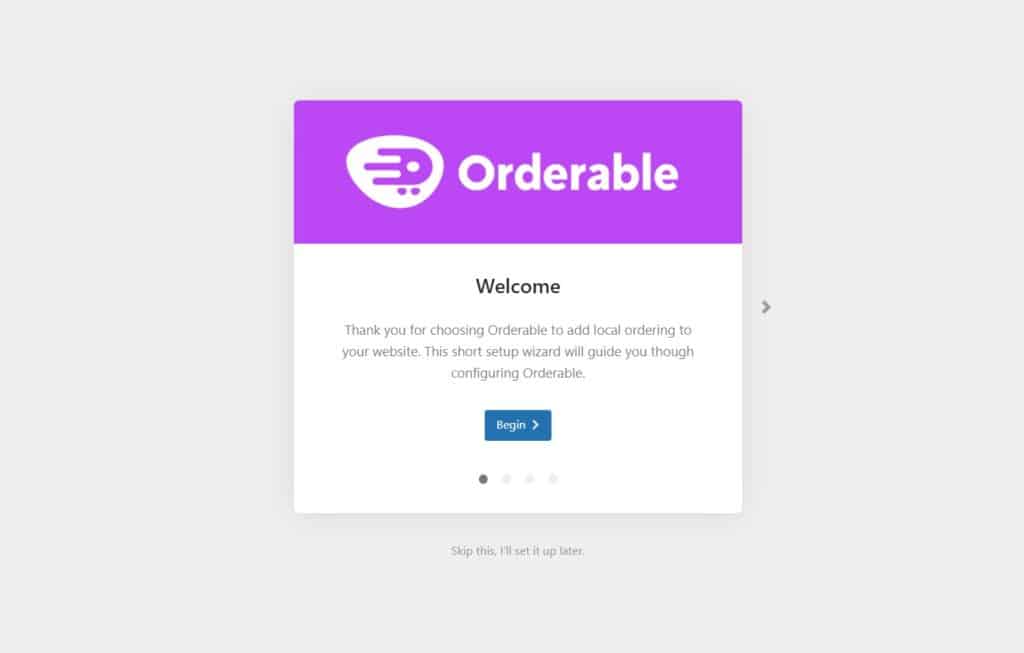
Next, we’ll start the onboarding process in Orderable to customize Orderable.
- Orderable will ask you to install WooCommerce. Go ahead and install WooCommerce if you have not already.
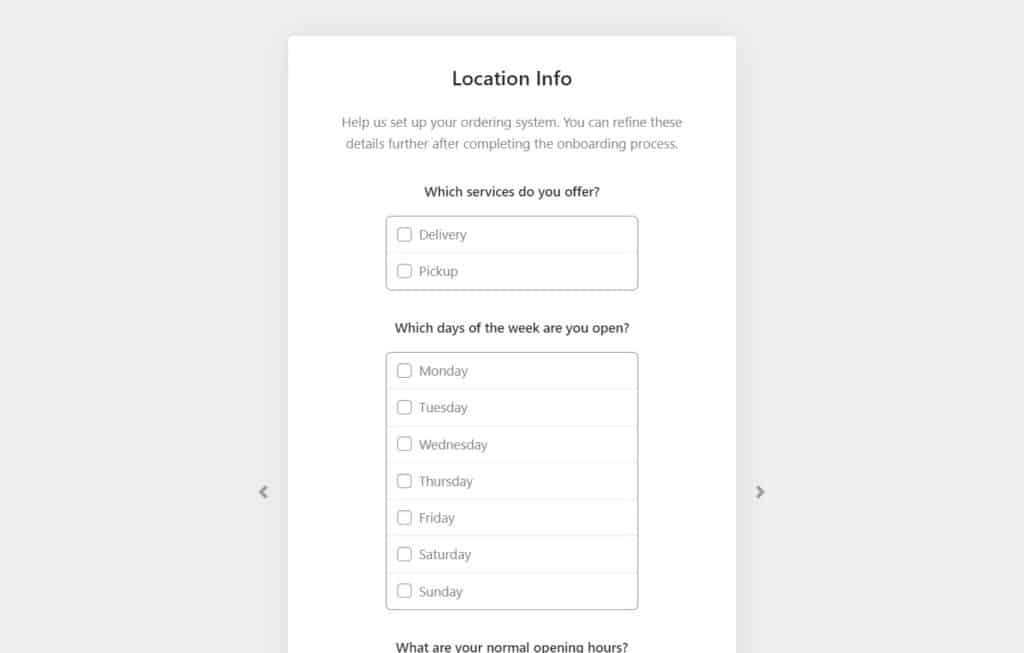
- Next, you’ll enter your business information, such as business name, address, city, country/State, postal code, and email.
- Next, you’ll choose which services you offer. It can be delivery, pickup, or both, days of the week you’re open, opening hours, and that’s it, you’re done.
- If you made any mistake, click on Store settings at the top of the page to make changes.
- You’ll be able to make additional settings, including updating your timezone, holiday hours, service hours, max orders, timeslots, etc.
- Always make sure to Save changes when you’re happy with all the changes you’ve made.
Once you’re done with this basic setup, let’s proceed to the next step and add food items to your WooCommerce store.
Step 3: Add products (menu items) to your website
Adding menu items is as simple as adding a WooCommerce product. We’ll do this using from WordPress dashboard. Follow these steps to add food items to your website:
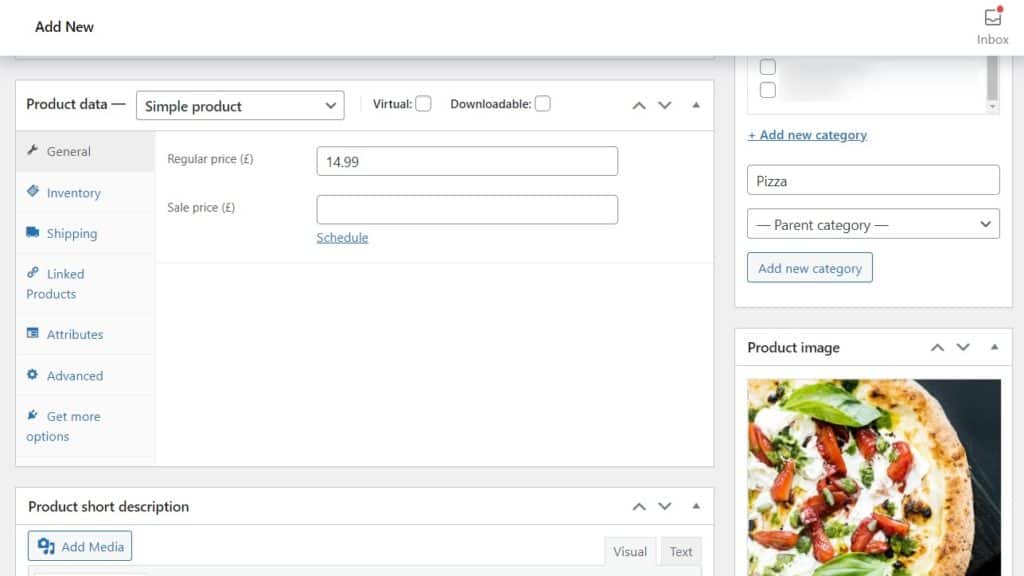
- Go to Products > Add New. You’ll be directed to a page where you can add all the information about your food item.
- You will be able to do the following for your food item or dish:
- Give it a title in the title area.
- Set a price in the Product data section.
- Set the product image link in the Product Image section on the right side.
- Create various product categories, for instance, mains, desserts, starters, etc.
- Click Publish when you’re happy with your product.
After adding your products, you can now create and customize an ordering layout for them.
Step 4: Customize your ordering layout
In this step, we’re going to customize a food ordering layout to show your customers and allow them to place an order. This will be your restaurant’s menu.
To do this, take the following steps:
- Go to Orderable > Layout Builder then click the Add New button at the top of the page.
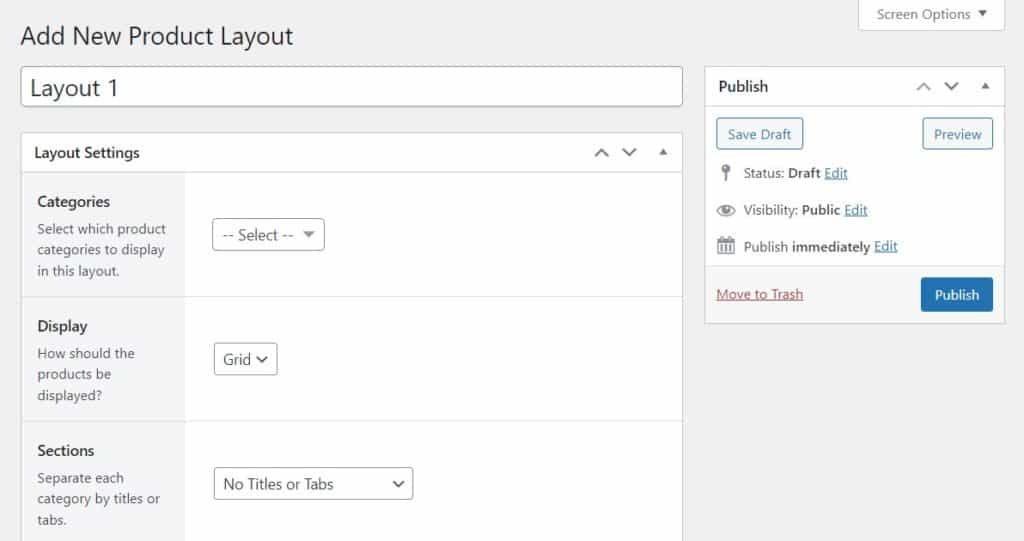
- Next, give your layout a title name. You’ll have a few customization options to finish this in the Layout settings section. You can:
- Select which categories you’d like it to include in the layout.
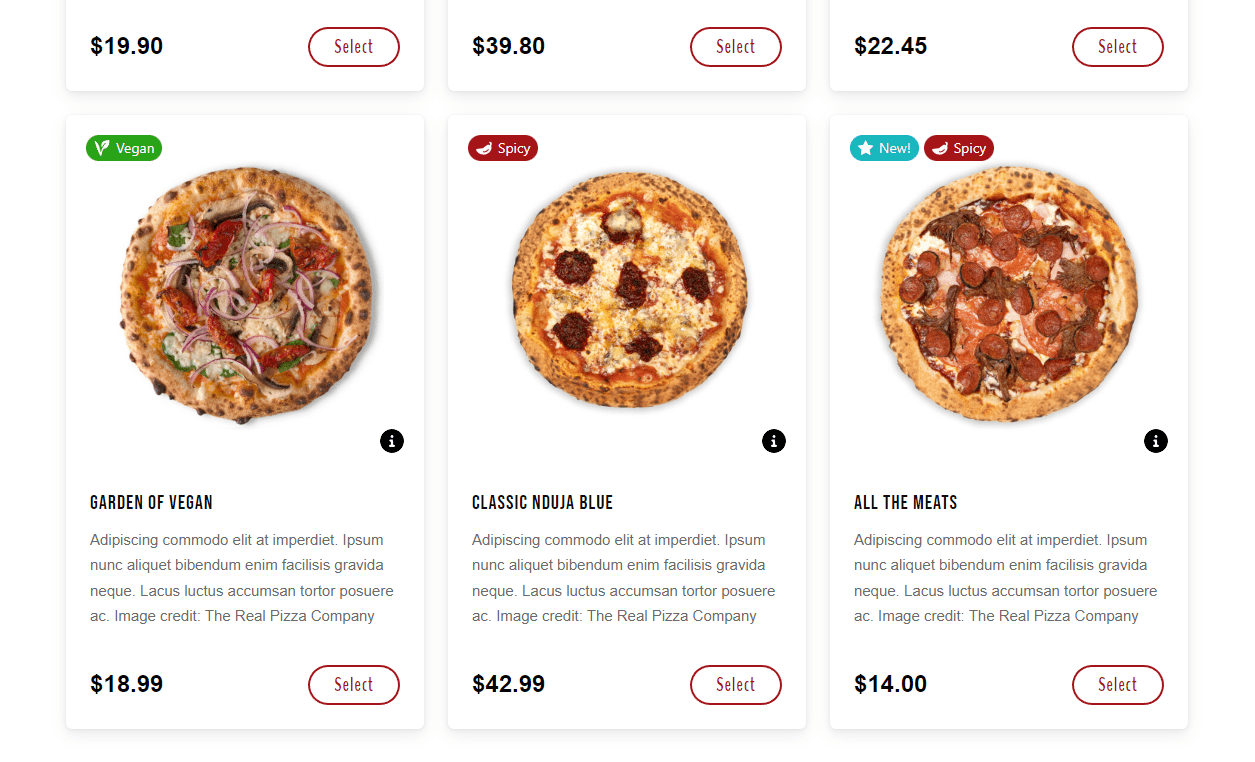
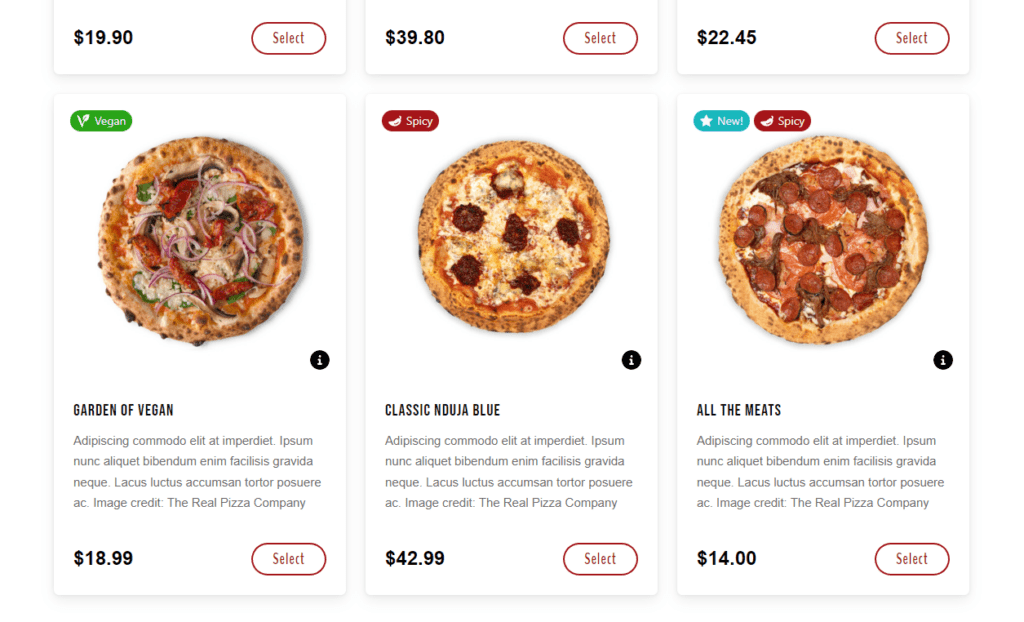
- Select if you want your layout to display in a Grid or List. You’ll be able to see a live preview of what this will look like at the bottom of the page.
- Decide how you want each category to be displayed to allow your customers to navigate the menu layout a little better.
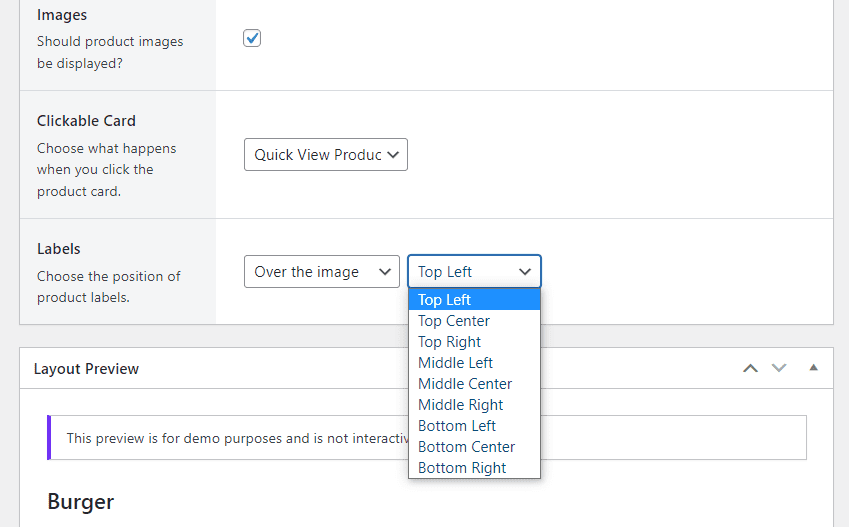
- Change product image layout.
- Decide if you want images to show and if you want the whole menu item to be clickable or just the button.
- Click the Publish button to update all the changes you’ve made.
Add your layout to a WordPress page
With your ordering layout already set, let’s add it to a page in WordPress.
Follow these steps:
- From your WordPress dashboard, hover over Pages and click Add New and name this page Menu. This wi be your restaurant’s online menu.
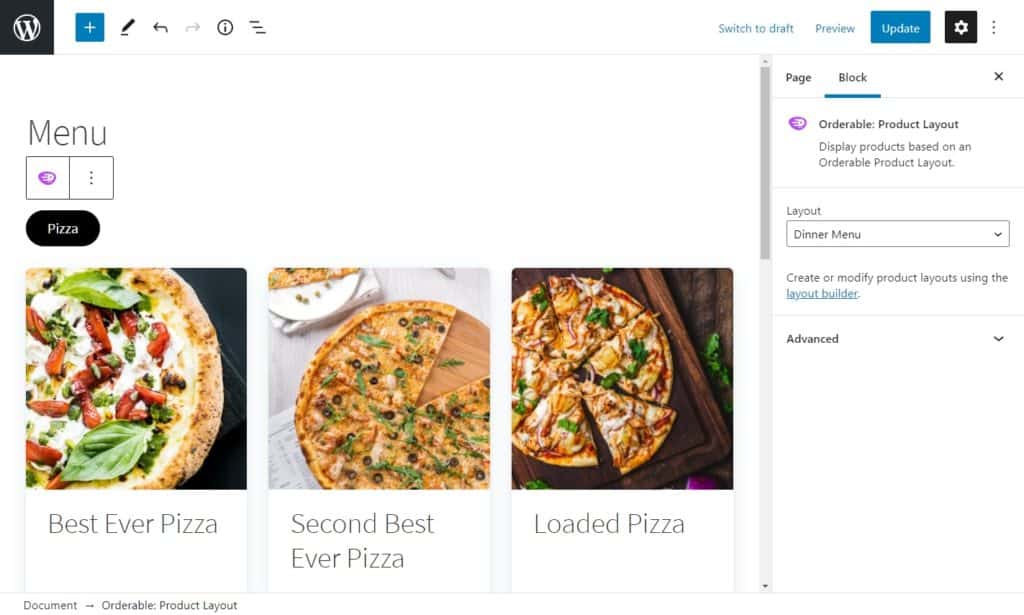
- Then, click the black plus sign to add a block and search ‘Orderable’ in the search area.
- Next, click the Orderable: Product Layout block.
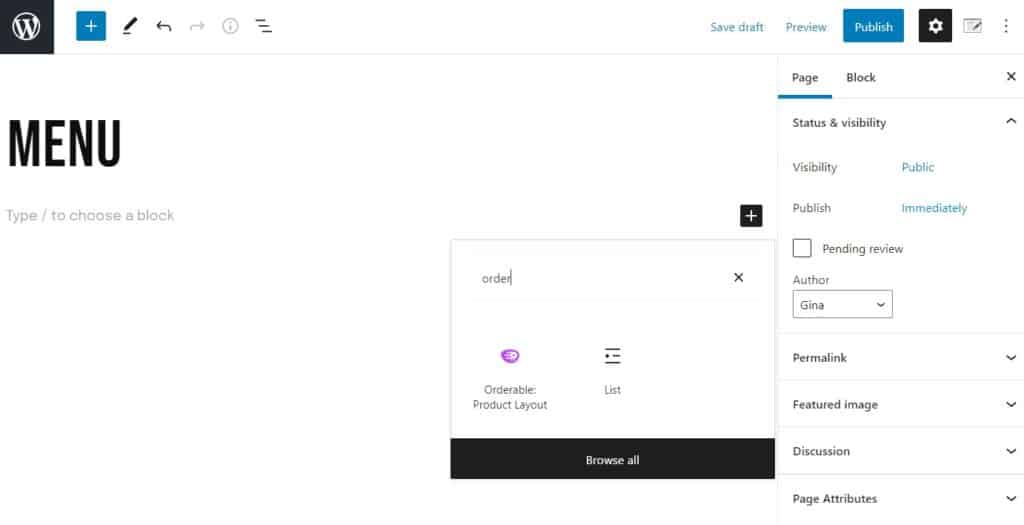
- A generic product grid will then be added to your page. Make sure to select your layout from the right-hand Layout dropdown and then click Publish.
Alternatively, you can add your layout with a shortcode. To do this:
- Hover over Orderable in the WordPress sidebar and click Layout Builder.
- Here you’ll see the layout you just created and a column called Shortcode.
- Copy the shortcode you see in this section and then hover over Pages in the WordPress sidebar and click Add New.
- Then paste the shortcode you copied earlier in the Type / to choose a block section and Publish.
You can live preview your menu page on the front-end side to check if everything’s okay.
Step 5: Set up delivery (and pickup) timeslots
For those interested in offering customers the option to select specific times for their delivery or pickup, setting up custom time slots aligned with your store’s schedule is the way to go. Don’t worry – we’ve got you covered on how to customize them in this guide.
The setup process for your time slots in Orderable involves the following steps:
- Navigate to your WordPress dashboard, find Orderable > Locations, and click Edit on the location where you wish to implement time slots.
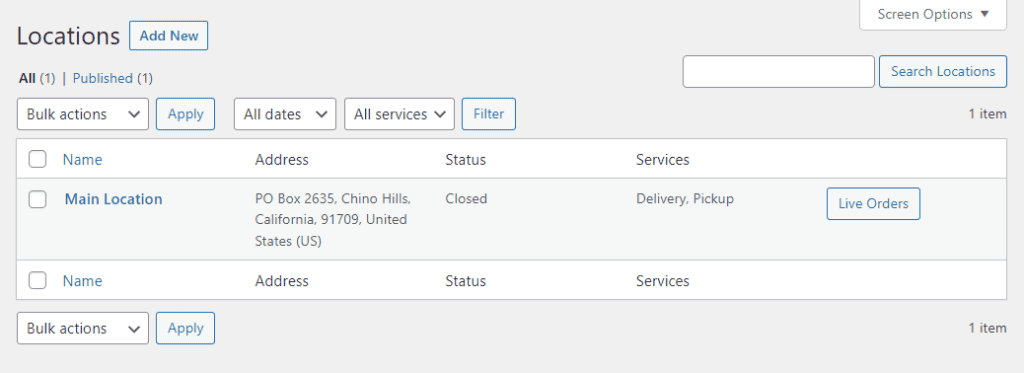
- Then, proceed to the Services section located further down on the page.
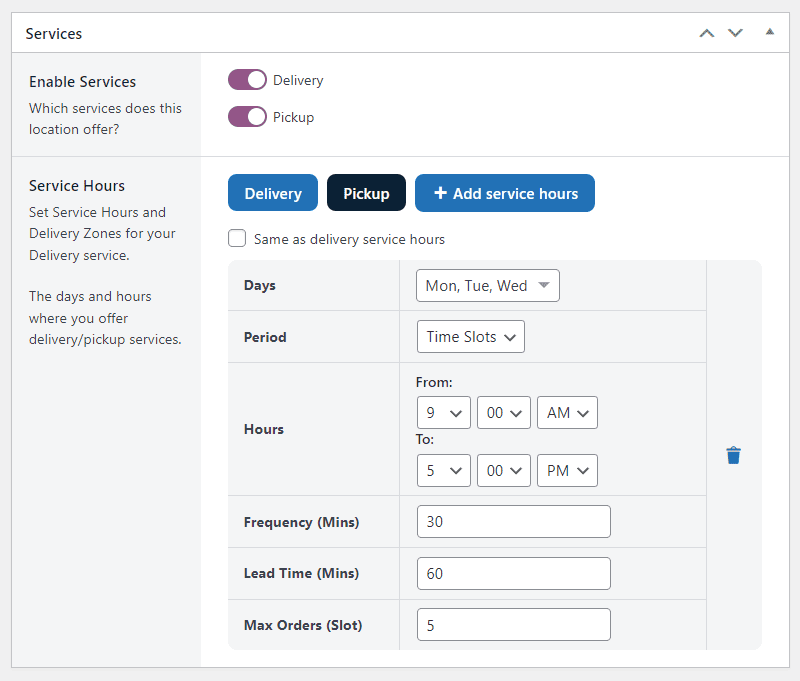
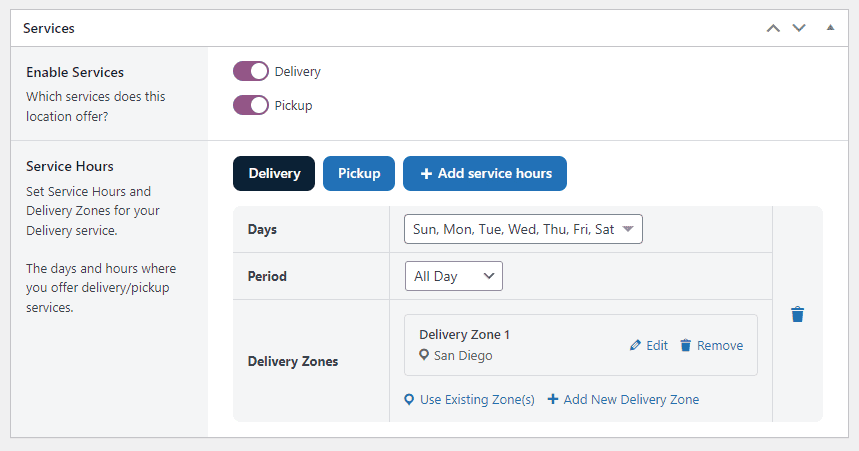
- You’ll notice options for both Delivery and Pickup, provided they are activated.
Both Delivery and Pickup sections feature the same settings, and you can toggle between the two using the respective buttons.
Let’s break down each setting:
- Days: Using the Select dropdown, choose the days you want the settings to be applied. For instance, if you wish to offer different time slots over the weekend, select Saturday and Sunday and adjust your time slot settings accordingly. To add time slots for the rest of the week, click + Add service hours.
- Period: Here you determine whether you want to add specific time slots or provide an all-day delivery/pickup service. Choosing Time Slots will present you with additional settings.
- Hours: This setting allows you to specify the duration when you want to offer delivery/pickup services.
- Frequency (Mins): This setting establishes how often a delivery or pickup slot is available. For instance, if you want to offer slots every 30 minutes, input ’30’ here.
- Lead Time (Mins): Lead time refers to the minimum amount of time before a particular time slot can no longer be selected. A lead time of ’30 minutes’, for example, means customers cannot order for that time slot if it’s less than 30 minutes before the slot begins.
- Max Orders (Slot): This setting allows you to limit the maximum number of orders accepted for each individual time slot.
Once you’ve adjusted the settings to your satisfaction, scroll down and click the Save Changes button. Your custom time slots will now be available for customers to choose from.
That’s it. Time slots will now be available from the front end of your website for customers to select.
Step 6: Add payment gateways
In this step, we’ll show you how to add payment gateways to your restaurant using WooCommerce.
- From your WordPress dashboard, go to WooCommerce > Settings and click the Payments tab at the top of the settings page.
- You’ll see a list of available payment gateways. This includes:
- Direct bank/wire transfer – allows you to take payments in via BACS.
- Cash on delivery – enables you to have your customers pay with cash (or with other means) upon delivery.
- Cheque payments – lets you take payments in person via checks.
- PayPal Standard – is added by default to your website.
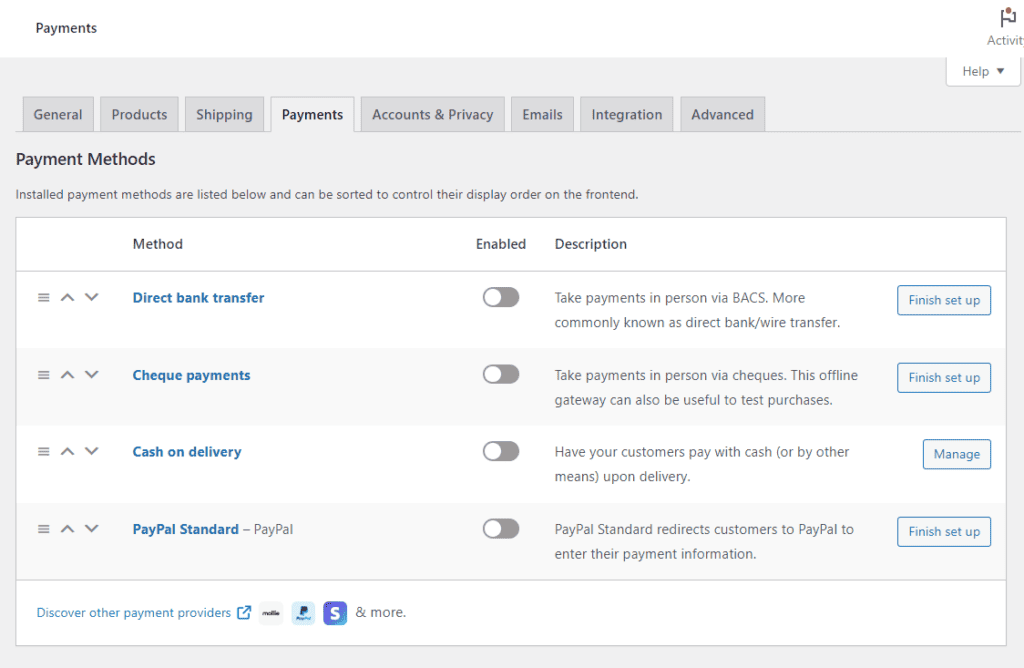
- Proceed to choose the gateways you want to enable for your restaurant by clicking the Finish setup button.
- Customize any additional settings or options specific to the chosen payment gateway, like name, description, instructions, and more. This may include enabling sandbox mode for testing, selecting supported currencies, or configuring payment notifications.
- Prioritize the payment gateways by dragging and dropping them in the desired order. This determines the order in which the payment options are displayed to customers during checkout.
- Click Save Changes.
- Test the payment gateways by placing a test order or using the provided testing options available with the payment gateway.
Once you’ve verified that the payment gateways are working correctly, your WooCommerce restaurant is ready to accept online payments. That wraps it up! You’ve created a WooCommerce food restaurant.
Start your WooCommerce restaurant today
Launching a WooCommerce restaurant in 2024 is a smart business strategy. The appetite for online food ordering is massive, and a majority of customers prefer this convenience.
By harnessing the power of WooCommerce and Orderable, you can build a top-notch restaurant ordering system and website and tap into this booming market. The rewards? Think about increased sales, happy customers, and a thriving business.
Get Your Restaurant Business Online With Orderable
Orderable is a user-friendly WordPress plugin that adds online ordering to your restaurant website.
Add your dishes, create your online ordering menu, customize your delivery schedule, and manage orders with ease.
Is it time you brought your restaurant to the digital world? Get started today by installing Orderable on your WordPress website.
From there, you can truly make your WooCommerce restaurant work for you by:
- Offering product add-ons for a personalized dining experience.
- Incorporating checkout tipping to encourage a culture of generosity.
- Deploying a QR code table ordering system for effortless dine-in experiences.
And that’s just the start. Welcome to the future of your restaurant, and happy cooking!
Gina Lucia is our in-house Content Manager at Orderable. She writes articles, user guides, technical documentation, and creates videos on everything WooCommerce and Orderable.
Gina has been working in the WordPress/WooCommerce space since 2012 when she developed WordPress websites for clients large and small.
For the past 8 years, she’s been writing about everything WordPress and WooCommerce, becoming an expert in what makes a WooCommerce store succeed.
When not writing, Gina loves to tend to her vegetable garden, read, or travel to mainland Europe.
Don’t miss out on the latest Orderable news!
Sign up for our newsletter to receive the latest news from the blog, you’ll get pinged every week with a digest of the latest updates.
[fluentform id=”6″]

Related Articles
How to Create a Restaurant Loyalty Program in 2026

How to Start a Cake Business From Home in 2026
10 Irresistible Restaurant Menu Ideas for 2026
Get Your Restaurant Online With Orderable
The WooCommerce plugin designed to help restaurants take orders online – with no added fees!
View Pricing
