How to Make a Food Ordering Website in 2026
How to Make a Food Ordering Website in 2026

Gina Lucia


If you’re wondering how to make a food ordering website in 2026, we have your back.
In this guide, we’ll walk you through the steps you need to take to set one up. This guide is straightforward and perfect for any skill level.
By the end of this guide, you’ll be able to create an efficient and user-friendly restaurant website fully customized to meet your business’s needs.
This guide is perfect for food ordering businesses like:
- Takeaways/local establishments.
- Bakeries.
- Local restaurants and cafes.
- Any other food delivery business.
Plus, we’ll walk you through how to do it all with the help of the WooCommerce plugin, Orderable.
Get Your Restaurant Business Online With Orderable
Orderable is a user-friendly WordPress plugin that adds online ordering to your restaurant website.
Add your dishes, create your online ordering menu, customize your delivery schedule, and manage orders with ease.

First, let’s first address deciding what you’ll need your food-ordering website to contain.
Step 1: Decide what you need your food ordering website to contain
As a food business owner, a website is key in connecting you with your customers. It showcases and attracts customers to your business, and if you set it up well, it can help you to retain them.
To achieve this, there are some things that your food-ordering website needs to have.
So, before you can even pick an online ordering platform or start building your website, you first need to write down these requirements. This will help you to decide what your website will offer to your customers.
| Feature | The benefits |
|---|---|
| Pickup & Delivery options | Provides flexibility for local customers |
| Delivery time slots | Improves food freshness and staff scheduling |
| Real-time order updates | Builds trust and reduces support queries |
| Product add-ons | Helps upsell and personalize meals |
| Checkout tipping | Encourages customer generosity |
| Food labels (vegan, halal, etc.) | Improves clarity and customer trust |
To do this, you’ll have to ask yourself the following questions.
Do you want to offer local pickup and delivery or just delivery?
Local pickup and delivery services dictate how your customers will receive their orders. You can allow customers to pick up their orders from your premises or deliver them to their doorstep.
Local pickup and delivery are suitable in these situations:
- Local pickup – customers near your premises can pick up their orders in person. This also works when customers want to save on shipping costs and inspect the food products before receiving them.
- Delivery – most customers prefer delivery for food products, so courier businesses like Uber Eats, DoorDash, and GrubHub are especially popular but come at a cost. Using your own delivery drivers is a great option if you want to take control over your delivery schedule and the quality of your drivers.
Free Download: Restaurant Business Plan Template
Want to start your restaurant business without jumping through heardles? Our free restaurant business plan template will walk you through the steps.

The Food Marketing Institute reports that 69% of customers prefer delivery over on-premises pickup for food products.
Customers have very busy schedules today, and offering delivery services helps them get your product conveniently.
Having both options available on your food delivery website allows your customers to choose the best option.
Do you want customers to select their own delivery time and date?
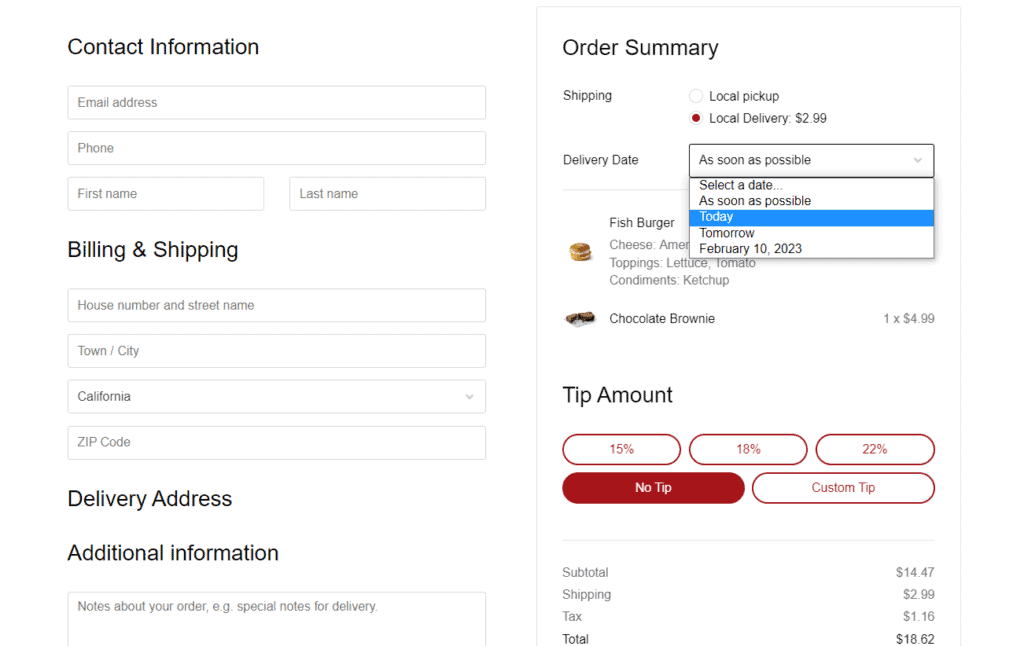
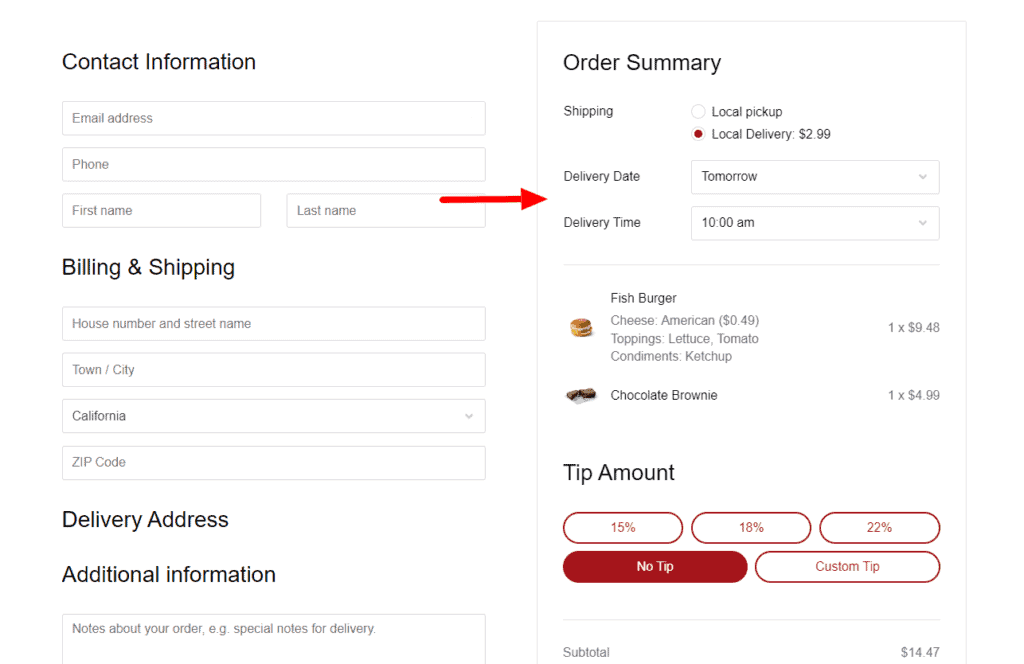
Since food products are typically perishable, customers may like to choose the time of day they receive them so they can consume them as soon as possible. This is feasible if you allow customers to select their delivery time and date.
Or, if you offer takeaway on your food delivery platform, allowing customers to select a specific time for delivery, or even as soon as possible, will allow you to set your schedule accordingly.
Adding delivery time and date to your ecommerce website also enables you to create delivery schedules that your staff and resources can handle easily. In doing all this, you improve customer experience and satisfaction at your convenience.
Do you want to give customers updates on their orders once they’ve placed them?
Giving customers updates on their orders once they’ve placed them is a great way to ensure they have a positive experience with your food ordering business. This is because customers value communication throughout this process.
You can send notifications to inform customers of the different stages their orders are in, for instance, processing, shipped, in transit, and ready for pickup.
Keeping customers in the loop shows that you also value communication which can encourage them to buy from you again. It also lets you keep up with 3rd-party food delivery apps like Uber Eats, which offer real-time order updates by default.
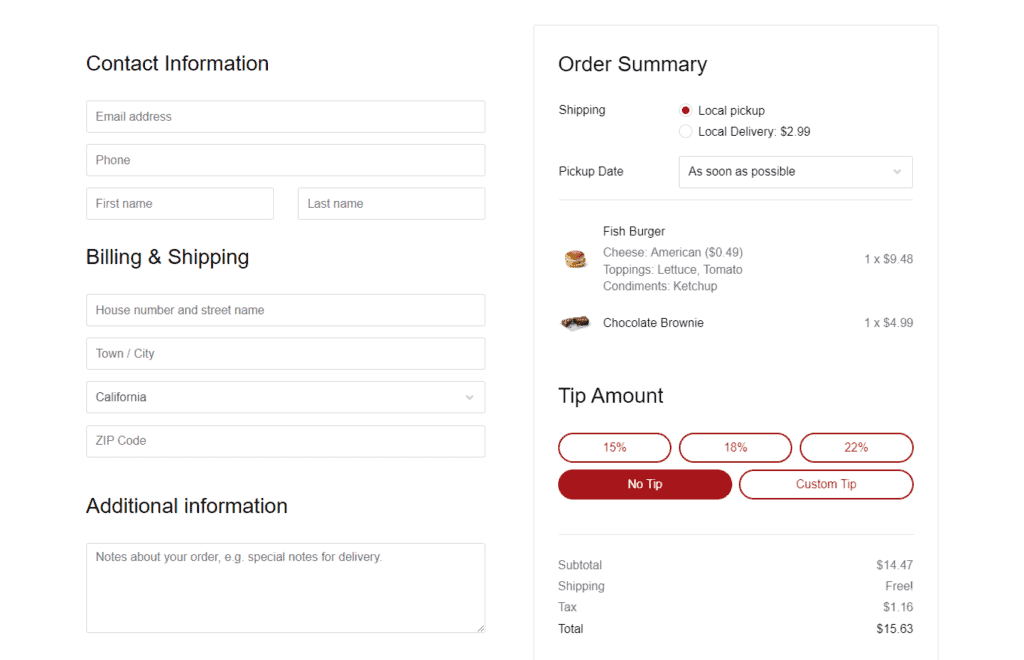
Do you want additional features such as product add-ons and checkout tipping?
You can also have features on your food ordering website that generate additional revenue. These can be product add-ons that enable you to upsell certain dishes or checkout tipping, where customers can leave a tip if they are pleased with your service.
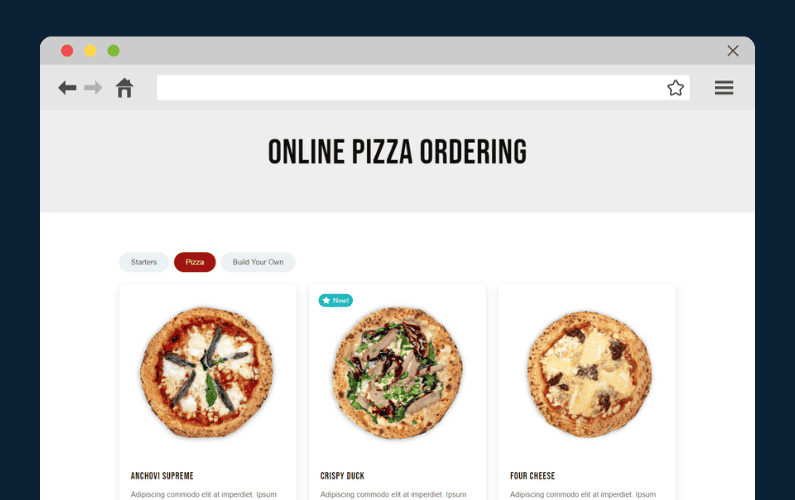
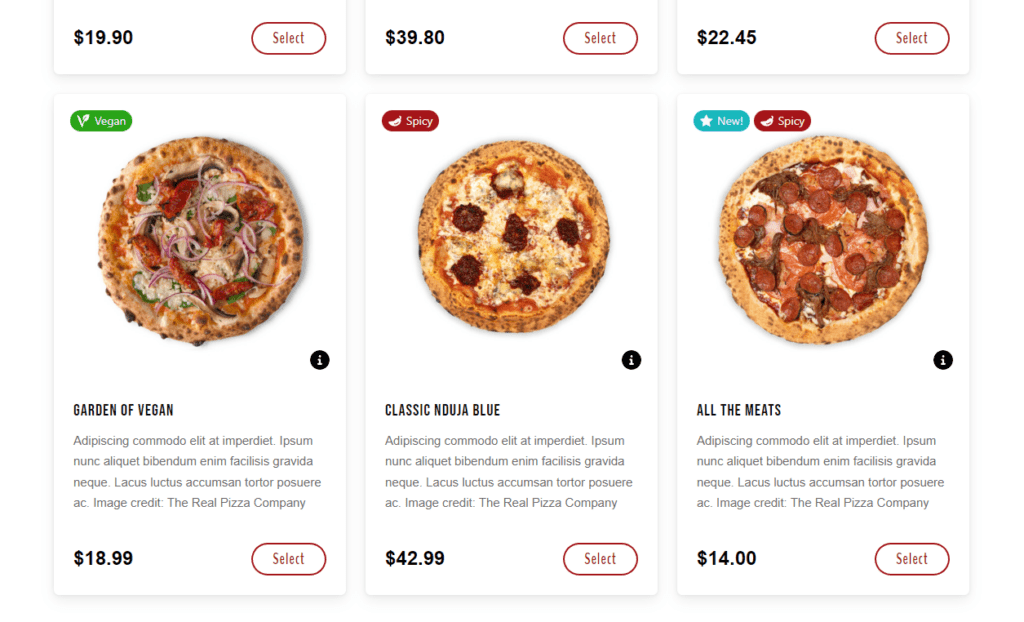
If you offer special categories of food like vegan, vegetarian, halal, etc., you might also want to add food labels to make them stand out. Customers looking for these types of food can spot them at a glance.
After all your requirements are in order, you can pick the platform you want to build your food delivery website.
Step 2: Pick the platform you want your food delivery website to sit on
A platform is a service that provides the tools to create, design, and publish your food delivery website. Using these platforms, you can create, edit, publish, and manage pages, posts, media, etc., without writing code.
| Platform | Ease of Use | Customizability | Fees per Order | Best For |
|---|---|---|---|---|
| WordPress + WooCommerce + Orderable | ⭐⭐⭐⭐ | ⭐⭐⭐⭐⭐ | ❌ None | Full control, custom sites |
| Shopify + food app | ⭐⭐⭐ | ⭐⭐ | ✅ Yes | Quick setup, less flexibility |
| Wix | ⭐⭐ | ⭐⭐ | ❌ | Small-scale use, low customization |
| Uber Eats / Just Eat | ⭐⭐⭐⭐ | ❌ | ✅ High | Marketplace exposure, limited control |
Currently, there are numerous platforms. Some popular ones include WordPress, Joomla, Squarespace, Shopify, and other content management systems (CMS).
It is important to pick the right platform since it will dictate how you create your website and manage content. You would want one that is easy to use, secure, and well-suited to your food-ordering business.
This is why we highly recommend WordPress and WooCommerce.
Why you should use WordPress and WooCommerce to set up your food delivery website
WordPress is the most popular CMS, accounting for nearly half (42.5%) of all websites today. This includes different types of websites such as blogs, portfolios, membership sites, etc.
WooCommerce is the WordPress solution for ecommerce websites. Together, WordPress and WooCommerce power over 160 million active websites, which is 8.7% of all websites today.
Here are a few reasons why these two are so popular:
- WordPress and WooCommerce are easy to set up and use. You can have your website ready in just a few clicks.
- WooCommerce is fully customizable to meet your food business’s needs. You can modify your ecommerce store’s appearance, add payment options, etc. Also, it has an extensive library of plugins built to add functionality to your WooCommerce website, like Orderable, the online ordering system we’ll be using.
- Both are open-source, meaning you can customize your WooCommerce website to your liking without incurring extra costs.
- WordPress and WooCommerce are highly secure. Both have a large developer community dedicated to generating updates for them in all aspects, including security, performance, etc. This helps to keep your food ordering website secure and ensures that it is always running smoothly.
- Both are scalable, making them capable of comfortably supporting your food business when it grows.
After picking your platform, you’ll need to get a domain name and hosting for your website. Let’s address what these are and how to get them next.
Step 3: Buy your website domain and hosting
Before you can start building your website, you must first purchase a domain name and hosting.
- A domain name – is the address of your website. This is what customers will type on the search bar of their browsers to find your website, for example, mywebsite.com.
- A hosting service – is simply a rented space for storing your website’s files and data online. This way, customers can access it from anywhere in the world.
You should carefully select your hosting provider because it will determine your website’s availability and performance. For this reason, we recommend managed WordPress hosting with Nexcess. Managed WordPress hosting means that Nexcess has hosting plans specifically tailored for WordPress.
Your website will have all the resources optimized to deliver the best experience possible for a WordPress website. Also, it has a high availability which ensures that your website is available whenever customers want to use it.
Nexcess offers domain registration and hosting all in one place, making integrating your domain name with your hosting account easier.
That being said, let’s first see how you can register for a domain name and get hosting for your website from Nexcess.
Register for a domain name
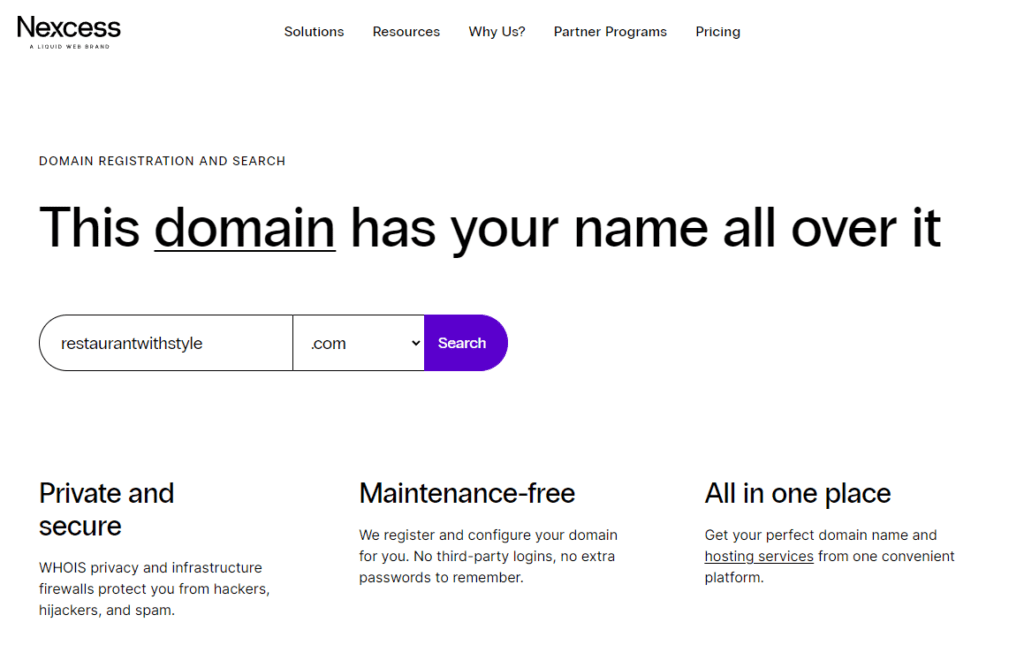
You can buy your domain name from the Nexcess website: nexcess.net/domain-registration by following these steps.
- From the Nexcess website, type the domain name you want to use and select your top-level domain (.com, .net, .org, etc.).
- Click Search to see if it’s available.
- Click on the cart icon next to your domain name on the next page to add the domain name to your cart.
Scroll down and click the Proceed to Hosting Options button to get web hosting for your WordPress website.
Get web hosting
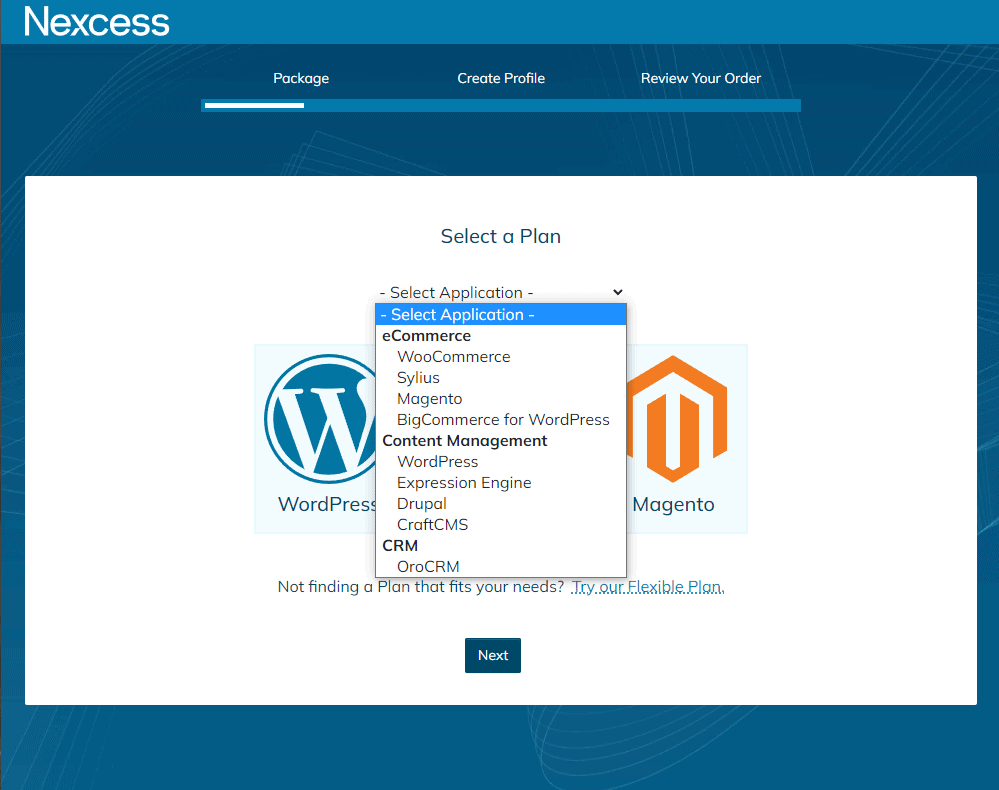
For this guide, we’ll use the managed WooCommerce hosting plan since we want to create a food-ordering website.
- On the next page, click on the Select Application dropdown. Under ecommerce, select WooCommerce. You will see the hosting plans displayed on the next page. You can see the monthly or annual prices by clicking the toggle switch at the top.
- If you’re a startup business and don’t have many files or monthly visitors, the Starter plan should work for you. Click on the Select button under this plan and then Next.
- You will be directed to the checkout, where you can complete the purchase for both your domain name and hosting plan.
Now that everything is in place, you can set up your website.
Step 4: Set up your WordPress website
Since you’ve selected the managed hosting plan for WordPress/WooCommerce, Nexcess will set up the basics. This includes integrating your domain name and hosting with your WordPress website and installing WooCommerce.
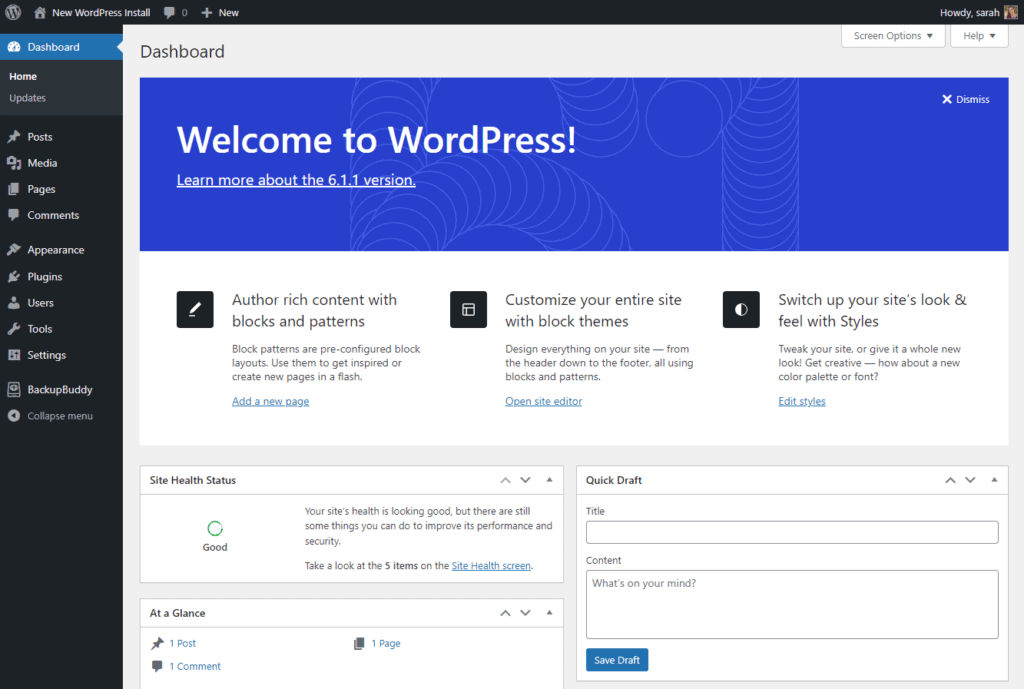
To continue setting up your WordPress website, you must first log into it.
Log into your WordPress website
To log into your WordPress website, you must first retrieve your login credentials from your Nexcess client portal.
To do this:
- Sign in to your Nexcess client portal and click on Plans.
- Next, go to Menu > Environment. Under Application, you will see the admin username and password.
- Click on the eye icon to show your password.
- You can now use these credentials to log into your WordPress website. To access the login page, type your domain name followed by /wp-admin like this mywebsite.com/wp-admin.
NOTE: This is just a summary. If you want a detailed guide on how to do this, you’ll find it here.
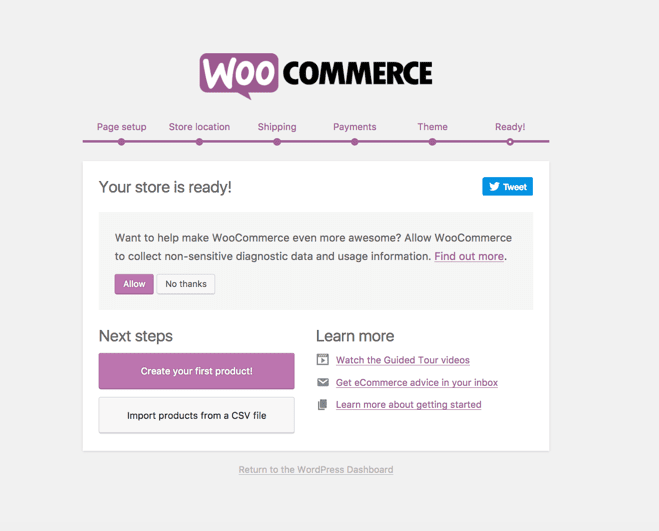
Enter your store’s information
Once logged into your WordPress website, click on WooCommerce from the left-side menu. You will be directed to a page requiring you to enter your store’s details. This includes the address, product types, industry, and specific business details like the number of products you plan to display.
You’ll see the Theme tab on this page’s last tab. You can ignore this since we’ll handle it in detail in the next section.
Step 5: Select your WordPress theme
WordPress has Classic and Block editors to enable you to build your website’s pages from scratch.
Alternatively, you can install website builders with additional features to help you design your website. But, this can take a lot of time, and you will likely make a lot of errors, especially if you’re new to these editors or website builders.
Fortunately, with a theme, you won’t have to build your pages out of nothing.
WordPress themes control your site’s general appearance, for instance, the layout of elements on your site’s pages, the color of hyperlinks, and so on. Having a general appearance in place makes creating your web pages a lot easier and faster. When you have a template to work with, using a website builder like Elementor becomes easier.
When picking a theme for your WordPress website, you should choose a niche-specific one. Niche-specific themes have templates built for specific websites, like food-ordering websites.
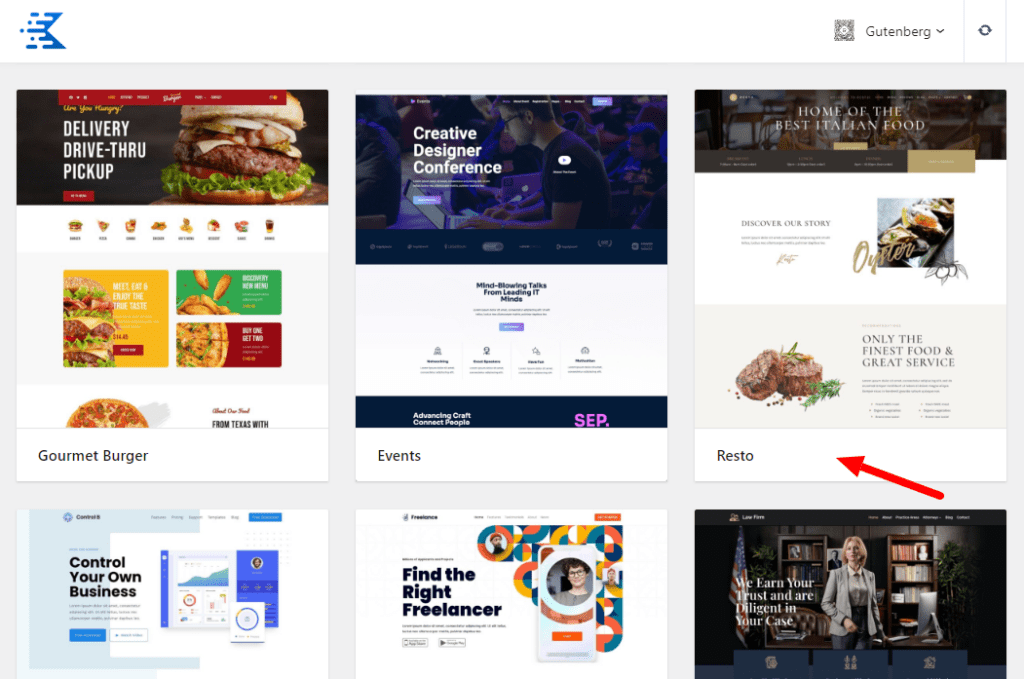
For food-ordering websites, we recommend the following niche-specific templates by Kadence WP:
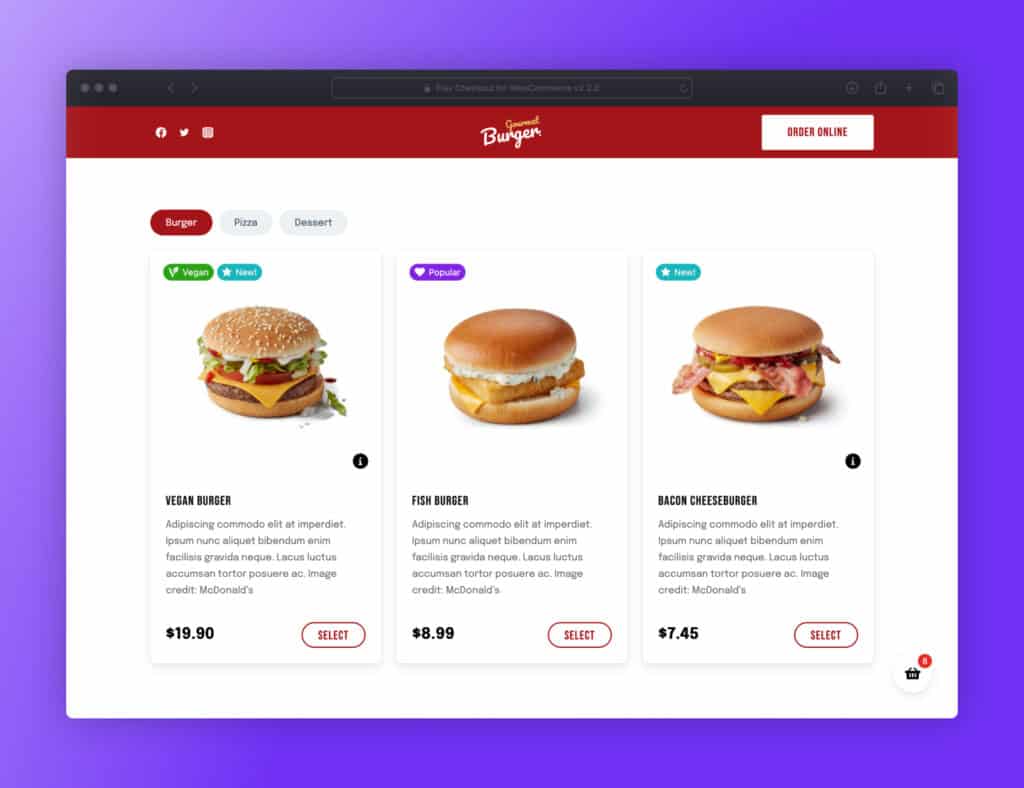
- Gourmet Burger – this theme is built for fast food restaurants which makes it perfect for food-ordering businesses. You can customize it to suit other types of food, but if you’re selling fast food like burgers, pizza, etc., having this theme is a great advantage.
- Wooden Craft – this theme has an amazing layout and a modern look that suits retailers in the food business. With Wooden Craft, you can give your food-ordering website a unique and sophisticated look.
The best part is that these themes are free and work well with the online ordering solution we’ll use later, Orderable. To use them, you only have to install Kadence and import them.
NOTE: Suppose you’re not using dedicated WordPress hosting. These themes will install WooCommerce for you, so all you have to do is enter your basic ecommerce store information once installed.
You can do it by following these steps:
- Go to Plugins > Add New from your WordPress admin panel and search for Kadence.
- Click the Install button on Starter Templates by Kadence WP. When the installation is complete, click Activate.
- While still on your WordPress dashboard, go to Appearance > Starter Templates.
- Filter to display ecommerce templates only and then scroll down. You should see these themes.
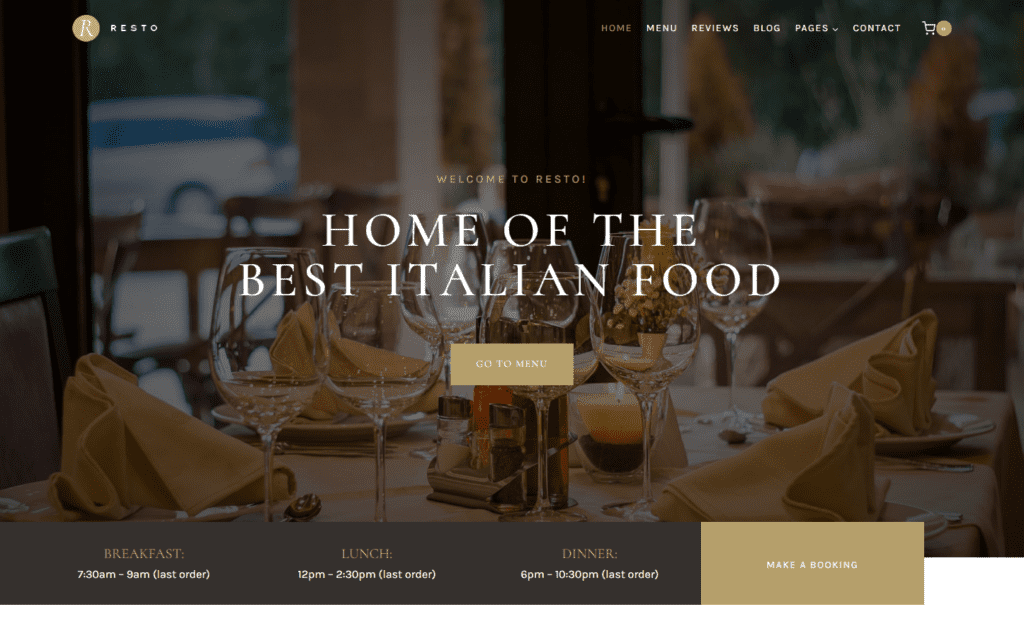
- Click on the theme you want to use. Here, we are using Gourmet Burger. You can edit the theme by either changing the color scheme or the font.
- When you’re done, you can import a single page or the whole website by clicking the buttons at the bottom left.
- Once importing is complete, click View Site for your website’s new look.
You have a fully functioning website with active pages, but one crucial thing is missing. Since we are creating a food ordering website, we need to add an online ordering solution.
Step 6: Pick your online ordering system plugin
If you want additional features such as the ones listed in Step 1 above added to your ecommerce store, you’ll need to add an online ordering system plugin to your WordPress website.
Introducing Orderable, the online ordering system plugin for WordPress
Orderable is a WooCommerce plugin that enables you to add a dynamic online food ordering system to your WordPress website. It is a powerful plugin that covers everything to do with online ordering on your WooCommerce website.
This includes creating menu layouts and adding menu items to them, offering delivery or pickup, and collecting payments.
It supports any payment gateway you might want to add (like credit cards, Stripe, PayPal, etc.), so you won’t miss out on customers by lacking their preferred payment method. Also, Orderable doesn’t charge transaction fees, leaving you to keep all profits to yourself.
With Orderable, you can offer all of the features mentioned in Step 1 and more in the following ways.
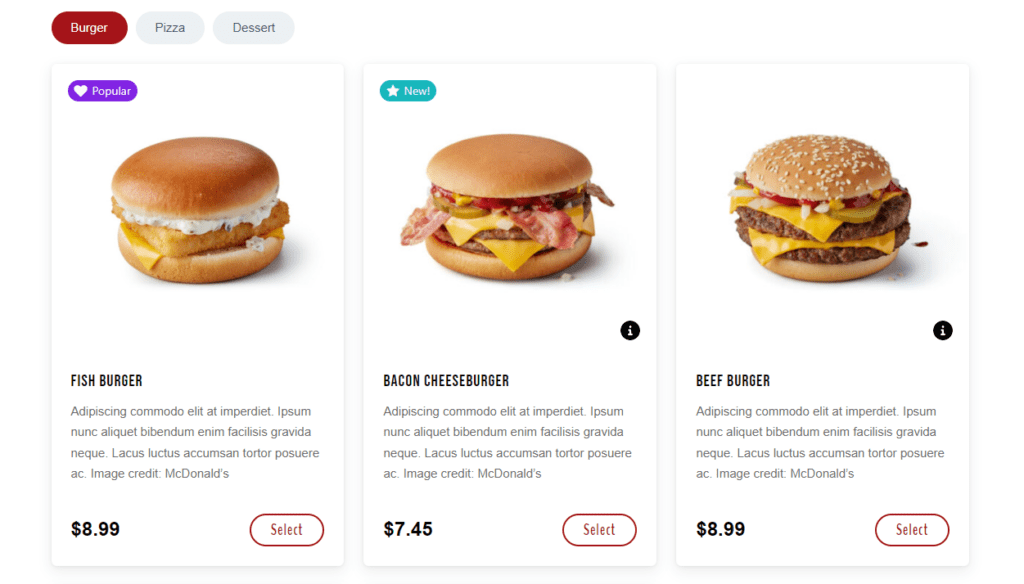
Create and display appetizing menus
Orderable makes creating menu layouts extremely easy. In just a few clicks, you can create a unique layout, add items, and display it on any page on your website.
This plugin also has a timed products feature that lets you select a given time when certain products will be displayed on the menu. As a result, you’ll be able to create dinner and lunchtime menus.
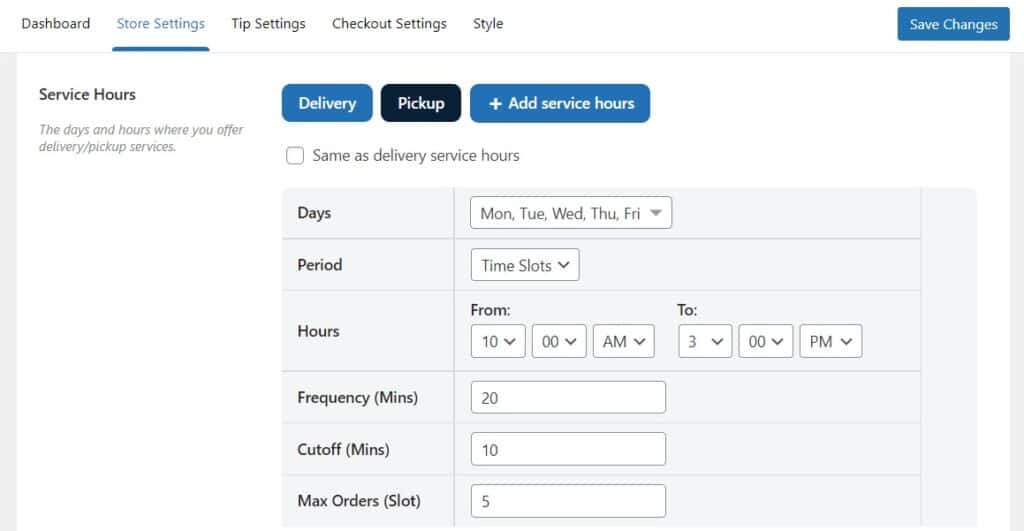
Take control of your schedule with delivery time slots
Orderable allows you to add delivery dates and time slots to your food ordering website. Customers can use them to select a time of the day at which they are available to receive their deliveries or pick their orders up. At the same time, you’ll get to set up a delivery or local pickup schedule that matches your available staff.
This way, delivery time and date slots enable you to improve your customer’s experience at your own convenience.
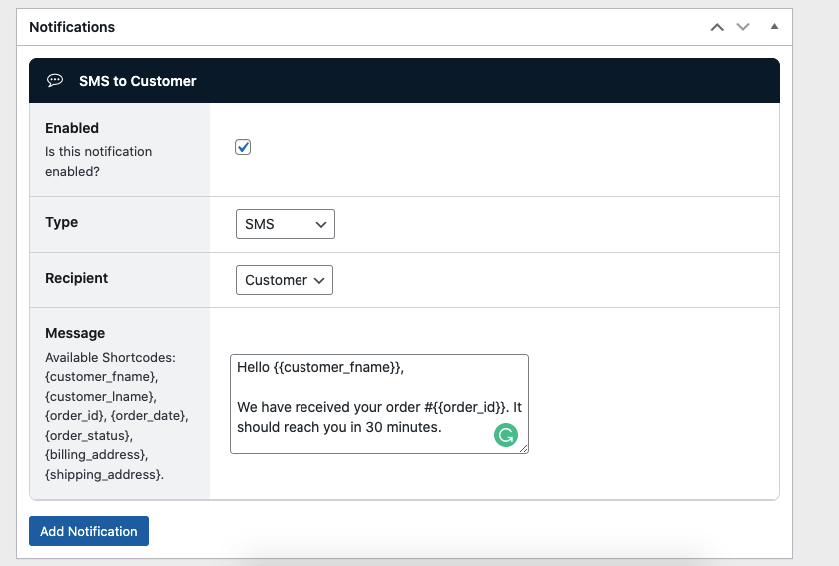
Send your customers order updates after they’ve placed it
Orderable lets you send order update notifications to your customers via the channels they commonly use, like WhatsApp and SMS messages to their phone numbers.
By sending them notifications through these channels, you ensure that they won’t miss any updates concerning the status of their order after they’ve placed it. You get to engage them throughout this process and ensure they have a positive experience with your business.
If you don’t use food delivery services like Zomato or Postmates and do deliveries in-house, you can use this feature to send updates to your order delivery staff. This could be when the order is ready for shipping, the delivery address, etc.
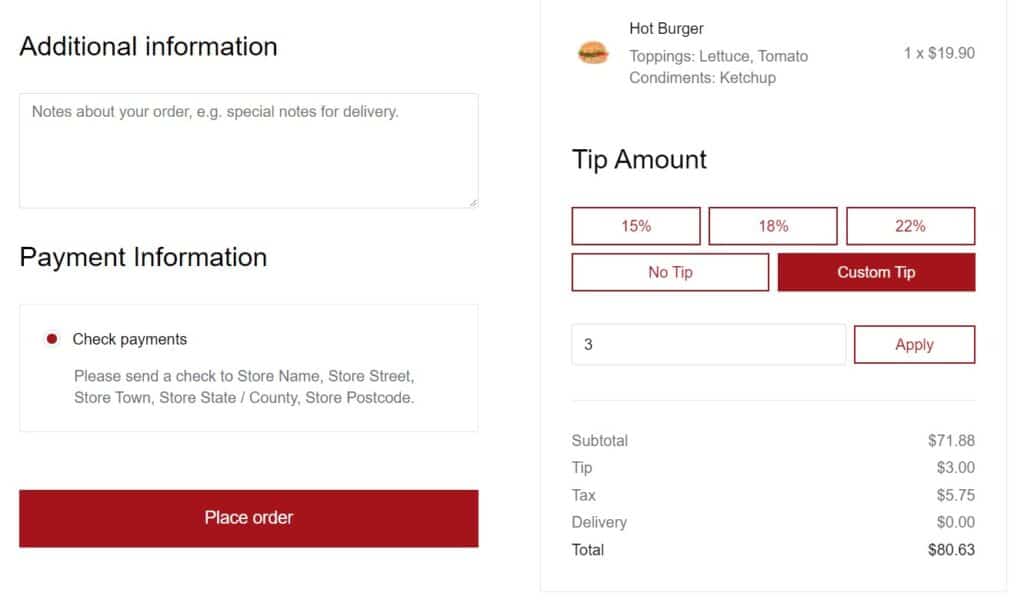
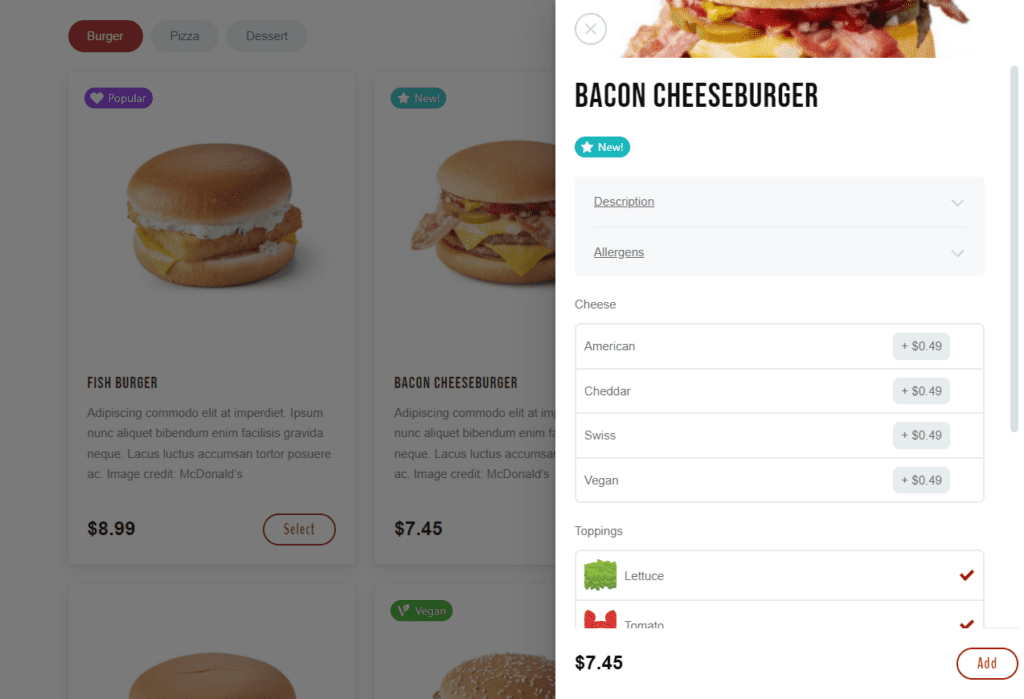
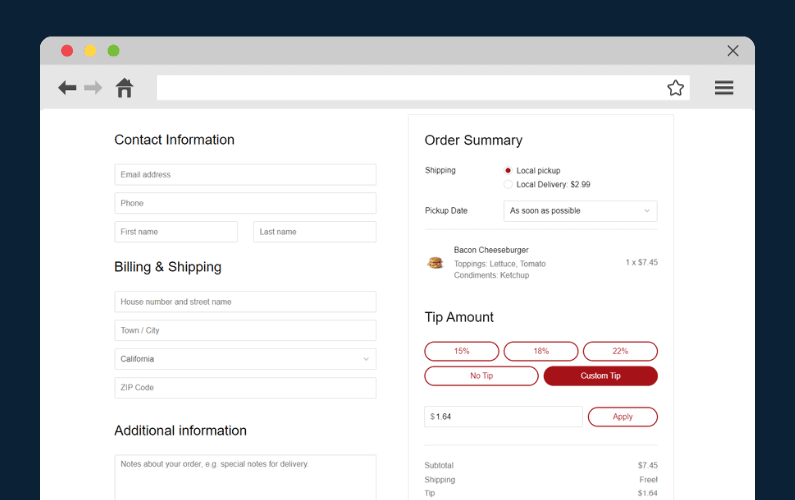
Increase your average order value with order bumps, product add-ons, and checkout tipping
As the owner of a restaurant business, you always want to maximize revenue. With the following features, Orderable has got you covered.
- Order bumps – suggest additional items to make a combo meal after a customer adds a certain food product to their cart. You can suggest fries to go with a burger.
- Product add-ons – suggest product add-ons, for instance, extra pepperoni on a pepperoni pizza for an additional cost.
- Checkout tipping – allow customers to tip you if they are satisfied.
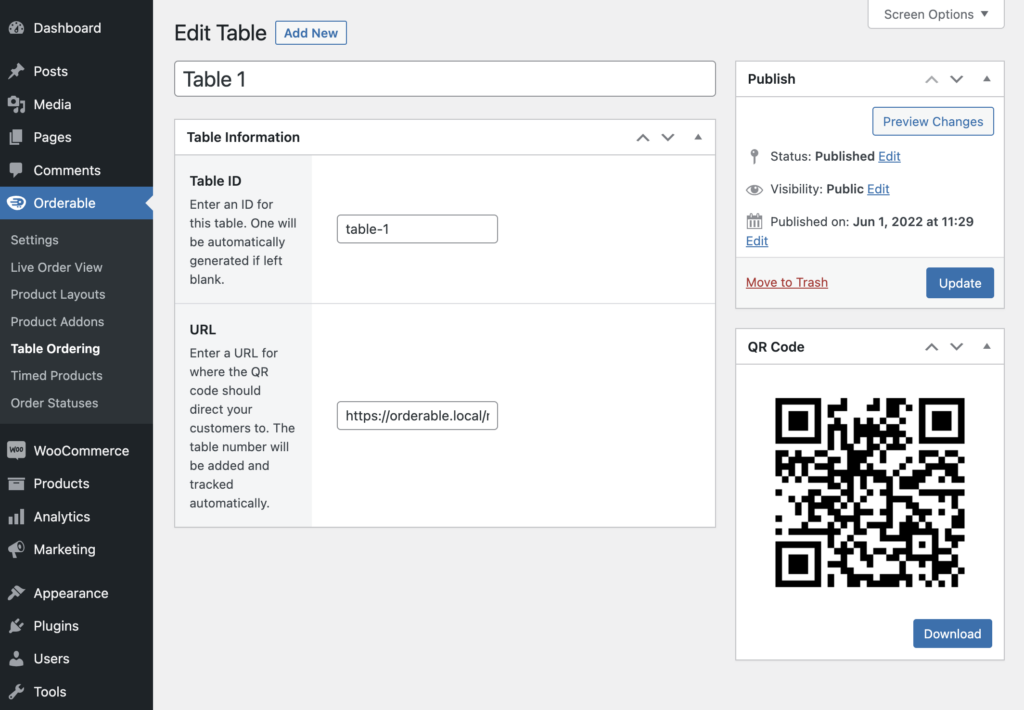
Add QR code table ordering
Orderable also allows you to improve the restaurant ordering experience for your customers using QR code table ordering.
You can do this by assigning each table in your restaurant with a QR code and linking it to the menu. When a customer sits at a table, they can scan the QR code and order from your menu. Your staff will be able to know the table from which the order has come and deliver it to the right table.
Orderable has features to enrich user experiences, like its mobile-optimized design, which allows customers to order from any device, whether on computers or mobile phones (Android or iOS). In addition, it has been built to deliver a smooth app-like ordering experience for customers.
How to add Orderable to WordPress
You can create your online ordering system with Orderable in two steps.
Step 1: Install Orderable Pro
Purchase Orderable Pro from the Orderable website: Orderable.com. Then follow these steps to install it.
Get Your Restaurant Business Online With Orderable
Orderable is a user-friendly WordPress plugin that adds online ordering to your restaurant website.
Add your dishes, create your online ordering menu, customize your delivery schedule, and manage orders with ease.
- Go to Plugins > Add New from your WordPress dashboard and click the Upload Plugin button.
- Select the .zip file of Orderable Free from your computer and click Install.
- Click Activate once the installation is complete.
- Repeat the above steps for Orderable Pro, and that’s it. You’ve installed Orderable Pro.
Step 2: Customize basic settings
After installing Orderable, you’ll have to customize some basic settings on your food ordering website. You can start by setting the hours in which your business operates.
To do this:
- Go to Orderable > Settings and click on the Store Settings tab.
- Here, you can select the days and times that your store will be operating. Under the same tab, you can also set your holidays and whether you want to offer local pickup/deliveries.
On this page, you’ll also see tabs for Checkout and Tipping settings which you can handle later.
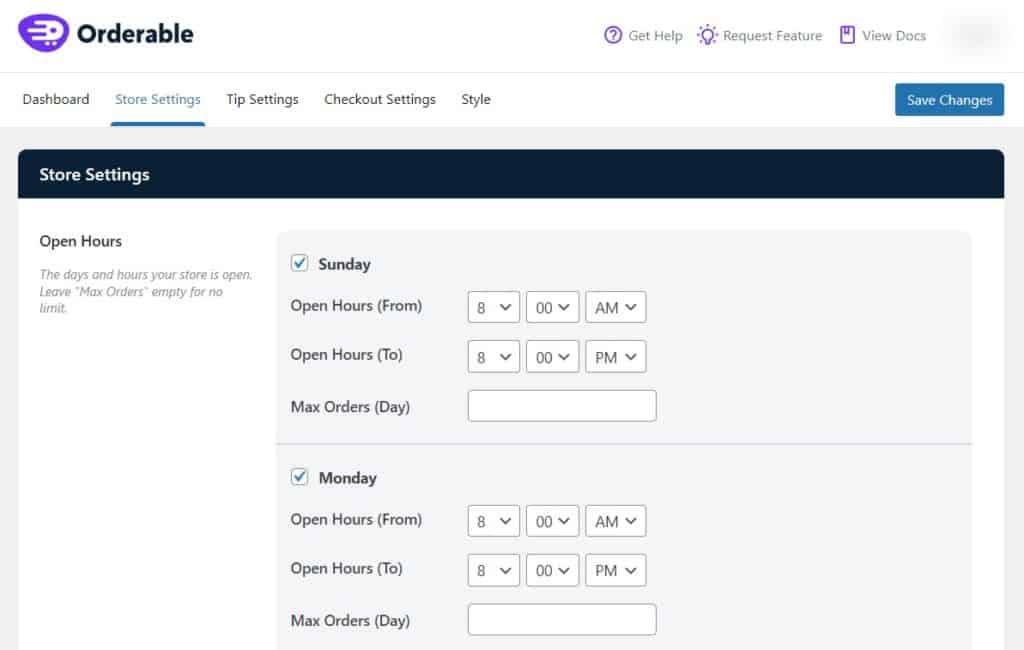
- Once done, click on Save Changes.
Once you’ve completed the basic settings, you can go ahead and do the following:
- Create menu layouts and display them on your site
- Set up a delivery date and time slot
- Set up SMS notifications to send order updates
- Add Product labels
- Add QR code table ordering
To increase your average order value, you can add:
That’s it! You’ve just created a food ordering website using WooCommerce.
Food ordering website FAQ
Use WordPress with WooCommerce and the Orderable plugin. This gives you full control over delivery, design, and order processing, without third-party commissions.
No. With Orderable, your WordPress site becomes your food ordering platform. Customers can browse, order, and pay directly on your website from any device.
You’ll need a domain name, hosting, a content management system (like WordPress), an ecommerce plugin (like WooCommerce), and an online ordering solution. You’ll also need tools for menus, payments, delivery scheduling, and order notifications.
The cost can vary depending on hosting, plugins, and customizations. A basic WordPress site with a premium ordering plugin typically costs less than using a third-party delivery platform that charges commissions.
Yes. WordPress is flexible, widely supported, and easy to scale. Combined with WooCommerce and plugins like Orderable, it’s a powerful setup for restaurants, cafes, and other food businesses.
You can start with free tools like WordPress, WooCommerce, and Orderable Free. But for advanced features (like tipping, scheduling, or text notifications), a paid plugin and reliable hosting are worth the investment.
Build your online food delivery website today
Creating an online food ordering website is straightforward with WooCommerce. It is a great platform, but it doesn’t cover everything, specifically setting up an online ordering system for your website.
For this, you need Orderable, which is more than just an online ordering solution for WordPress. It has amazing features that boost the performance of your food business while improving your customers’ experience.
If you’d like to try Orderable, you can get the free version here or buy the full version from Orderable.com.
Get Your Restaurant Business Online With Orderable
Orderable is a user-friendly WordPress plugin that adds online ordering to your restaurant website.
Add your dishes, create your online ordering menu, customize your delivery schedule, and manage orders with ease.
Gina Lucia is our in-house Content Manager at Orderable. She writes articles, user guides, technical documentation, and creates videos on everything WooCommerce and Orderable.
Gina has been working in the WordPress/WooCommerce space since 2012 when she developed WordPress websites for clients large and small.
For the past 8 years, she’s been writing about everything WordPress and WooCommerce, becoming an expert in what makes a WooCommerce store succeed.
When not writing, Gina loves to tend to her vegetable garden, read, or travel to mainland Europe.
Don’t miss out on the latest Orderable news!
Sign up for our newsletter to receive the latest news from the blog, you’ll get pinged every week with a digest of the latest updates.
[fluentform id=”6″]

Related Articles
How to Add a Tip at the Checkout in WooCommerce

How to Increase Customer Loyalty in Restaurants

How to Make and Print Your Own Restaurant Receipts
Get Your Restaurant Online With Orderable
The WooCommerce plugin designed to help restaurants take orders online – with no added fees!
View Pricing
