WooCommerce Order Notifications: How to Create and Send
WooCommerce Order Notifications: How to Create and Send

Gina Lucia


WooCommerce notifications are one of the best ways to interact with your customers. They can help build customer loyalty and boost sales by letting your customers know that their orders have been placed, shipped, or delivered.
But how do you send order notifications to customers when they don’t come in-build with WooCommerce?
The solution? A WooCommerce order notification plugin that effectively gets these notifications out to customers quickly and easily from within your WordPress website.
In this article, we’ll show you how to create and send WooCommerce order notifications using Orderable Pro, a WordPress plugin designed to help you send notifications to customers so that they never miss an important update again!
Get Your Restaurant Business Online With Orderable
Orderable is a user-friendly WordPress plugin that adds online ordering to your restaurant website.
Add your dishes, create your online ordering menu, customize your delivery schedule, and manage orders with ease.

What are WooCommerce order notifications?
WooCommerce order notifications are a great way to stay in touch with customers and update them on their order status.
If you mark a customer’s order as pending or processing, you can send them a kind of push notification in the form of an email, text, or WhatsApp message to let them know.
Order notifications come in various forms that are sent automatically in real time when an order is placed. The notification can contain anything you like, depending on the type of notification you want to send.
So now we know what WooCommerce notifications are, let’s address why you might want to add these advanced notifications to your WooCommerce store.
Why use order notifications in your WooCommerce store?
Order notifications are an incredibly useful tool to help keep customers informed about their orders. Just sending one simple order notification to a customer can be the difference between a customer coming back due to a great customer experience or getting in touch with your support team because they’re confused about their order.
It’s good to have an order notification system in place because it will help you:
- Keep customers informed of where their order is or what stage it’s at.
- Increase customer satisfaction and loyalty – by letting them know that you’re taking care of their order and needs.
- Improve sales – by allowing you to include sales notifications at certain stages of the order journey, including coupons for them to use the next time they reach the checkout page and more.
WooCommerce notifications can be used in various ways, here are just a few. You could send a notification to:
- Let customers know when their order has shipped – this could contain their delivery date and time so they’re kept in the loop.
- Tell a customer when their order is prepared – perfect for restaurants, takeaways, or online stores that make items to order.
- Thank customers after their order has been shipped – to thank them for shopping with you and give them the incentive to do so again.
- Inform customers of specific product stock levels with a stock notification – providing they’ve made a recent order.
As a store owner, WooCommerce notifications can be a valuable tool for a better customer experience and repeat business. But this feature doesn’t come with the default WooCommerce install. To add it, we’ll need the help of a WooCommerce plugin. Specifically, Orderable Pro.
How to create and send WooCommerce order notifications
Sending order notifications in WooCommerce is a pretty straightforward task when you have the right tools, and in this case, we’ll be using Orderable Pro to get it done.
Get Your Restaurant Business Online With Orderable
Orderable is a user-friendly WordPress plugin that adds online ordering to your restaurant website.
Add your dishes, create your online ordering menu, customize your delivery schedule, and manage orders with ease.
Orderable Pro is a plugin for WordPress which allows you to not only send order notifications but create custom order statuses to go with them.
With these WooCommerce notifications, you’ll be able to:
- Create and send an unlimited number of notification messages to customers.
- Send them via email, text (SMS), or WhatsApp.
- Customize the order notification message to include anything you like. Including order information, social media links, FAQ information, and more.
But that’s not all Orderable Pro can do. As well as this incredibly useful feature, with Orderable Pro you’ll be able to:
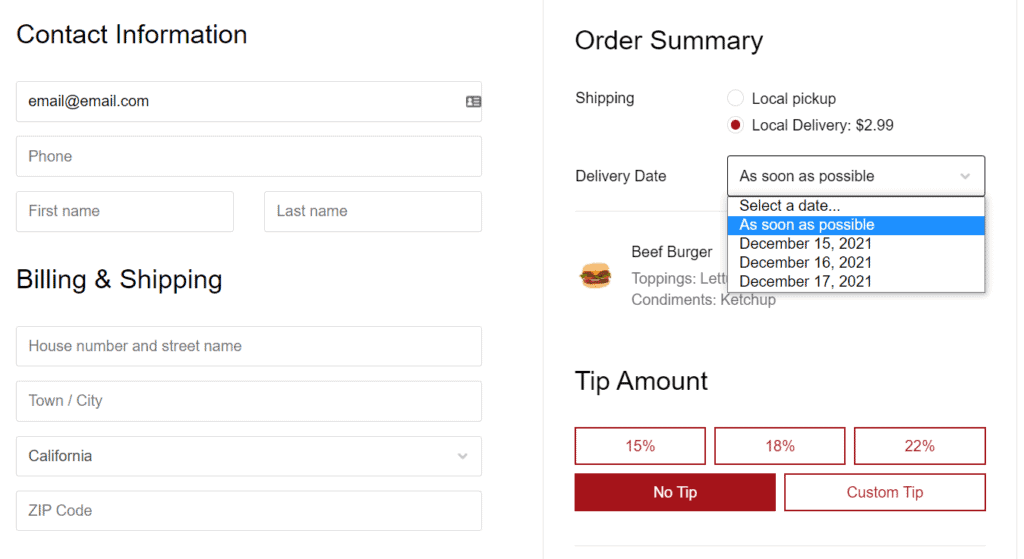
- Add time and date slots to the checkout page for customers to choose from.
- Include tipping at the checkout.
- Completely upgrade the default WooCommerce checkout into one that’s slick and easy to use.
- Include features that are particularly useful for food businesses, like nutritional information, allergen information, table ordering, and more.
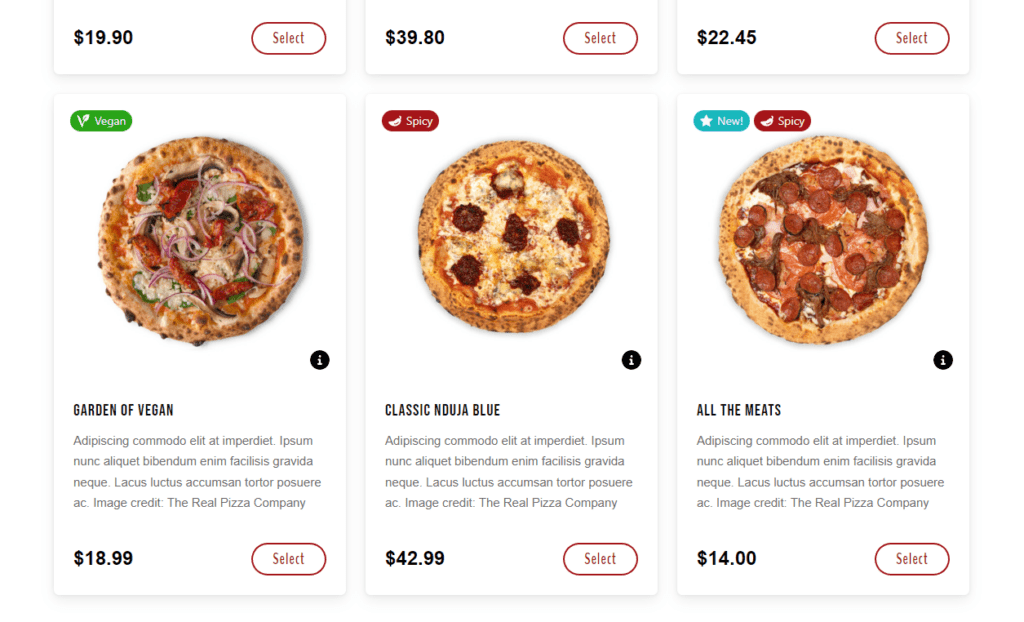
- Add product labels to your products to let customers know what is new, on sale, or to showcase dietary features like vegan and gluten-free.
So now we know the benefits of Orderable Pro, let’s get your first WooCommerce notification set up.
Send order notifications with the WooCommerce plugin Orderable
To send order notifications with the WooCommerce plugin Orderable Pro, we’ll first need to create a custom order status. This will allow us to be specific about which point in the customer’s journey to send the message.
Note: If you want to customize an existing order status, such as pending or completed, skip to step 3.
Step 1: Create a custom order status
Once you have Orderable Pro installed, you’ll be able to customize the plugin’s basic settings by going to Orderable > Settings. These settings will allow you to set up time slots, enable custom checkout, and more.
Once done, we’ll go to the order statuses section to set up your first custom order status.
To do this, take the following steps:
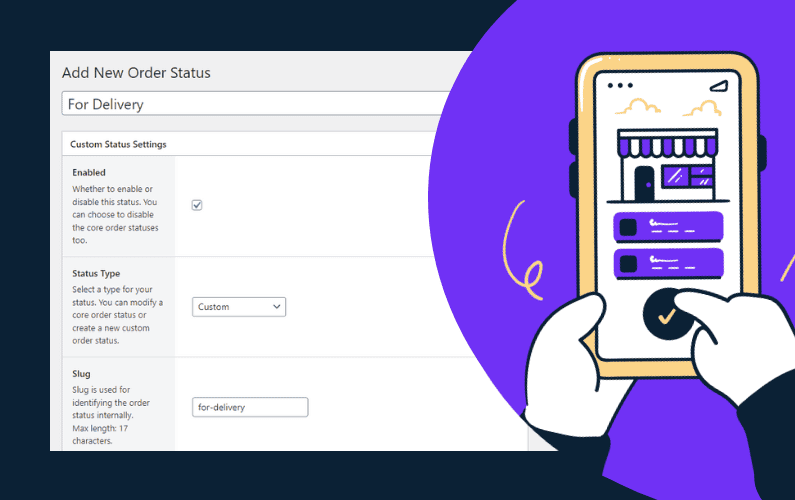
- From your WordPress admin dashboard, go to Orderable > Order Statuses and click the Add New button at the top of the page.
- You’ll then be taken to the Edit Custom Order Status page. Give your new order status a title/name.
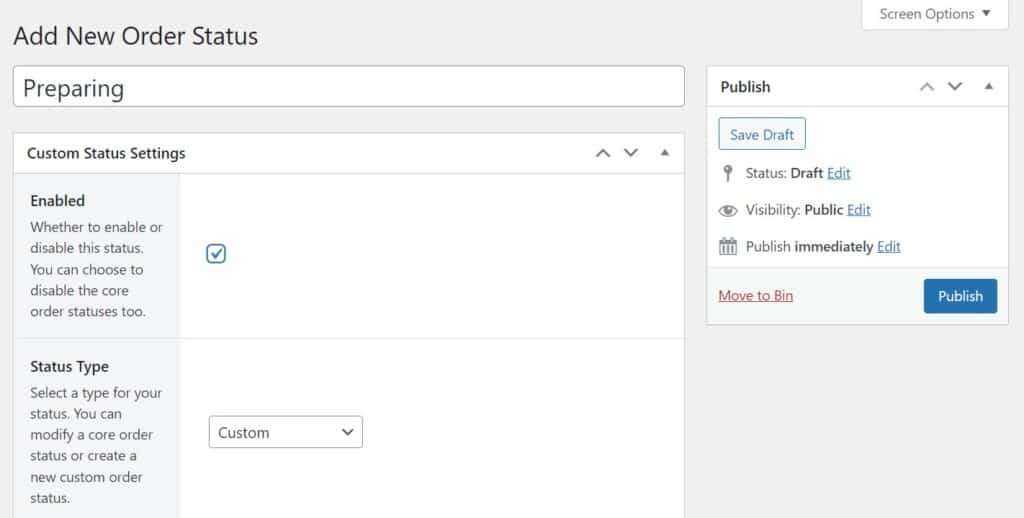
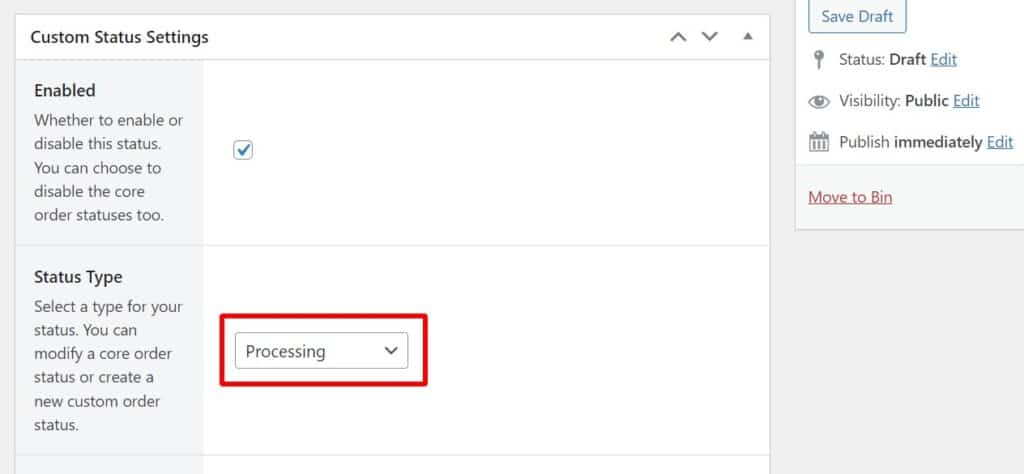
- Click the checkbox next to Enabled to have this order status appear on the Orders page in the backend of your WordPress site. This will allow you to use the custom order status like any other order status.
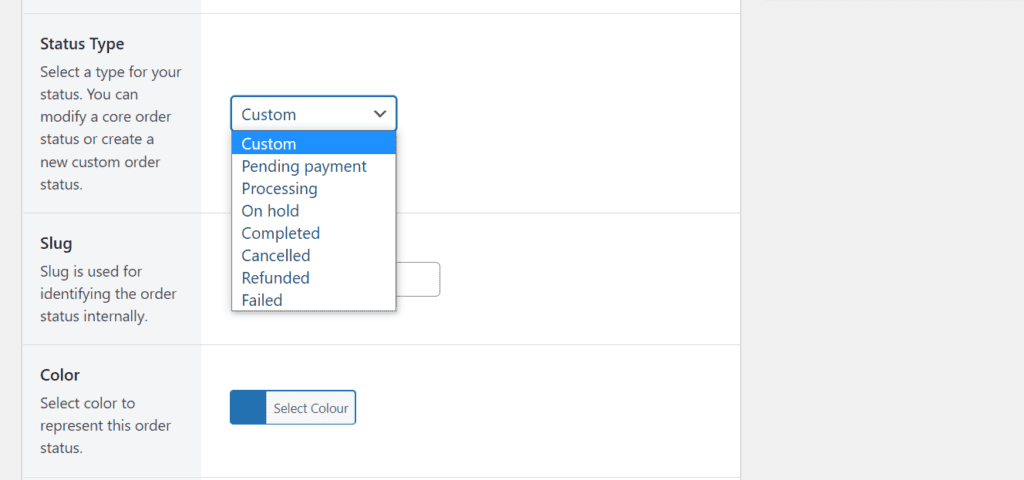
- Underneath this, you’ll be able to select the Status Type.
- You can pick between a default order status (in the list), or create a new one. If you pick a default order status, it will override it (we’ll explain this further in step 3).
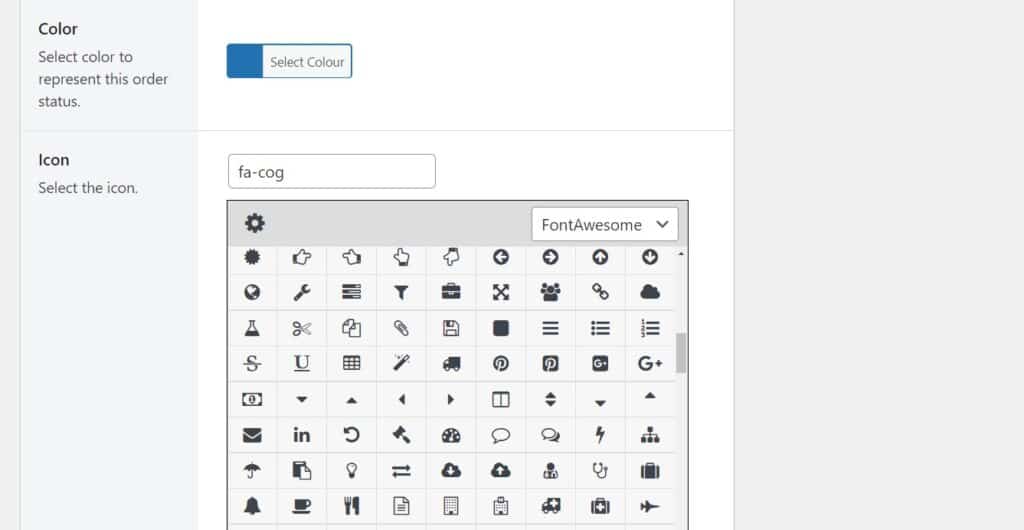
- After this, you can pick the order status color using the color picker. This will help you see the order status better on the orders page in the back of your website.
- Icon allows you to select the icon you want to show on the orders page.
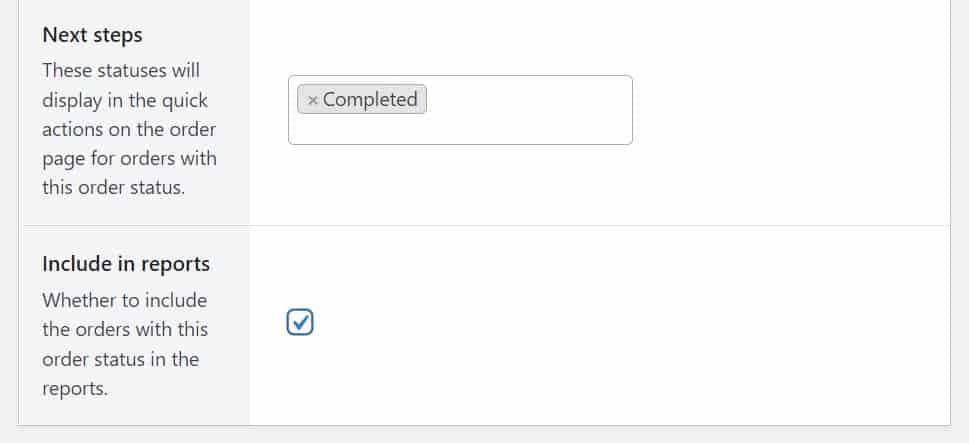
- With Next steps, you can decide which order statuses will be displayed in the Actions column of the orders page.
- Lastly, select the checkbox next to Include in reports to add this order status to your store’s reports.
Now we’ve created a new order status. We can add a notification to it.
Step 2: Add your order status notifications
You can add as many WooCommerce notifications as you like to each order status.
This is particularly useful if you’d like to send one notification to a customer and one to a shipping company. Or one to the customer and another to the person in charge of preparing the order.
To add an order notification to your order status, take the following steps:
- Scroll down to the Notifications section of this page and click the Add Notification button.
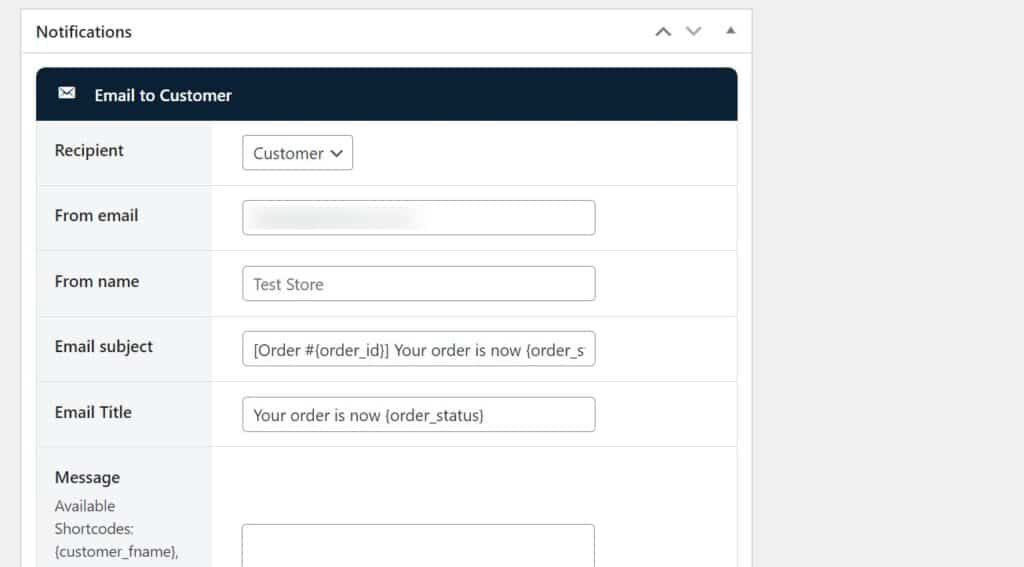
- An email notification editor will appear. Select who you would like the email sent to.
- If you select Custom for the Recipient, you’ll be able to enter a custom email address.
- Next, you’ll be able to customize everything from the From email to the From name, Email subject, Email title, email contents, and more. Orderable Pro comes with a few template options you can add here for easy automation.
- The next two checkboxes enable you to include the order table and include customer information should you want to.
- Once you’re happy with all your changes, click the blue Publish button.
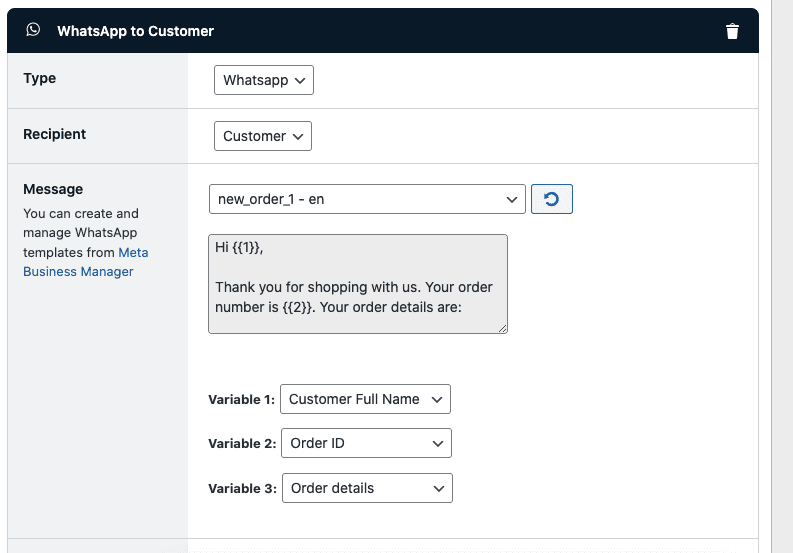
Note: Orderable Pro also comes with the ability to send other types of notifications too. Check our SMS notifications and WhatsApp notifications guides for more information.
So now we know how to add a new order status and a notification. But what if you want to edit an existing order status?
Step 3 (optional): Send notifications for default order statuses
Editing an existing order status is straightforward with Orderable Pro. Here’s how to get it done:
- Go to Orderable > Order Statuses from your WordPress admin dashboard and click the Add New button.
- Give your new order status a title/name.
- Either rename the default status or write the default name. E.g., You could rename Processing to Preparing or write Processing to keep the name the same.
- Click the checkbox next to Enabled. If you want to disable a default order status, leave this unchecked.
- Underneath this, you’ll be able to select the Status Type.
- Pick the default order status you want to disable or edit from this dropdown.
- Continue to edit the order status to customize it if you need to (including adding order notifications), and click Publish once done.
That’s it. You’ve created/edited the order statuses in your WooCommerce store and added some WooCommerce notifications.
Add WooCommerce notifications to your store today
Congratulations! You have now learned how to create and send WooCommerce order notifications.
Adding custom order notifications to your WooCommerce store is straightforward when you have the right tools. When that tool is Orderable Pro, you get a whole host of other features that will help you manage your ecommerce store easily and boost sales too.
Get Your Restaurant Business Online With Orderable
Orderable is a user-friendly WordPress plugin that adds online ordering to your restaurant website.
Add your dishes, create your online ordering menu, customize your delivery schedule, and manage orders with ease.
Gina Lucia is our in-house Content Manager at Orderable. She writes articles, user guides, technical documentation, and creates videos on everything WooCommerce and Orderable.
Gina has been working in the WordPress/WooCommerce space since 2012 when she developed WordPress websites for clients large and small.
For the past 8 years, she’s been writing about everything WordPress and WooCommerce, becoming an expert in what makes a WooCommerce store succeed.
When not writing, Gina loves to tend to her vegetable garden, read, or travel to mainland Europe.
Don’t miss out on the latest Orderable news!
Sign up for our newsletter to receive the latest news from the blog, you’ll get pinged every week with a digest of the latest updates.
[fluentform id=”6″]

Related Articles

How to Put Together a Restaurant Marketing Plan in 2026
How to Create a WooCommerce Custom Order Status

How to Improve Restaurant Customer Service in 2026
Get Your Restaurant Online With Orderable
The WooCommerce plugin designed to help restaurants take orders online – with no added fees!
View Pricing
