How to Add Dietary Product Labels to WooCommerce
How to Add Dietary Product Labels to WooCommerce

Gina Lucia


Do you offer products that cater to customers’ specific dietary needs in your WooCommerce store? Let’s say you have vegan, gluten-free, or lactose-free food. You would want customers who prefer these food categories to find them as easily as possible.
Adding dietary product labels to your ecommerce store is a great way to ensure that they can find these special categories quickly and easily.
So in this article, we’ll walk you through how to add product labels to your WooCommerce store using a powerful product labels plugin for WordPress: Orderable.
Get Your Restaurant Business Online With Orderable
Orderable is a user-friendly WordPress plugin that adds online ordering to your restaurant website.
Add your dishes, create your online ordering menu, customize your delivery schedule, and manage orders with ease.

But before we get to that, let’s first understand why dietary product labels are important to your WooCommerce store.
Why add dietary product labels to your WooCommerce store?
Any online store that sells food goods or dishes to customers can benefit greatly from adding dietary food labels to its products. These product labels are important to your WooCommerce restaurant for the following reasons.
Customers will know exactly what’s in your menu
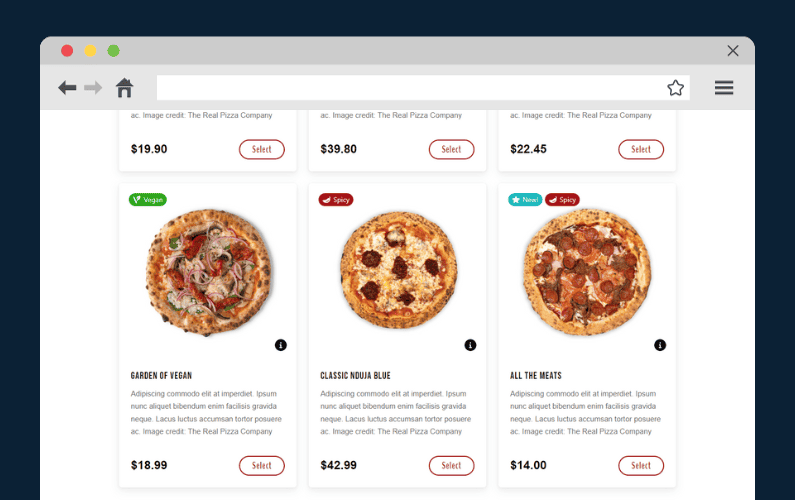
If you have food products that cater to customers’ specific dietary needs in your menu, product labels allow customers to see what they are at a glance.
Let’s say you use lactose-free milk or vegan products like soymilk, almond milk, and coconut milk in your products. Some customers can only consume these types of products or exclusively prefer them.
So, if you add product labels to them on your menu, you’ll make it much easier for customers to find them.
When you don’t have these labels, customers can’t find the products relevant to them at a glance. They will likely assume that your restaurant doesn’t offer them. This is the case even if you’ve indicated on the individual product page that a food product is vegan, for example. As a result, they will likely look elsewhere for these options.
You’ll show that you care about your customers’ dietary needs
Customers are interested in dietary information for multiple reasons:
- Halal or kosher – for religious reasons.
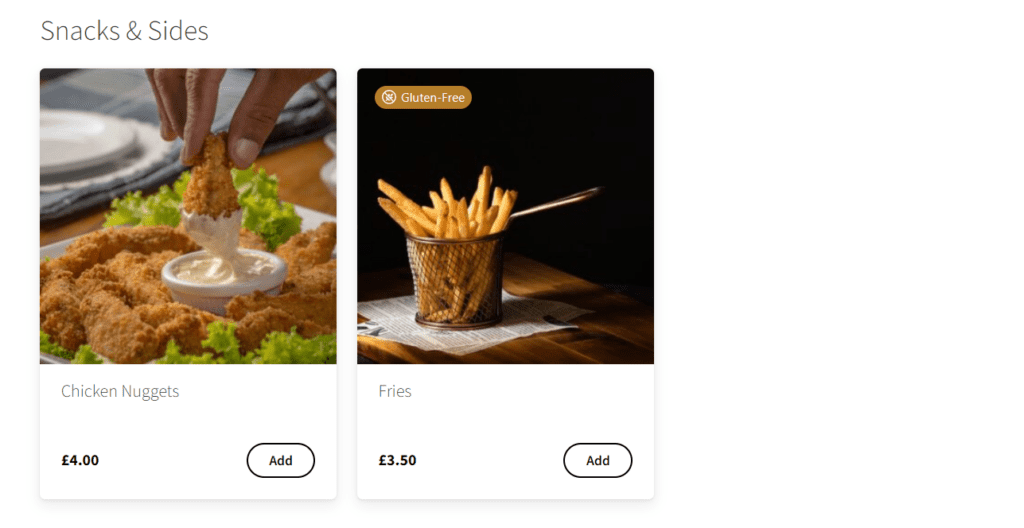
- Lactose-free/Gluten-free/nut-free – for health reasons.
- Vegan/Vegetarian – for personal beliefs or preferences, etc.
Including these labels on food items belonging to these categories shows that you care about your customers’ religious and personal beliefs and their health. This is important in building trust with your customers, which will help you to retain them and attract more customers in the long-run.
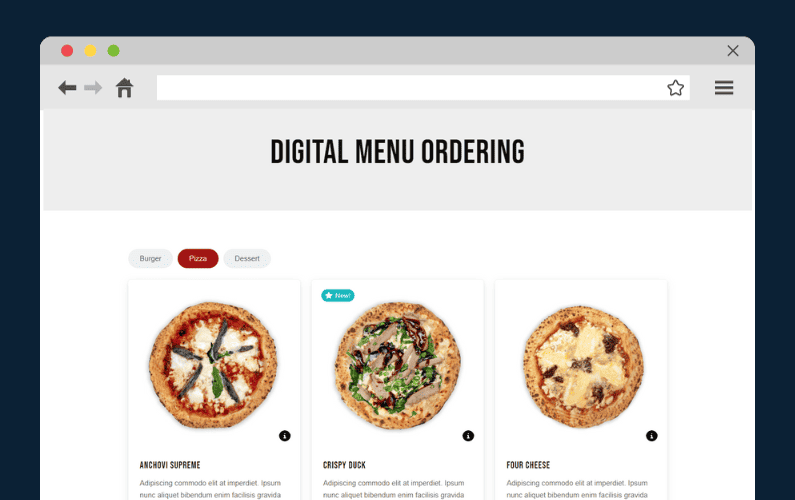
Product labels stand out
Customers look through menus quickly and rarely visit the product page unless they find a specific product interesting. So if your products lack labels, these things that you might want to highlight will often be overlooked.
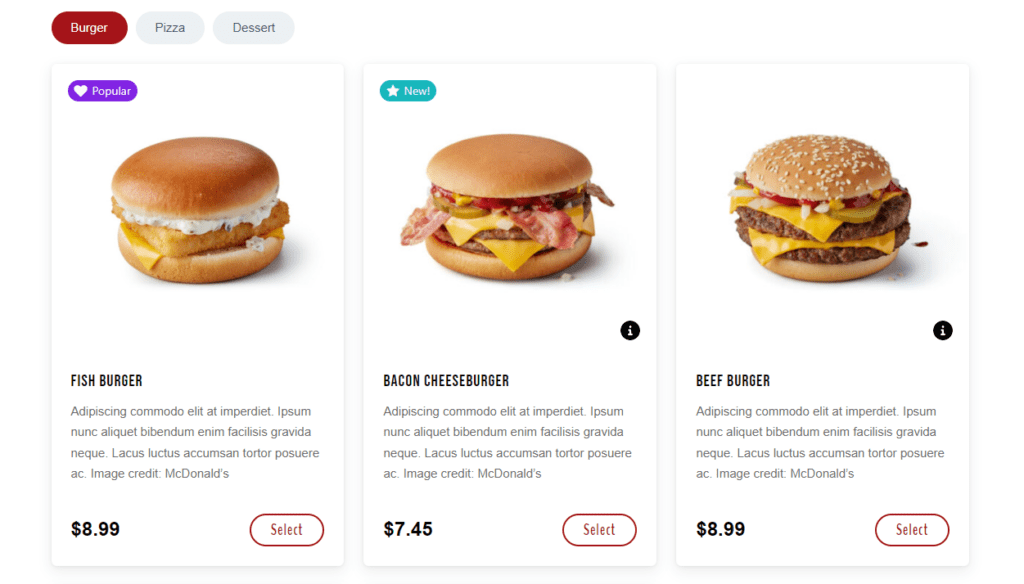
Adding labels to products on your menu makes it clear that you’re offering products of relevance to your customers. These labels will help them stand out from the rest. Because of this, you can use these labels to capture your customers’ attention and lead them to the individual product pages.
Apart from what we’ve just discussed within the context of a business selling food-specific items, you can also use product labels in other ways.
Other ways to use WooCommerce product labels
Product labels aren’t limited only to dietary labels. You can also use them to channel your customer’s attention to other events that are happening across your WooCommerce store. With product labels, you can create the following.
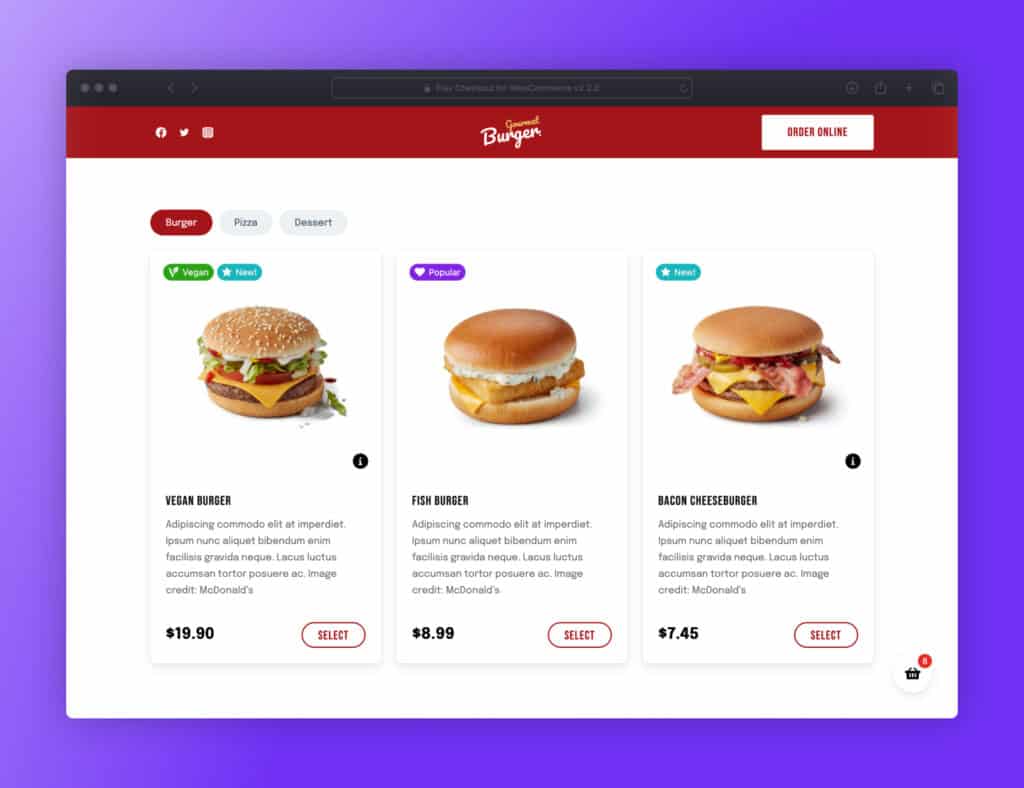
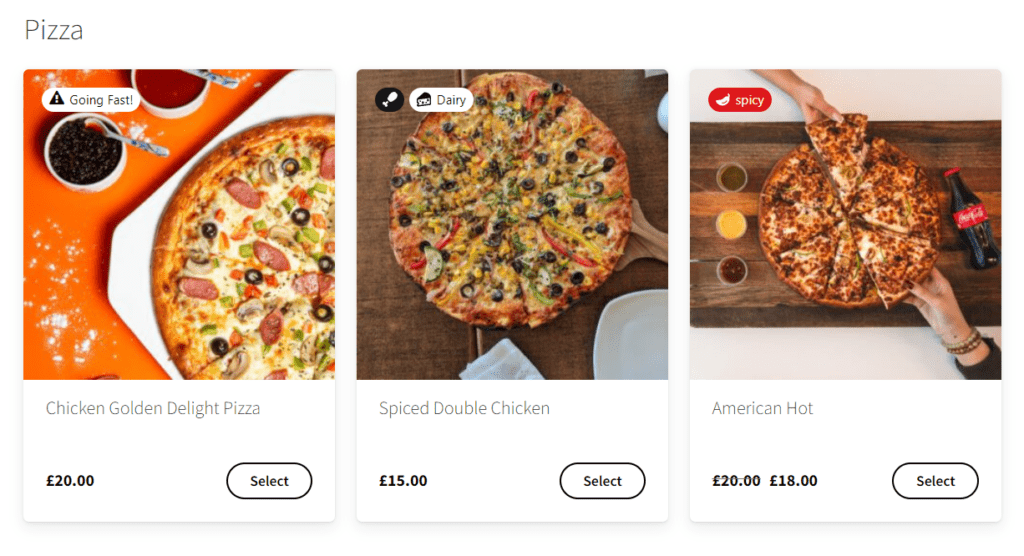
- Sales badges – to draw your customer’s attention to on-sale products, special offers (e.g., Valentine’s day promotion or Black Friday), themed offers, end-of-season sales, discounted products/sale price products, ongoing flash sales, and more. For instance, you have a badge that says ‘Buy 1 Get 1 Free’, ‘30% OFF’, and so on.
- Bestseller badges – to let customers and visitors know which products sell fast, are in high demand or are popular among your customers.
- New product badges – to highlight new arrivals in your store. For example, you can point your regular customers to new products in your store to keep their interests always high.
- Manual stock status – to inform your customers how many items are left in stock. For example, only two items are in stock! This drives a sense of urgency in your customers to be among the last ones to purchase the item.
The possibilities for using this tool in your store are endless. You might have something specific in mind, so in the next section, we’ll walk you through how to set up product labels in your WooCommerce store.
How to add product labels to your WooCommerce store
You can’t add product labels to your WooCommerce store with the default WooCommerce setup. So, in this section, we’ll walk you through how to do this, plus we’ll do it with the help of the plugin Orderable.
Get Your Restaurant Business Online With Orderable
Orderable is a user-friendly WordPress plugin that adds online ordering to your restaurant website.
Add your dishes, create your online ordering menu, customize your delivery schedule, and manage orders with ease.
Add dietary product labels to WooCommerce with Orderable
Orderable is a versatile WordPress plugin that lets you create distinct dietary product labels for products on your WooCommerce store. With Orderable, you can add labels to your products as icons and text highlighting the unique ingredients of your food items that appeal to certain customers.
Orderable also lets you customize your product labels’ properties (such as colors and fonts) to make them stand out.
Specifically, with Orderable, you’ll be able to do the following.
Create a product label for anything you’d like
Orderable gives you control over the text and the icon of the product label. This means that you can create product labels for anything you’d like. All you have to do is type in a name for your product label, for example, vegan, kosher, halal, gluten-free, add a short brief description, and select the icon.
Orderable doesn’t limit you to a single label per product. You have the freedom to add multiple labels.
With Orderable, you’ll be able to create as many product labels as you want and assign them to products as you see fit.
Make your product labels stand out in your shop’s category and product pages
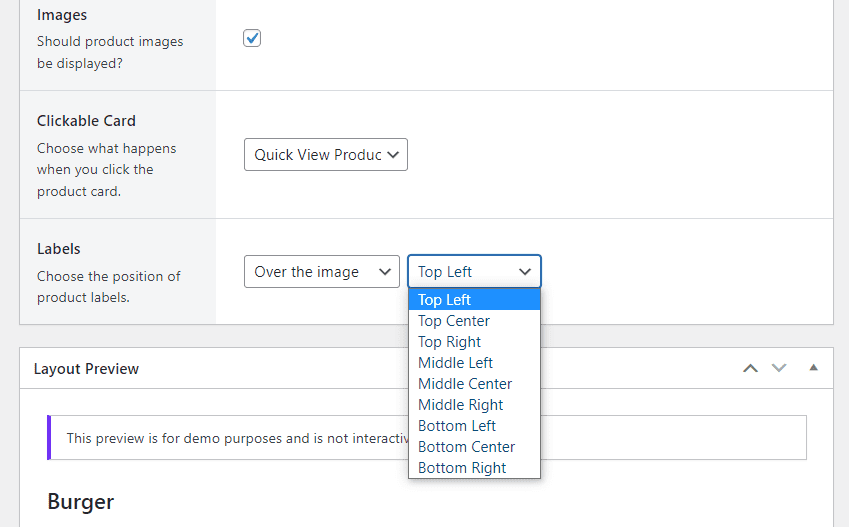
How your product labels are positioned on a product page or shop page matters. Orderable lets you position your labels where you feel they would stand out the most on your menu or the product page. You can decide if you want to display your label at the top of the product image, in the middle section, or at the bottom of the image on the category page.
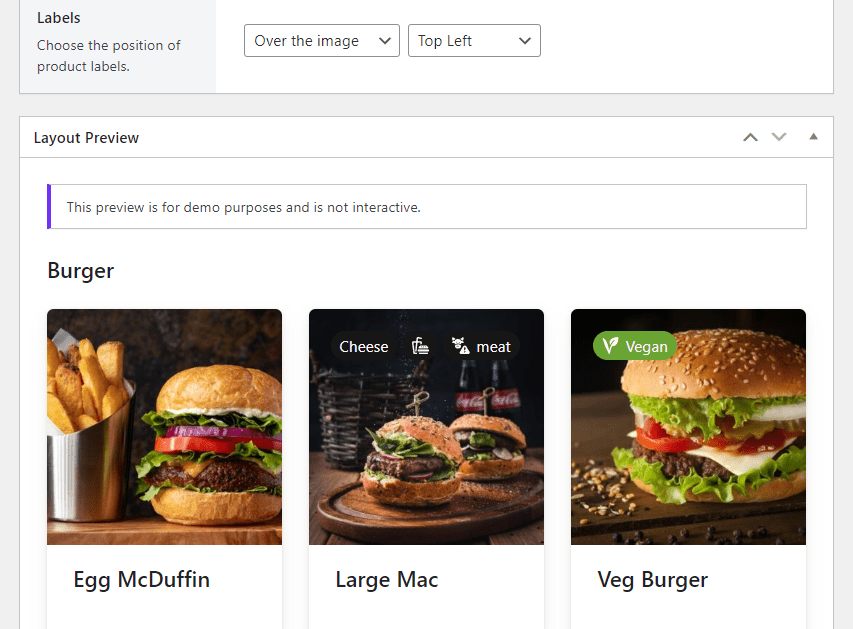
You’ll be able to do the same for the product page and also decide if you want the icon to appear first, before the name of the label, and vice versa.
Custom product labels to suit your store
Orderable lets you edit the colors of your product labels. You can select colors that best suit the product label, such as green for vegan and vegetarian. Plus, you can choose which font to use for your product label.
This plugin gives you a wide range of icon designs/templates to choose from, so you can pick one that best suits your product label. For instance, if you’re creating a vegan product label, you can select the leaf icon.
Create flexible menu layouts
With Orderable, you can create flexible menu layouts quickly and easily. You can add food items to these layouts in just a few clicks. Orderable even lets you decide when certain foods will be displayed, making it easy to create lunchtime or dinner menus.

Allow customers to customize their dishes
With Orderable’s product add-ons feature, you can allow customers to add toppings, remove certain food components, and even make a dish vegan. They can create custom versions of your dishes that suit them.
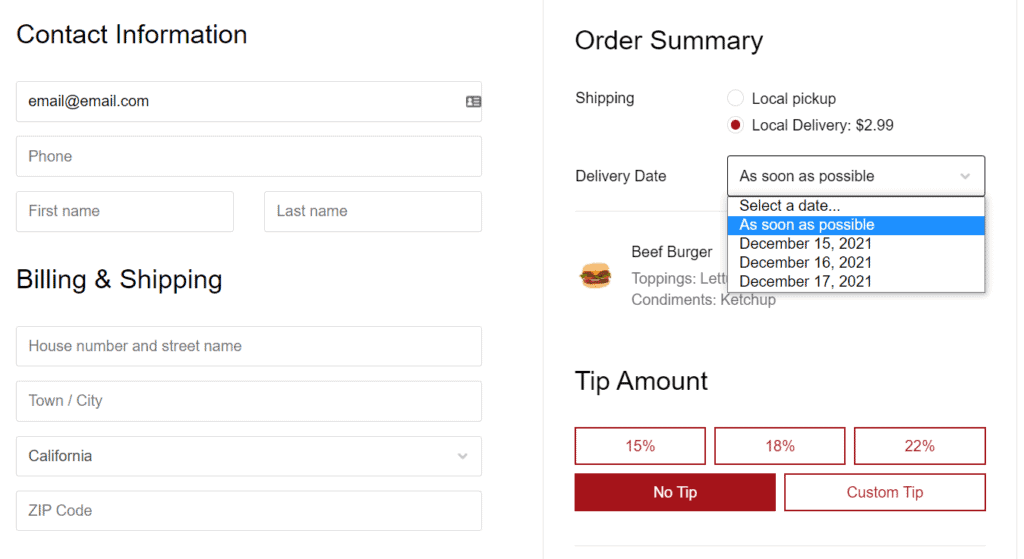
Provide your customers with an easy ordering experience
Orderable’s app-like one-page design lets make it easy for your customers to order from you. This plugin gives you full control over your checkout, allowing you to dictate the experience you want to provide your customers.
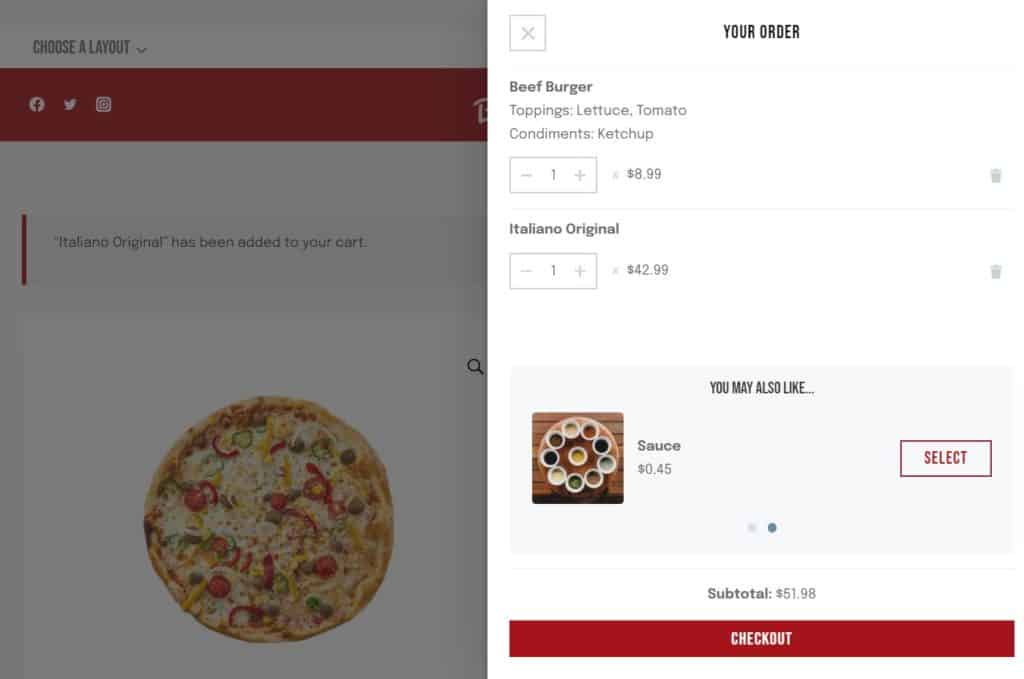
Suggest products that go with the customer’s choices
Orderable lets you add order bumps to your store, which suggest additional products that go well with what the customer has in their cart. These could be sauces, side dishes, and so on, which will help you to increase your average order value.
Despite letting you do so much, Orderable doesn’t charge any fees per transaction, so you get to keep your profits to yourself. That being said, let’s set up Orderable on your WooCommerece store and add product labels to it.
How to add product labels to your WooCommerce store
In this tutorial section, we’ll walk you through how to add product labels to your WooCommerce store.
Step 1: Install Orderable (Pro)
Start by purchasing the WooCommerce plugin Orderable Pro from the Orderable site: orderable.com.
You’ll be sent two plugins, Orderable and Orderable Pro (the premium version of Orderable that we need for the product labels). Download them and then follow the steps below to install Orderable on your WordPress website.
- Go to Plugins > Add New from your WordPress dashboard.
- Click Upload Plugin, then upload Orderable from the zip files you downloaded.
- Next, click Install Now and Activate the plugin on the next page.
Following this, you’ll need to install Orderable Pro. To do this, repeat the steps above from step 2.
Now that Orderable Pro is installed, we can move to configure some basic settings.
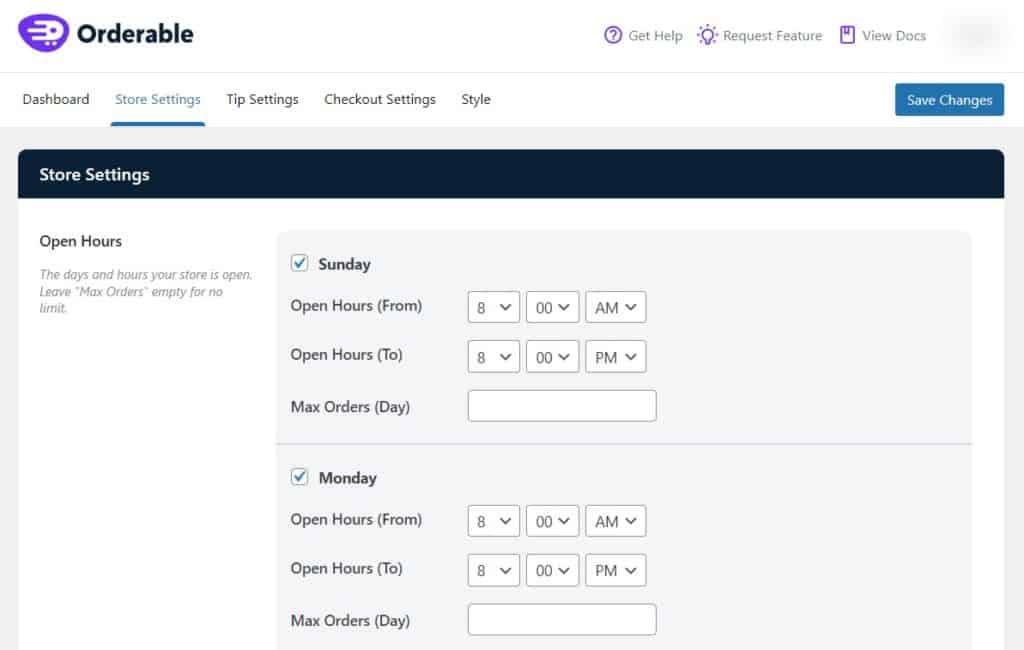
Step 2: Change Orderable settings to suit you
After a successful installation, you will be directed to the Orderable page. You can click the Store settings tab and change some basic settings here. You’ll be able to set store hours for your website, set a time zone, and more.
To do this, take the following steps:
- If you didn’t land on this page, then from your WordPress dashboard, go to Orderable > Settings and click the Store Settings tab to open the store settings page.
- You can set the days and hours when your store is open, enter your restaurant’s details, update your website’s time zone, check which services you’ll offer (either local pickup or delivery), select service hours, add a holiday, and more.
- When you’re satisfied with the changes you’ve made, click the Save Changes button to update settings.
With the basic settings ready, we can now create and customize product labels
Step 3: Create WooCommerce product labels
Follow these simple steps to add a new label to your store:
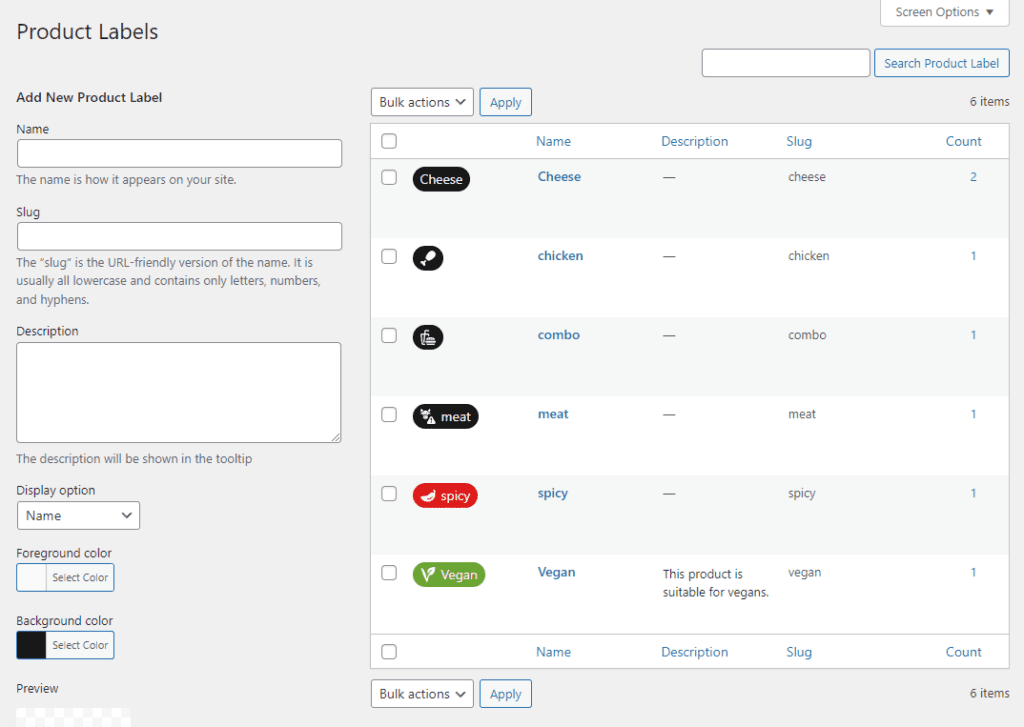
- Go to Orderable > Product Labels from your WordPress dashboard to add a new product label on the Products Labels page.
- On this page, you’ll be able to:
- Enter the Name of your product label, for example, vegan. Or any other custom text you like.
- Add a Slug – which is a URL-friendly version of the label name.
- Type in a Description – it will be displayed when a customer hovers over a product label. It should be short and simple but informative.
With Orderable, you can create as many different labels as you like. so keep going until you’re ready to move on. After creating product labels, you can customize them to fit your store’s design.
Step 4: Customize your product labels
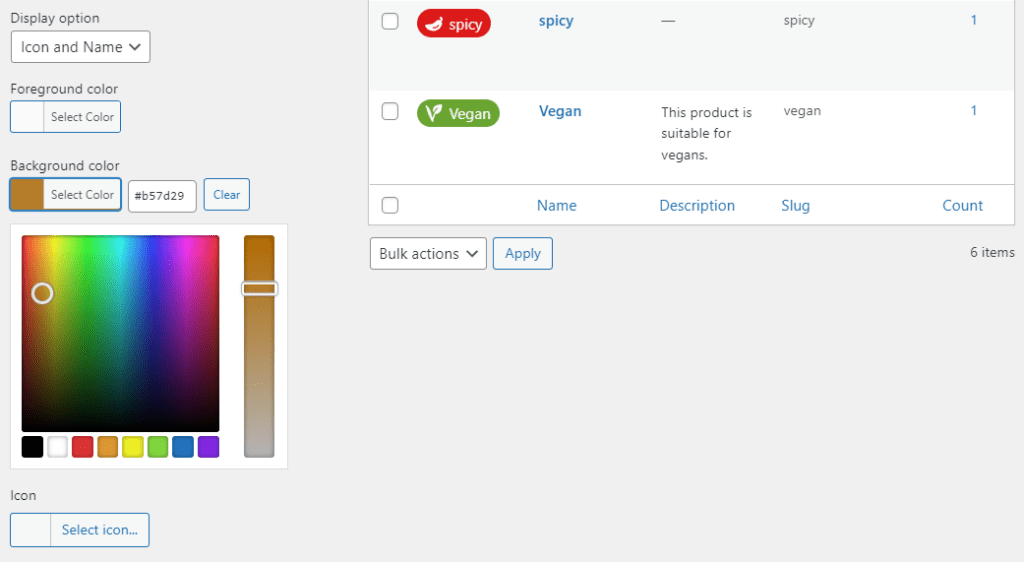
- While still on the product labels settings page, you can make the following adjustments to customize your product labels.
- Choose a Display option. There are a few options here: Icon, Icon and Name, Name and Icon.
- Select a background color and foreground color for your product label.
- Select an Icon at the bottom of the page. For example, a leaf icon for a vegan product label.
While editing your product labels, you’ll get a live preview of what the label looks like. So when making design changes, you can see the updates in real-time.
- Next, we’ll need to edit the position of your product label. To do this, go to Orderable > Product layout from your WordPress dashboard and click Edit to position your product label in the Labels section.
Step 5: Assign product labels to products
After creating and customizing your product labels, you can now assign them to single products. To do this, take the following steps:
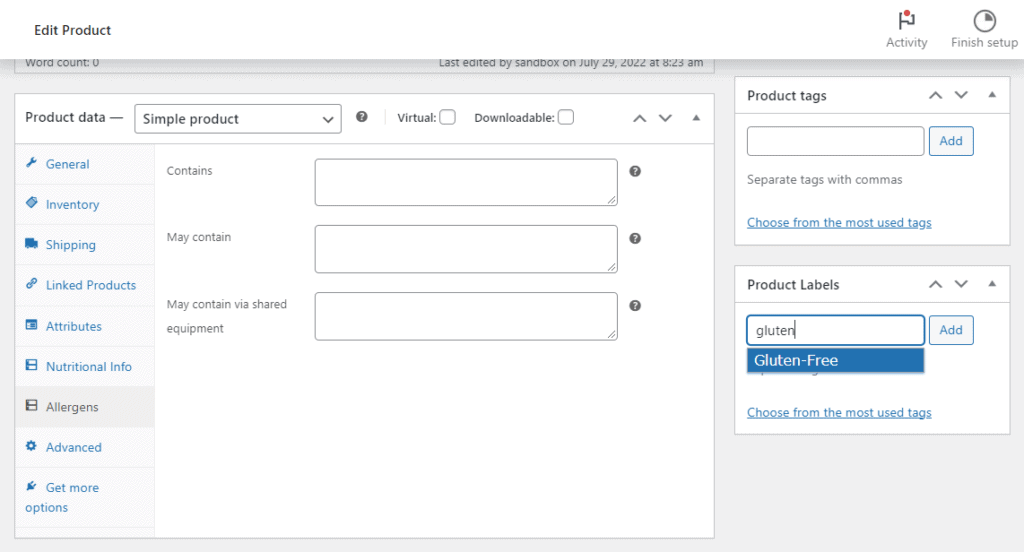
- Go to Products > All products on your WordPress dashboard. In this product list, hover over a specific product, and click Edit.
- You will see the product labels section below the product tags box. Click on this box and type the name of your product label and select it once it appears.
- Click Update when you’re done and view your product from the front end of your website.
That’s it. You’ve just created a dietary product label and added it to a product.
Create your WooCommerce product labels today
Adding dietary product labels allows you to easily communicate unique attributes of your food items that are relevant to specific groups of customers. Since you can’t do this in the default WooCommerce install, Orderable has got you covered.
Orderable lets you create clear and descriptive product labels for WooCommerce that are easily noticeable to customers. This way, customers with special dietary needs can find their preferred food options quickly and easily.
Get Your Restaurant Business Online With Orderable
Orderable is a user-friendly WordPress plugin that adds online ordering to your restaurant website.
Add your dishes, create your online ordering menu, customize your delivery schedule, and manage orders with ease.
Gina Lucia is our in-house Content Manager at Orderable. She writes articles, user guides, technical documentation, and creates videos on everything WooCommerce and Orderable.
Gina has been working in the WordPress/WooCommerce space since 2012 when she developed WordPress websites for clients large and small.
For the past 8 years, she’s been writing about everything WordPress and WooCommerce, becoming an expert in what makes a WooCommerce store succeed.
When not writing, Gina loves to tend to her vegetable garden, read, or travel to mainland Europe.
Don’t miss out on the latest Orderable news!
Sign up for our newsletter to receive the latest news from the blog, you’ll get pinged every week with a digest of the latest updates.
[fluentform id=”6″]

Related Articles
How to Add Digital Menu Ordering to Your Restaurant

48 Fresh Ideas for Restaurant Events (2026 Edition)
New to Orderable: Updates for January 2022
Get Your Restaurant Online With Orderable
The WooCommerce plugin designed to help restaurants take orders online – with no added fees!
View Pricing
