How to Add Table Ordering to Your Restaurant Website
How to Add Table Ordering to Your Restaurant Website


Gina Lucia


If you’ve been thinking about adding table ordering to your restaurant website but are unsure where to start, this guide will help.
In this guide, we’ll walk you through:
- What table ordering is.
- Why you should add table ordering to your restaurant website (rather than use an app).
- How to add table ordering to your restaurant website (using a tool).
The tool in question is the online ordering system plugin for WordPress, Orderable.
Get Your Restaurant Business Online With Orderable
Orderable is a user-friendly WordPress plugin that adds online ordering to your restaurant website.
Add your dishes, create your online ordering menu, customize your delivery schedule, and manage orders with ease.

Adding table ordering to your restaurant website can not only help you improve your customers’ experience but also has the potential to increase order sizes and keep customers coming back.
So, before we get into the table ordering tutorial, let’s first address why adding table ordering to your website is the way to go.
What is table ordering?
In a restaurant, table ordering refers to a system where customers place their food and drink orders directly from their table rather than ordering at a counter or from a waiter.
Here’s a breakdown of how it typically works:
- QR codes and digital menus: Customers scan a QR code at their table, which opens the restaurant’s digital menu on their smartphone.
- App-based ordering: In some restaurants, customers can order through a dedicated app. They select their table number and place their order directly from the app.
- Interactive tabletops: Some high-tech restaurants use interactive tables where customers can browse menus and place orders directly from a digital screen built into the table.
- Payment integration: These systems often allow customers to pay for their meals via their phone or the digital interface, offering a completely contactless dining experience.
- Service: The ordered items are prepared in the kitchen and then brought to the table by the waitstaff.

Advantages of digital table ordering
- Efficiency: Reduces the waiting time for order placement and can streamline kitchen operations and speed of service.
- Table turnover: With customers able to order and pay for their meals self-service style on their mobile device, this kind of ordering solution typically speeds up table turns and as a result, increases revenue.
- Safety: Minimizes contact between staff and customers, which is crucial for health safety standards.
- Customer experience: Enhances the dining experience by providing customers with more control over their orders.
- Up-to-date information: Digital menus can be updated instantly to reflect changes in availability or specials.
So now we know what table ordering is, let’s take a look at why you should add this to your restaurant website rather than use a third-party app.
Why add table ordering to your own website rather than use an app?
When it comes to having the feature of table ordering for a restaurant, there are two common ways to do it:
- Add the feature to your restaurant website.
- Use an app that has a table ordering feature.
For any restaurant, table ordering via your website is much more beneficial than using an app. Here’s why.
You’ll keep the dining experience in-house
When you have a table ordering feature on your website, you have control over the entire online ordering process. This helps you create the best customer experience possible.
Another advantage comes in the form of saving transaction fees. 3rd party apps charge monthly fees, fees on each transaction, and more. This can quickly add up to a substantial part of your expenses. With the table ordering feature on your website, you save on the excess fees and improve your overall margins.
By keeping the online ordering experience in-house, you also get the option to suggest the right products of your choice as an addon and upsell. This feature can help improve customer experience and improve average order value.
You’ll have control over the payment options
Merchant fees and payment processing solutions are important aspects to consider while offering payment options to your customers.
When you give control of online ordering to 3rd-party apps, you also give them control of payment processing options. Table ordering via your website allows you to choose the payment options you want to keep.
You’ll be able to offer things like Apple Pay, PayPal, credit card, Google Pay, Android pay, and more.
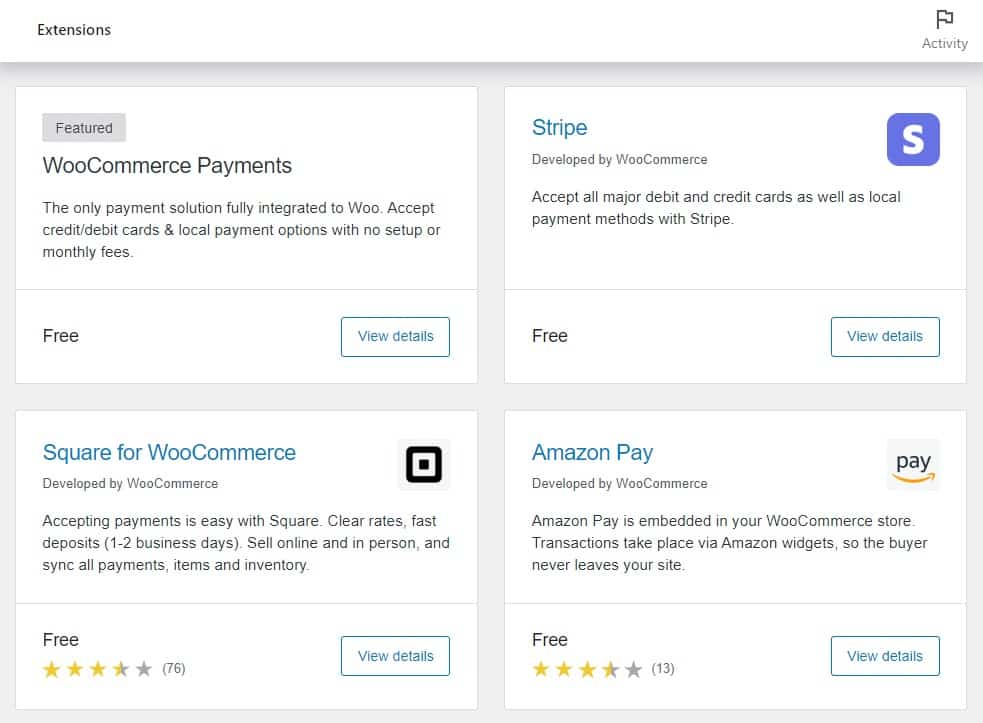
This is important as some payment options may favor you and your customers more than others. Either way, you’ll have full control.
You’ll keep all ordering options in one place
Once you have a customer onboard to order online, you may want to offer other options like local pickup or food delivery alongside table ordering.

With a website, you can keep all these options in a single place, making the whole experience for customers and your staff straightforward and intuitive. With 3rd-party ordering apps, you likely can’t achieve the same without hefty fees and restrictions.
A smooth online ordering process increases the chance of customer retention and repeat business.
You’ll be able to add more information
With growing awareness about food ingredients, their benefits, and nutrition – you want to be able to give more information to your customers about the dish. This helps the conscious customers choose the right dish for themselves and give them a better experience overall.
Another way to entice customers to order a dish is by giving colorful descriptions of how the food is prepared.
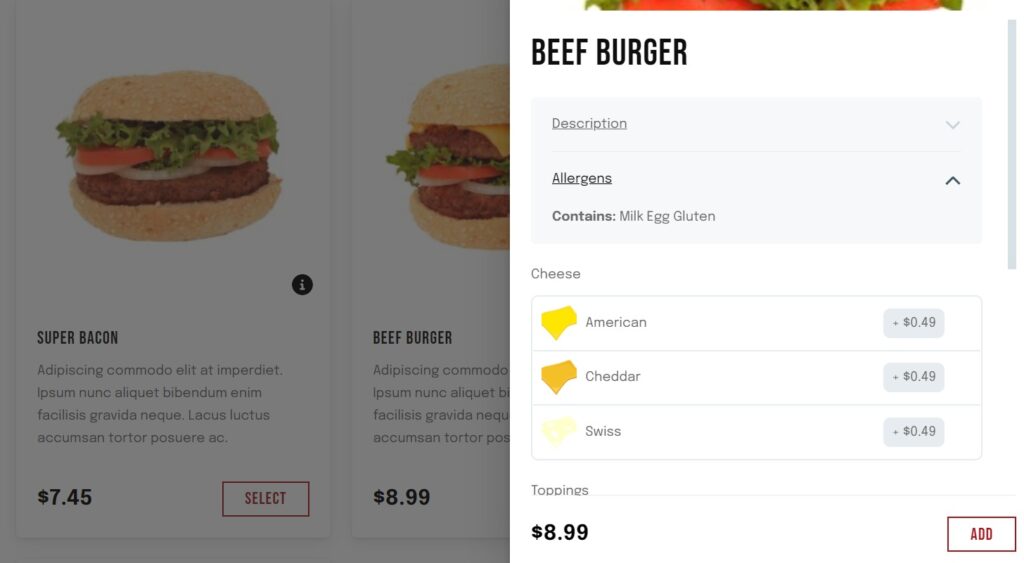
3rd-party mobile apps limit your options of adding digital menu items, seeing nutritional information, and having long descriptions or add-ons. On your website, you have all the liberty of making a custom menu per your preference.
These are just some of the benefits that come with having a table ordering feature on your website.
So now we know just some of the benefits of setting up table ordering on your website. Let’s now see how to set up table ordering on your WordPress website.
How to add table ordering to your website
After following the steps below, you‘ll be able to offer your customers table ordering on a custom digital menu on your website. One of the easiest methods to achieve our objective is with the WordPress restaurant plugin, Orderable.
Introducing the WordPress restaurant plugin, Orderable
Orderable is a powerful online ordering plugin for WordPress that can take care of everything you need for a smooth online ordering experience.

From table ordering to custom menus to complete checkout control – Oderable has everything you need.
Some of the key features of Oderable include:
- Manage table orders with QR codes – to identify each table order separately as your tableside ordering system.
- Modern app-like ordering design – to give customers an intuitive user interface that can be used on both desktop and mobile.
- Custom menu options and time slots – create your restaurant menu from scratch in just a few steps with our pre-done designs and templates.
- Table ordering, delivery, and local pickup – to maximize restaurant operations.
- Product addons and suggested extras – to increase revenue and offer customers more choice.
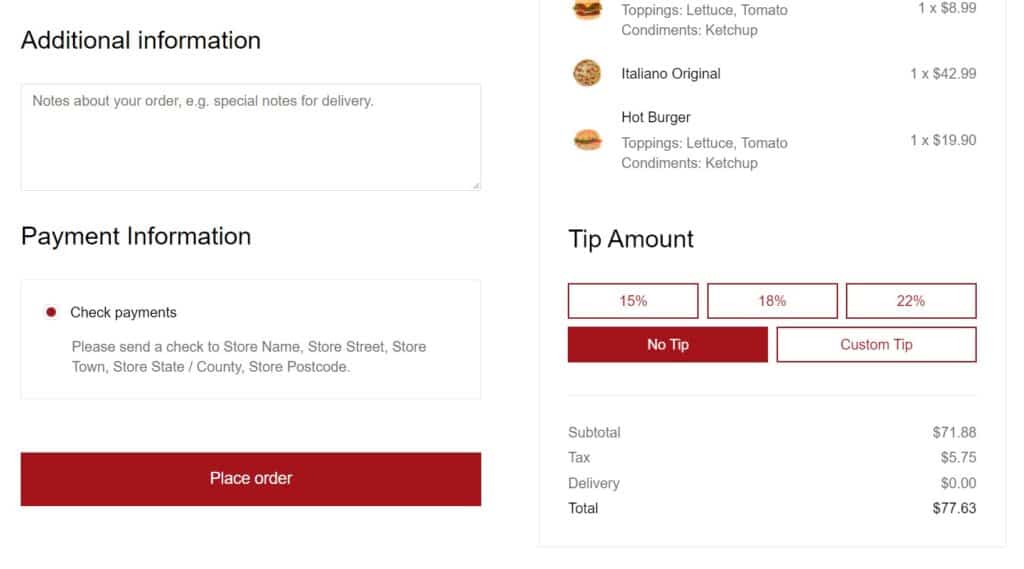
- Custom checkout options – with payment options, checkout tipping, and much more.
With Orderable, your customer can scan the QR code on the table with their own device to see the custom menu on your website. They can then choose their food items, add extras if they wish, make the payment, and place the order.
Your staff will instantly get the order on the dashboard and bring the order to the right table.
The best part of Orderable is that all of this is without any transaction fees! Unlike many 3rd-party apps that would charge 30-40% on every transaction.
So now we’ve introduced Orderable. Let’s now see how we can set up Orderable from scratch on your WordPress website and start taking orders from customers in no time.
Step 1: Install Orderable
To install Orderable, take the following steps:
- Purchase Orderable from the Orderable website: orderable.com
Get Your Restaurant Business Online With Orderable
Orderable is a user-friendly WordPress plugin that adds online ordering to your restaurant website.
Add your dishes, create your online ordering menu, customize your delivery schedule, and manage orders with ease.
- You’ll then be sent two plugins to download and install on your WordPress website.
- Upload and Install the plugin(s)
- Login to the admin dashboard of your WordPress website.
- Go to Plugins > Add New.
- Click on Upload Plugin.
- Upload the .zip file for the Orderable plugin.
- Click on Install Now and then on Activate Plugin on the next page.
- Repeat the steps for Orderable Pro.
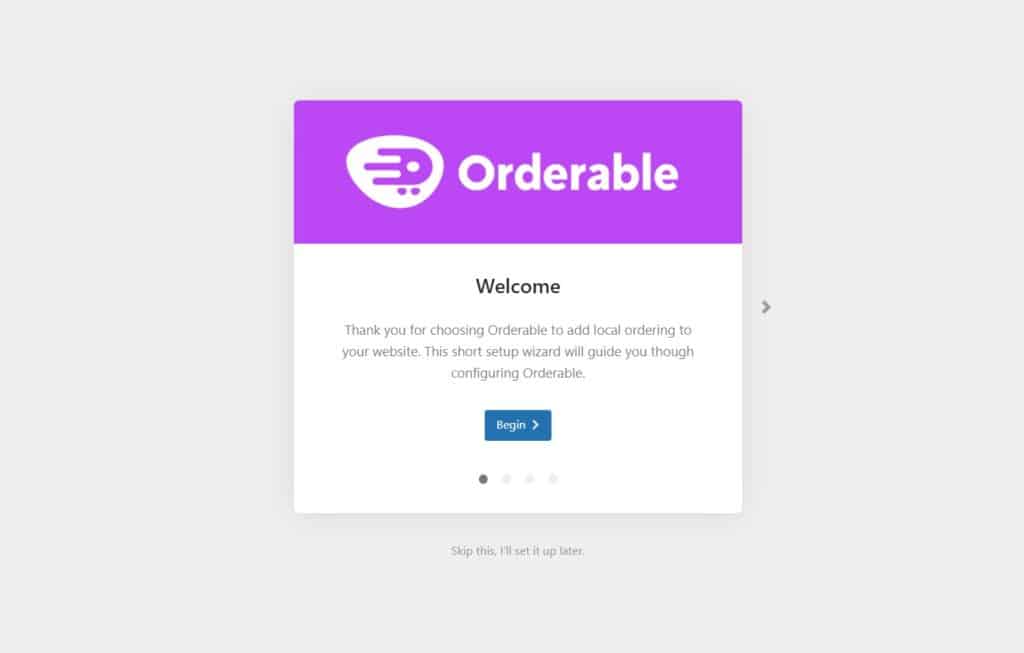
Once this is done, you’ll immediately see a setup screen where you can enter all your restaurant information.
At this point, if you do not have WooCommerce installed, Orderable will install it for you automatically. Orderable works with most WordPress themes, including the default WordPress themes.
The setup screen will now ask us to put in the information related to the restaurant.
Step 2: Enter your restaurant information
We start by putting in the basic details about the business, like name, address, and ZIP code.
The next screen will ask about the services you provide and when. Check the boxes of delivery and pickup if you want to offer them.
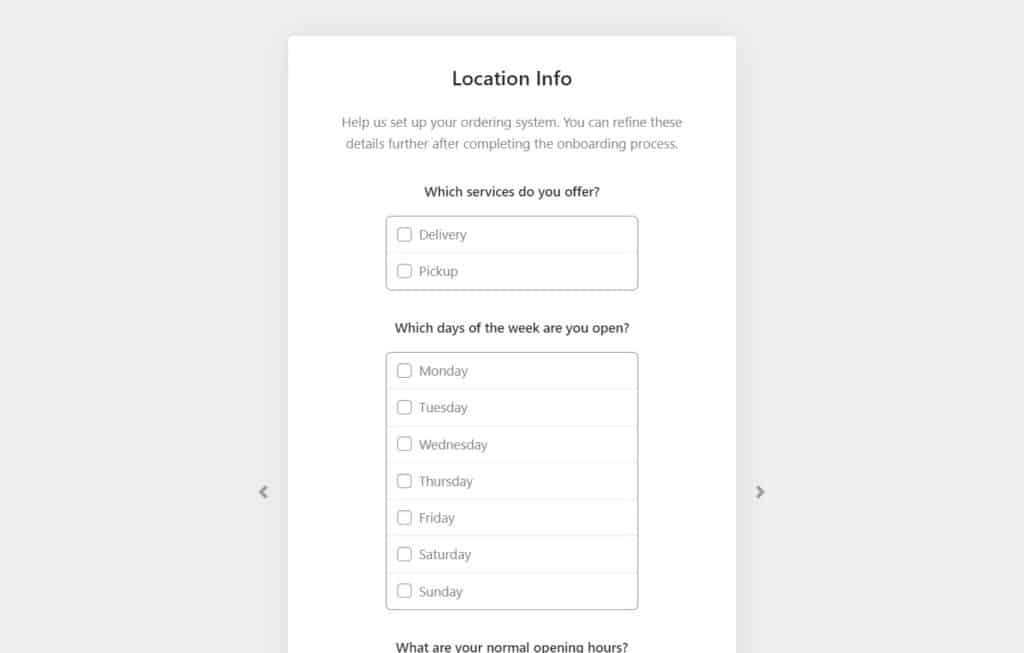
If you have any questions on this part, we have a detailed video showing the setup steps.
After all the basic information has been entered, you will see the below end-of-setup screen.
The next step is to list the food items we want to offer our customers while table ordering.
Step 3: Add your food/menu items
We add food items as products in the WordPress dashboard. To add the food items, take the following steps:
- Go to the WordPress dashboard and click on Products > Add New.
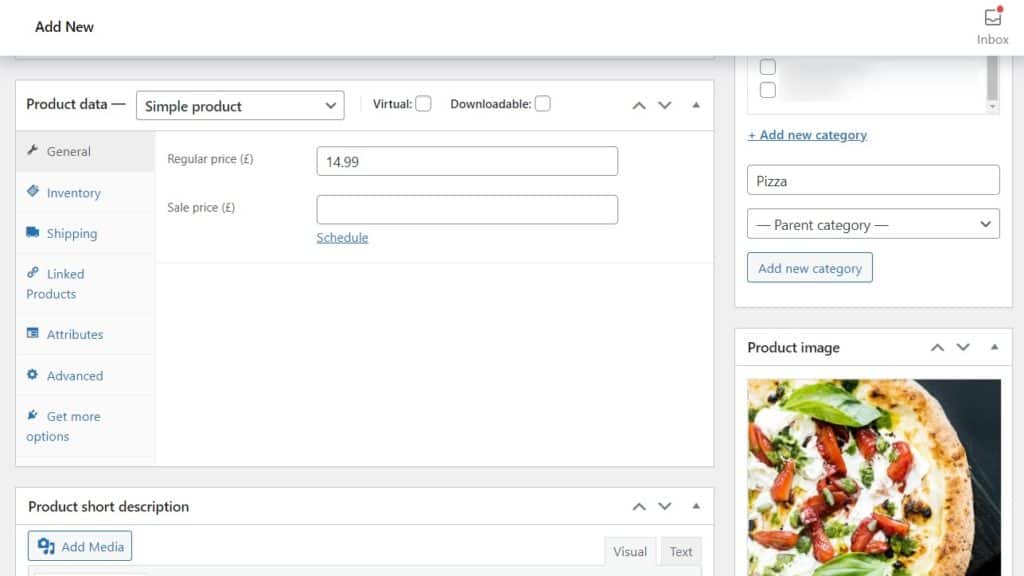
- Add information about the dish.
- Write the dish name in the Title area.
- Then scroll down the page until you get to the Product data section. Here you‘ll be able to add a price.
- Add an image of your dish by clicking on the Set Product image link.
- If you wish, create product categories. E.g., Starters, Mains, Desserts, All-Day breakfast, etc.
- Once you‘re happy with your dish, click Publish.
You can follow the steps in the next section if you want to include add-ons like toppings, additional sauces, special ingredients, etc.
(optional) Step 3-a. Add Product add-ons
To create add-ons for your dish, do the following:
- From the WordPress menu in the dashboard, click Orderable > Product Addons.
- Click the Add New button.
- Give a name to the group of add-ons you are creating. E.g., if the add-ons are for a pizza dish, you could name it Pizza Addons.

- Click on Add Your First Field button.
- Enter the add-on information like name, field type, description, and other details.
- Now add your options. For example, in our case, since it is a pizza addon, we add different sauces as options. To add:
- Click the Add Option button.
- Write the name of the sauce and its price.
- You can also add an image to make it more attractive.
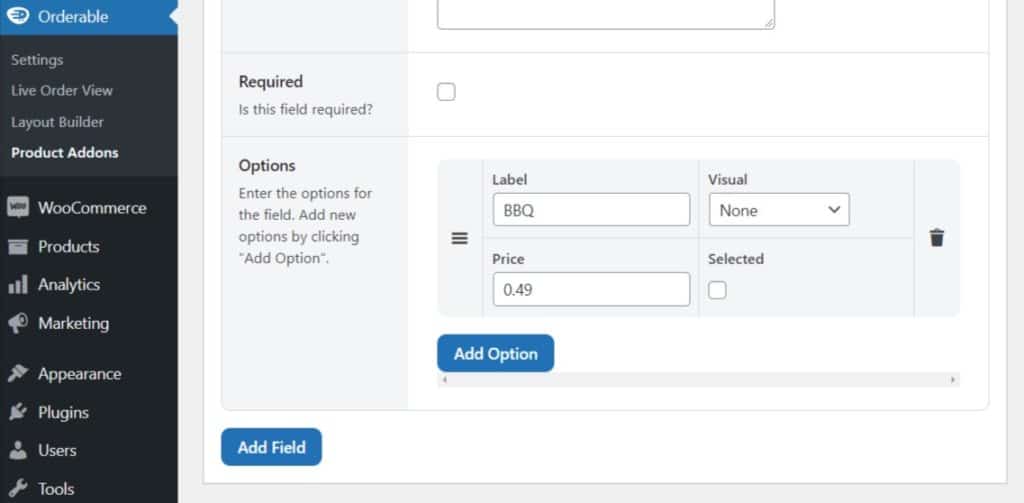
Repeat the steps to add all the options you wish to provide.
- Next, pick the products or categories to which this add-on will be shown. They are set as conditions. Here is how to add a rule:
- Click on Add Your First Rule in the Conditions section.
- Select the product addons to show on individual products. They can be searched by name or category. Add as many rules as you need.
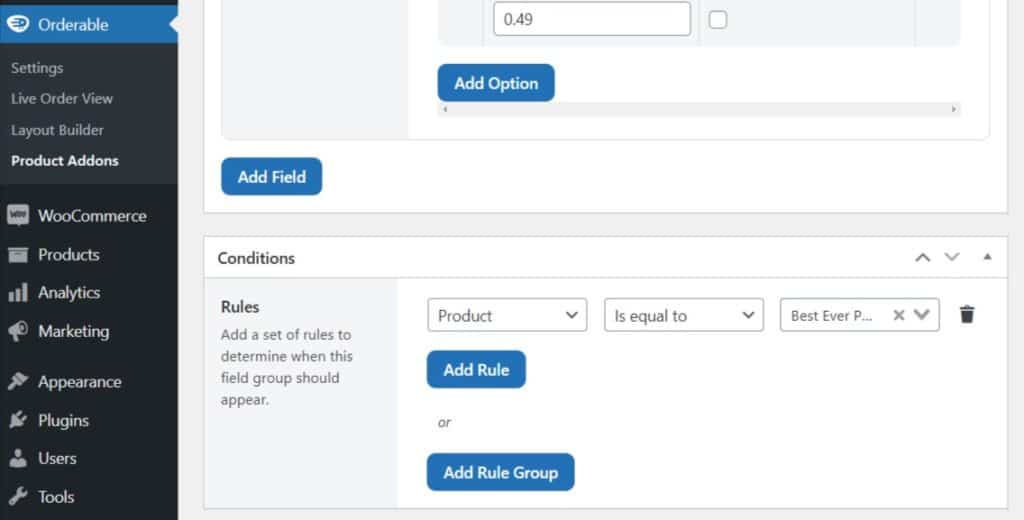
- Once you have added all the desired conditions, click Publish.
The next step is to create the menu itself. Customers see this when they’re on their mobile devices at your restaurant. Using this, they’ll be able to see your dishes, additional information, and more. Then they’ll be able to place their order, and you’ll get a notification in real-time.
Step 4: Create your online restaurant menu
To create a menu, we first design a product layout using Orderable and then add it to a WordPress page. Let us start with creating a layout:
1. Create a menu layout
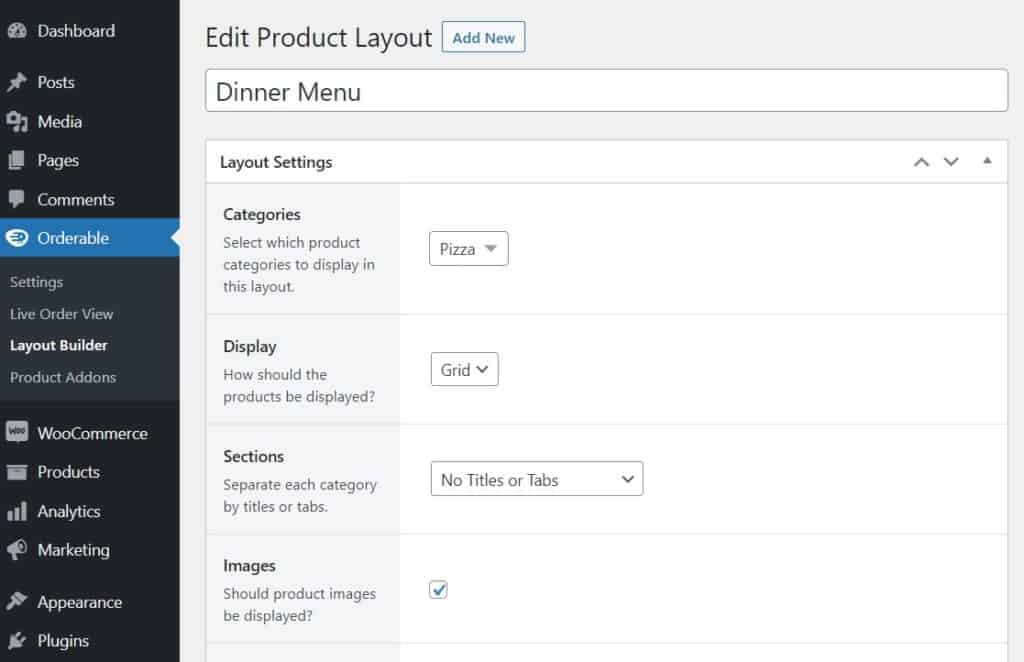
- Login to your WordPress dashboard. Click on Orderable > Layout Builder.
- To create a menu layout, click the Add New button.
- Give the layout a title.
- Select the Categories you want to include. As you add the categories, you’ll see a live preview of the menu at the bottom of the page.
- Choose how you want the menu to be displayed as a Grid or List.
- You can choose how the categories look by changing the Sections dropdown.
- Choose if you want images in the menu and if the whole menu item should be clickable.
- Click Publish.
2. Create a menu page
Once we have the layout ready, we need to add it to a WordPress page. Here’s how we do it:
- Go to the WordPress dashboard and click on Pages > Add New.
- Give a name to the page and add a block by clicking on the black plus sign.
- Search for ‘Orderable’ while searching for the block to add. Choose the Orderable: Product Layout block.
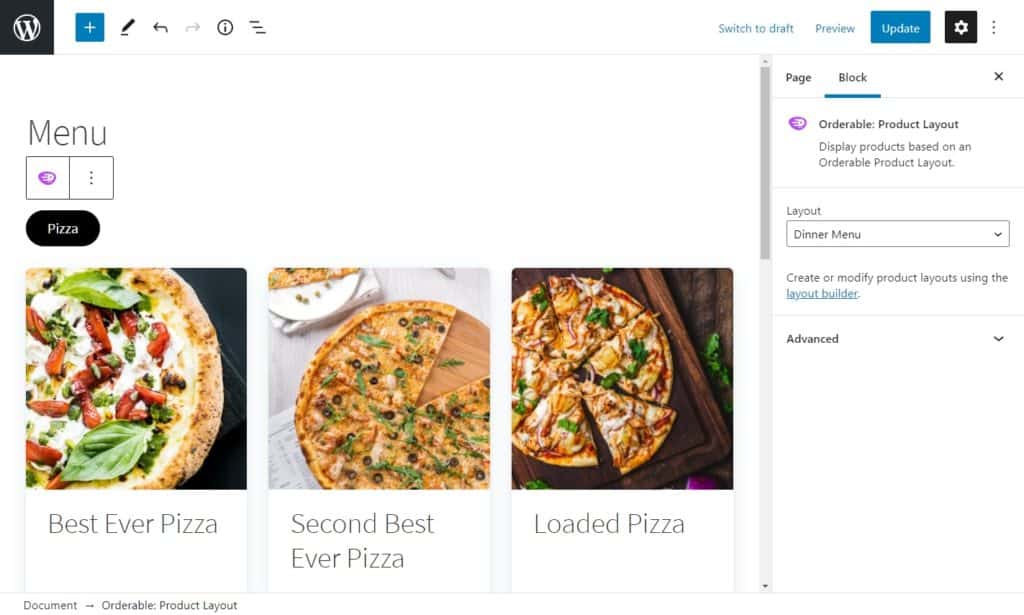
- You will see a generic product grid on your page.
- Choose the layout you created from the Layout dropdown on the right side of the screen.
- Click Publish.
And your custom menu is now ready for table ordering! You can read more about creating menus here.
As the last step, we need to set up table ordering on Orderable.
Step 5: Add table ordering
With Orderable, you’ll be able to use QR code ordering as its table ordering system. This means you’ll create a QR code for each one of your tables within Orderable.
When a customer scans that QR code on their table, they’ll be taken to your website, and whatever they order will be assigned to their table.
To setup table ordering in Orderable, do the following:
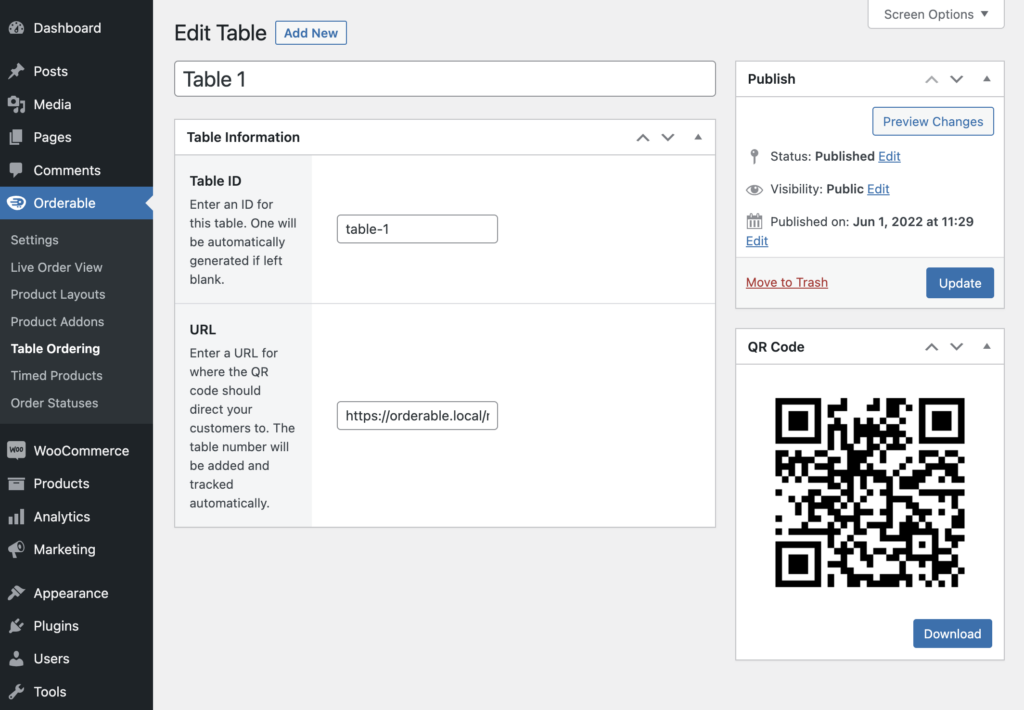
- Log in WordPress dashboard and choose Orderable > Table Ordering.
- Click Add New.
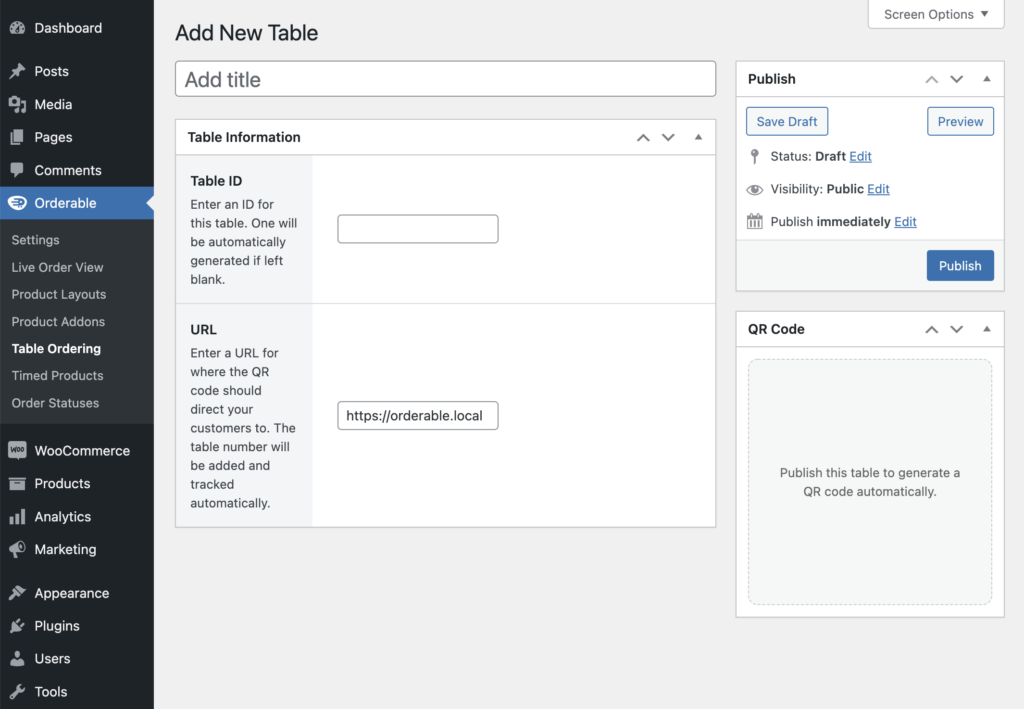
- Add details about the table. For example, add the table number as the Title.
- Table ID is auto-generated based on your Title. You can also enter a unique ID manually. This ID is visible in the URL when your customer visits via the QR code assigned to the table.
- Enter the URL you want the customer to go to via the QR code. This would be the menu page you created in the previous section.
- Click Publish.
Once the table is published, you will see the generated QR code. Repeat this for all tables you want to take orders from. Each table will have a unique QR code.
- Print out each QR code and place it on the respective tables.
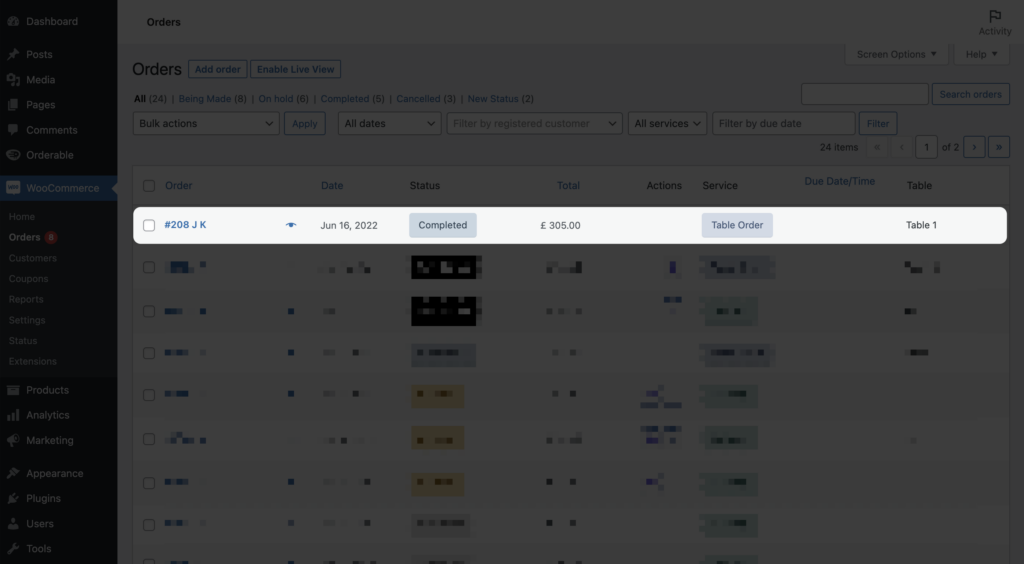
- When a customer scans the QR code and orders, the Orders section in the WooCommerce dashboard will show the Service Type as “Table Order” with the table name beside it.
And that’s it! You have now set up table ordering for the customers in your restaurant.
Add table ordering to WordPress today
In this article, we talked about why tableside ordering via a website is a much better choice for your table service restaurant than adding it via an app. We also went through all the steps to add the feature from scratch using an all-in-one online ordering WordPress plugin, Orderable.
Orderable helps you have greater control over table ordering and the entire digital ordering experience. It also saves you time and money in the long term as you do not pay any transaction fees.
Get Your Restaurant Business Online With Orderable
Orderable is a user-friendly WordPress plugin that adds online ordering to your restaurant website.
Add your dishes, create your online ordering menu, customize your delivery schedule, and manage orders with ease.
Gina Lucia is our in-house Content Manager at Orderable. She writes articles, user guides, technical documentation, and creates videos on everything WooCommerce and Orderable.
Gina has been working in the WordPress/WooCommerce space since 2012 when she developed WordPress websites for clients large and small.
For the past 8 years, she’s been writing about everything WordPress and WooCommerce, becoming an expert in what makes a WooCommerce store succeed.
When not writing, Gina loves to tend to her vegetable garden, read, or travel to mainland Europe.
Don’t miss out on the latest Orderable news!
Sign up for our newsletter to receive the latest news from the blog, you’ll get pinged every week with a digest of the latest updates.
[fluentform id=”6″]

Related Articles

Get Ready for the 2024 Stellar Sale at Orderable!

Kitchen Receipt Printer: Your Ultimate Guide

7 Bakery Website Examples for 2026
Get Your Restaurant Online With Orderable
The WooCommerce plugin designed to help restaurants take orders online – with no added fees!
View Pricing
